The CData ODBC Drivers provide access to live data from more than 70 data sources from within Dundas BI without having to write any code. These data sources range across social media, web applications, BIG Data, email and other data categories including Twitter, Facebook, YouTube Analytics, Marketo, ServiceNow, Box, MongoDB, Gmail, Microsoft Exchange and the list goes on and on. With direct ODBC connectivity, the drivers solve the problems of analyzing stale data and having manual data collection processes, allowing you to create reports and dashboards that can be updated in real time.
Dundas BI provides a "a single and unified experience across all data sources and all devices, providing full functionality and faster performance for data exploration, analysis and visualization." And with the ODBC Driver for JSON by CData, you can merge that experience with the flexibility to connect to data from any JSON file or Web service. Note that Dundas BI does let you create a new type of data connection using APIs but that requires a web developer that can write the code required to develop that connection. Using existing ODBC drivers by CData, organizations don’t need the expertise of a web developer and the time and effort required to develop that connector, they can simply download, configure and connect to data within unique sources in minutes.
This article will serve as a tutorial for configuring the JSON driver to connect with a Web service and building a dashboard in Dundas BI to display the data from the service, providing easy analytics of the data in question. This approach can be applied to any data sources that provide JSON based web services for data delivery.
Resources for this Article
Configuring the JSON Driver
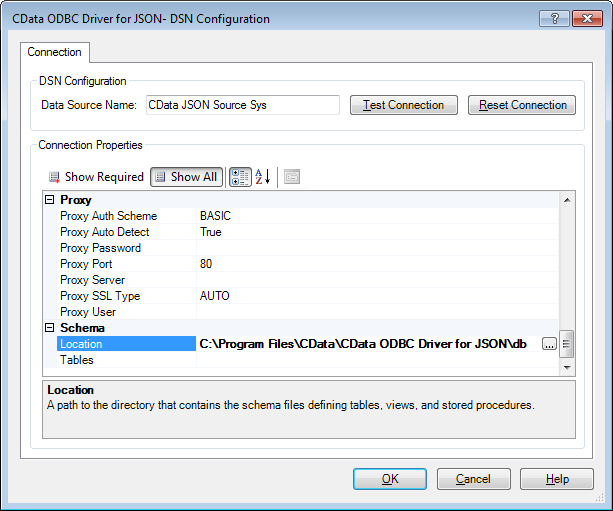
There are many settings that are configurable in the JSON ODBC Driver, from caching to security settings for proxies and firewalls. For this article we will work with one of those settings: the Location connection property. This property informs the driver of the location on disk of the schema files used to interpret the data return by the Web service.
In this article, we are using the JSONPlaceholder Fake Online REST API for Testing and Prototyping. You can read more about the Web service on the website, but the service appears to simulate a social media platform, with users, posts, comments, photo albums and todo lists.
In order to properly interpret the data returned by the Web service, we will need to defineschema files for the tables we wish to use in our BI tool. The schemas for the CData JSON driver are defined using a proprietary language called RSBScript and you can read about RSBScript in detail in the online Help documentation. While the schema files in the compressed folder linked above will work out of the box, allowing you to immediately begin working with the JSONPlaceholder service, the following section provides some detailed information on how a specific schema file is built for the Web service.
If you wish, you can skip ahead to the section for connecting to the Web service in Dundas BI using the JSON driver.
Schema Definitions
In order to write a proper schema, we will need to understand the data that will be returned by the Web service we’re connecting to. The /users resource for JSONPlaceholder returns the most complex JSON, so we use it as an example for defining a schema. You can see a sample entry below:
{
"id": 1,
"name": "Leanne Graham",
"username": "Bret",
"email": "This email address is being protected from spambots. You need JavaScript enabled to view it.",
"address": {
"street": "Kulas Light",
"suite": "Apt. 556",
"city": "Gwenborough",
"zipcode": "92998-3874",
"geo": {
"lat": "-37.3159",
"lng": "81.1496"
}
},
"phone": "1-770-736-8031 x56442",
"website": "hildegard.org",
"company": {
"name": "Romaguera-Crona",
"catchPhrase": "Multi-layered client-server neural-net",
"bs": "harness real-time e-markets"
}
}
You can see several immediate name-value pairs and two nested objects: address and company. Within the address object, there is another nested object: geo. It is helpful to have direct access to all of this data, so we will need to be sure to write the schema to drill down into these objects. Each of these fields will be considered a column in our schema.
Defining Columns
For fields like id or name, the element in the schema file is relatively simple, providing a name, type, and path for the field:
<attr name="ID" xs:type="integer" key="true" other:xPath="id" />
<attr name="Name" xs:type="string" other:xPath="name" />
Note that we’ve designated the ID column as the key, since this value is unique to each row.
For the nested objects, we simply need to specify the path to the value. For the address street, we include an element like the following in the schema file:
<attr name="Address_Street" xs:type="string" other:xPath="address/street" />
For the address’s geographical latitude, we include an element like the following:
<attr name="Address_Latitude" xs:type="double" other:xPath="address/geo/lat"/>
All of the entries for the columns in our schema will look similar to those above and will be place within an rsb:info element in the schema file. The next steps are to set the URI attribute so the driver can navigate to the proper endpoint to retrieve the data, set the Repeat Element, so the driver can interpret separate rows of data properly, and then enable the appropriate operations for the endpoint.
Setting the URI
We need to ensure that the JSON driver requests data from (or pushes data to) the proper endpoint for each table schema. To do so, we will set the URI attribute in the schema file:
<rsb:set attr="uri" value="https://jsonplaceholder.typicode.com/users" />
Setting the Repeat Element
We also need to ensure that the driver can properly interpret separate rows of data. To do so, we set the RepeatElement attribute to the JSON path where individual entries repeat. For our User data, this is simply the JSON root path, or /json/:
<rsb:set attr="RepeatElement" value="/json/" />
All column xPaths are relative to this path.
Enabling Operations
Because we are only using the JSON Driver to read data into a BI tool, we can simply enable the GET HTTP method in our schema. To do so, we would add the following scripting to our schema file:
<rsb:script method="GET">
<rsb:call op="jsonproviderGet">
<rsb:push/>
</rsb:call>
</rsb:script>
With the GET HTTP method enable, we have created a read-only table (often called a view) that can be used in BI, reporting, and ETL tools, as well as custom applications. The next step is connecting to the data in Dundas BI.
Connecting in Dundas BI
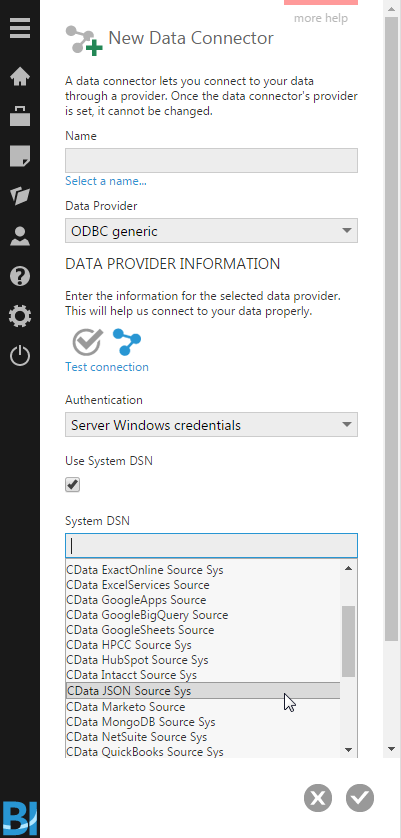
Thanks to native connectivity to generic ODBC drivers in Dundas BI, connecting to your data using CData ODBC Drivers is straightforward. To connect to the JSON service, you’ll need to create a New Data Connector, set the Data Provider to ODBC generic and click the checkbox for Use System DSN. With that checked, you can now select the System DSN you configured to connect to the JSONPlaceholder Web service and click the check button.
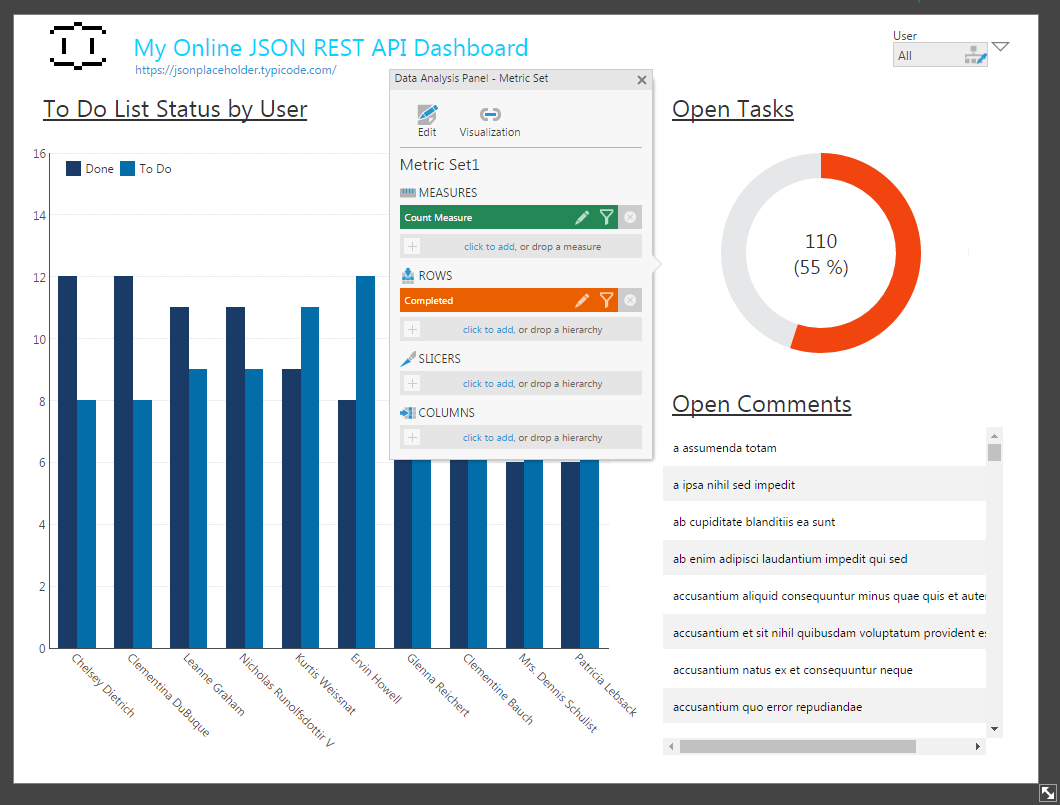
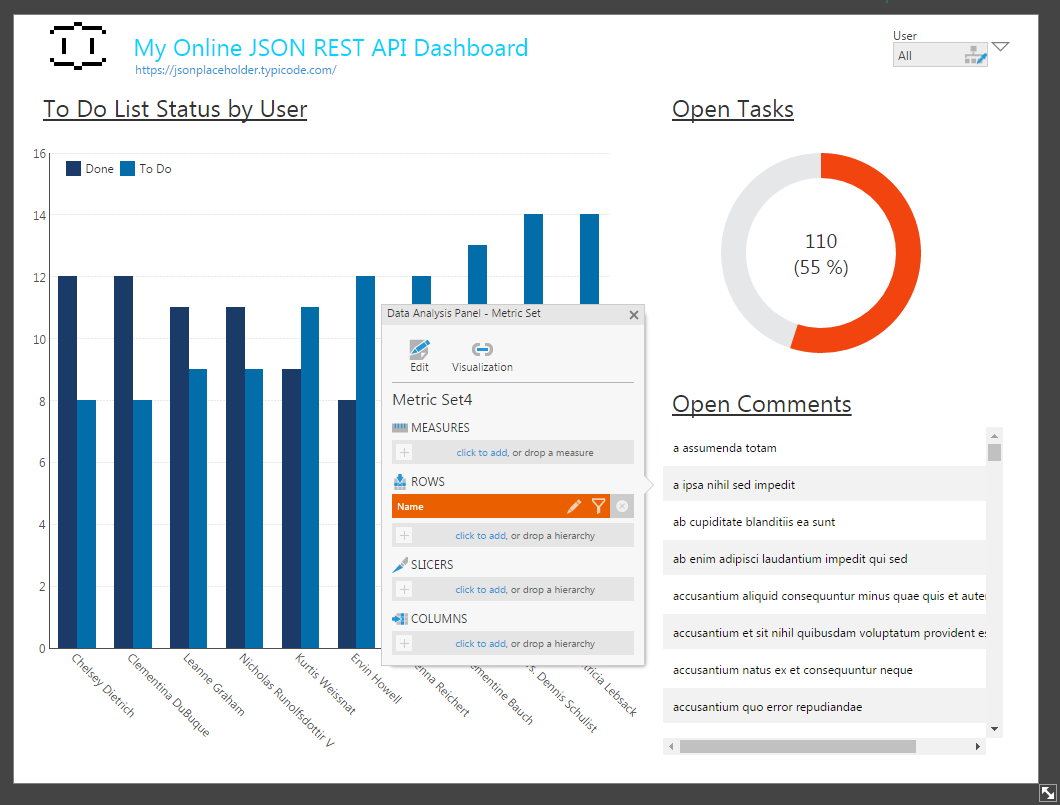
With the Data Connector configured, we can begin to build reports and dashboards based on the data returned by the JSON Web service. Before we jump in though, we are going to highlight the ability to create Relationships in Dundas BI to build associations between the available Tables and Views.
Relationships in Dundas BI
In order to create more meaningful charts and graphs, we can utilize the Relationships feature of Dundas BI. As per the Dundas BI documentation:
"If your database tables do not have existing native relationships (e.g., foreign key) defined, you can use the Relationships dialog to add user-defined relationships. Relationships can also be defined between data cubes".
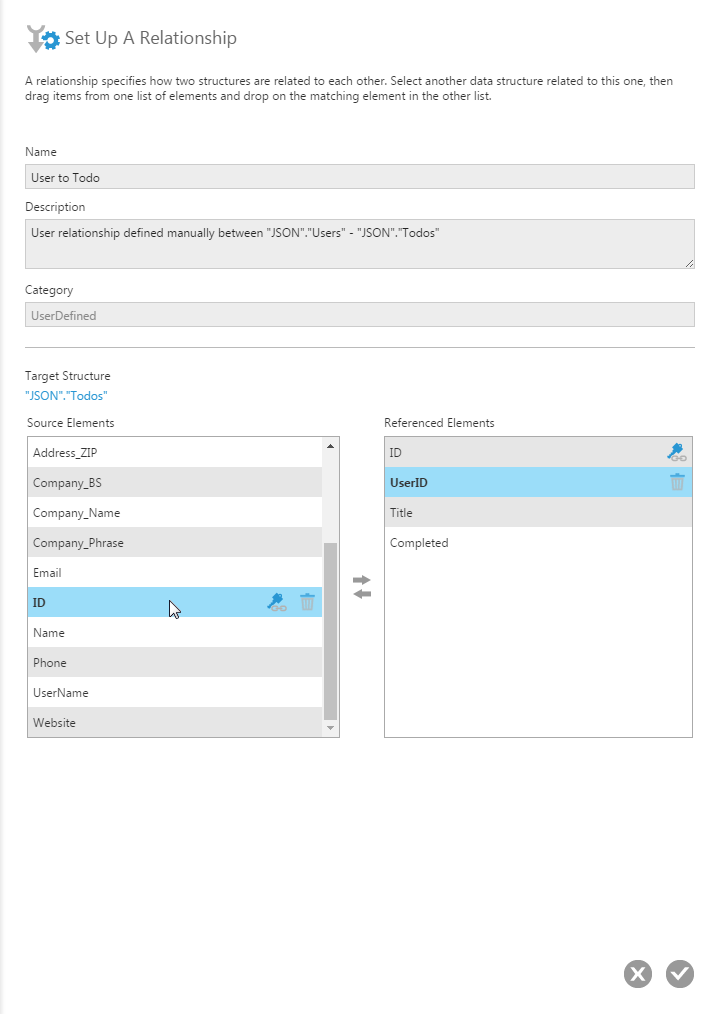
By right-clicking on a View or Table, you can define the Relationships between these structures, allowing you to map related data based on associated columns. For example, we can map the Id field from the User View to the UserId from the Todos View, allowing us to collect and view data from the Todos View and list it based on a user’s name, providing more context for the data.
Typically with user-defined relationships, Dundas BI will retrieve all of the necessary data and perform a JOIN locally. The CData Drivers come with a built-in SQL Engine that processes requests from BI tools and, where possible, submits requests directly to the data source to allow the source servers to process any filtering, JOINs, LIMITs, etc. Whatever query functionality is not supported by the data source will be managed by the SQL Engine, meaning that the BI tool is saved from the work of processing a large dataset and can lean on the work done by the development team at CData Software to process large datasets quickly.
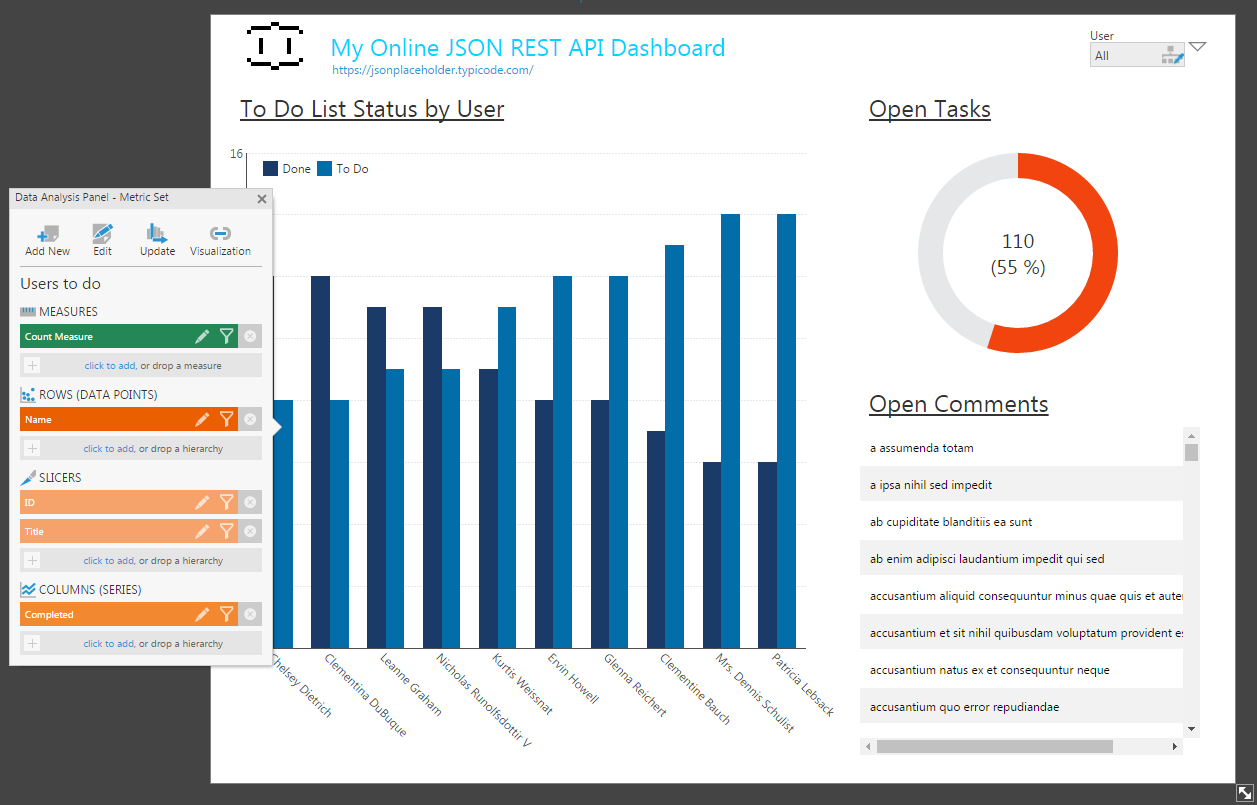
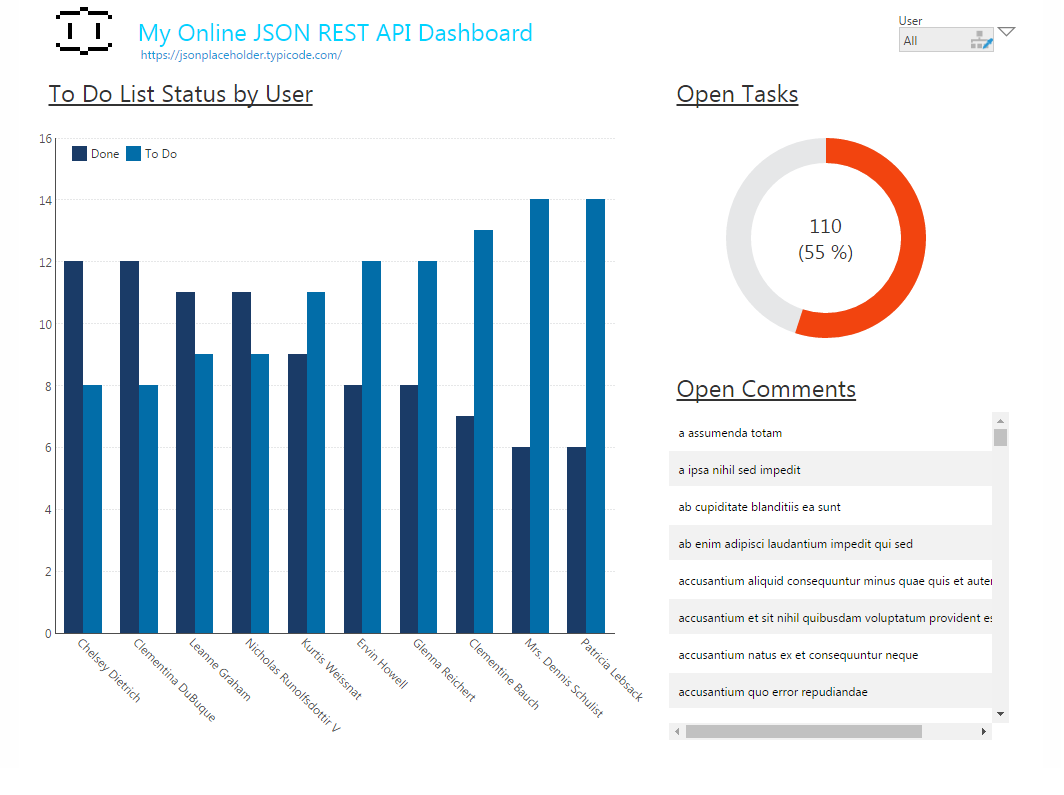
Sample Completed Dashboard
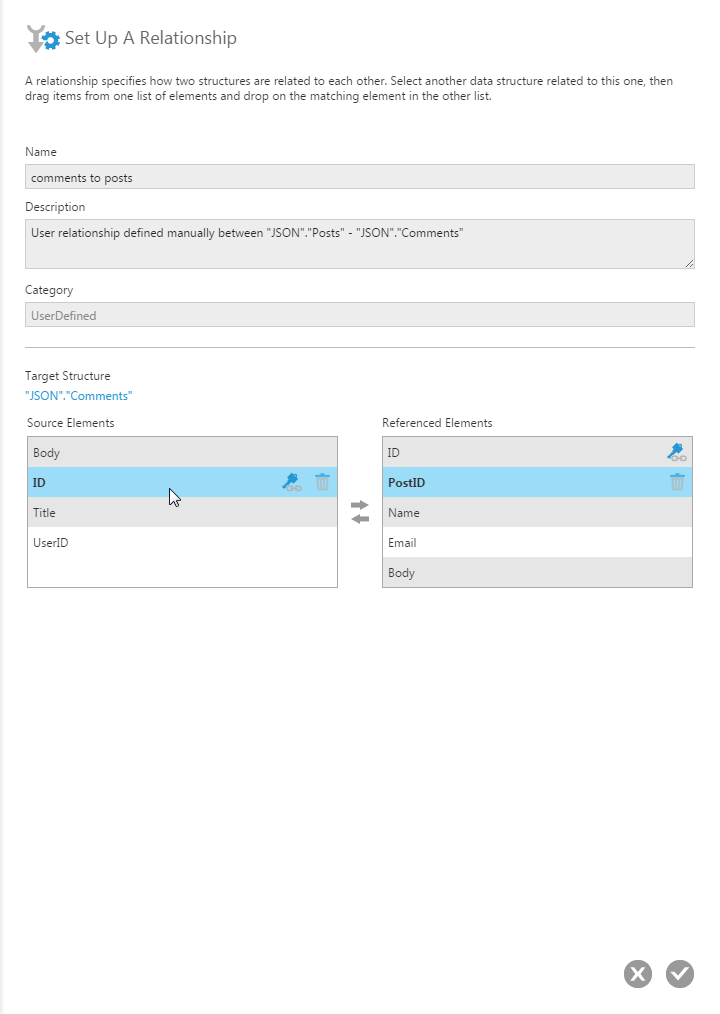
With the Connector created and the relationships configured, we are ready to build our dashboard. In this case, we will build a dashboard that reports on the completed and uncompleted tasks from the Todos View, aggregated by User. Here, we use the relationship between the User and Todos to display the Name of the User instead of his/her Id. We also report on the open tasks (those marked not complete) as a percentage of the total tasks. And we list the comments for various posts by users.
Between the raw, powerful functionality of the CData ODBC Drivers and the intuitive visualization features of Dundas BI, users are able to make the most sense of their data, building charts and graphs of exactly the data they want, updatable in real time.
More Information & Free Trials
You can read more information about all of CData ODBC Drivers from CDataODBC landing page and download a free, 30-day trial for any data source you wish. If you have questions about CDataODBC Drivers, you can always reach out to the Support Team. If you want to download a trial of Dundas BI, you can visit the Dundas site for more information. Download your free trials and start building meaningful visualizations of data from more than 70 sources today!
About the Author
Jerod Johnson is a Technical Marketing Engineer at CData Software
Follow Us
Support