1. Overview
Notifications offer a way to send reminders, alerts, or the latest data using a dashboard, report, or other view, based on a schedule or under certain conditions. The related view can be exported and attached as an image, PDF, Excel, or another format.
For example, you can set up a notification that emails your dashboard to your group once a week, or when the latest hourly data indicates a problem. You can also be notified of events such as when someone replies to your note.
2. Set up a notification
To create a notification for yourself or others, click Notification in the toolbar when you have any type of view open, then choose the type of notification you want to create.
You can also right-click (or long-tap) an empty part of the page and choose Notification from the context menu.
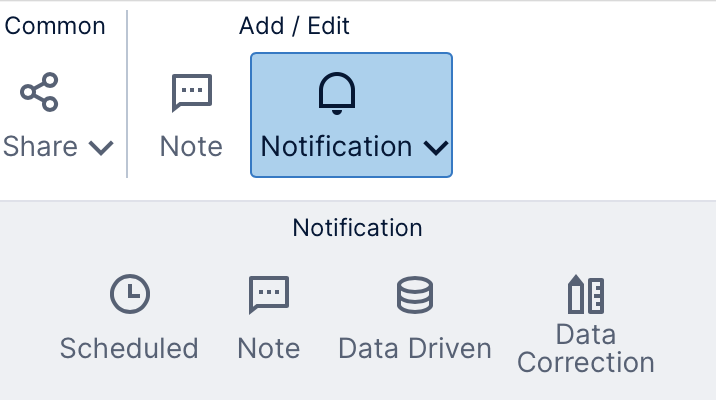
3. Types of notifications
3.1. Scheduled
A scheduled notification occurs on a periodic schedule which you define by selecting recurrence and other scheduling options.
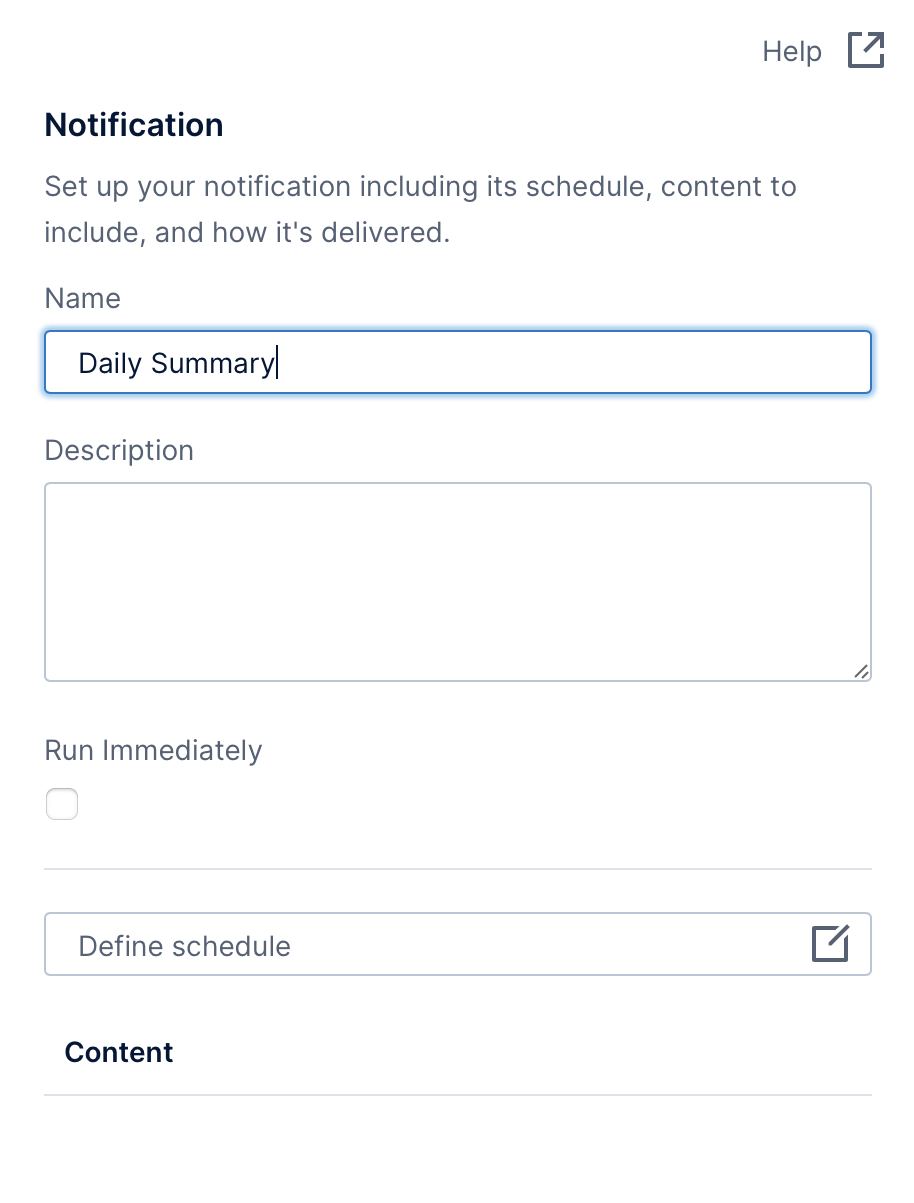
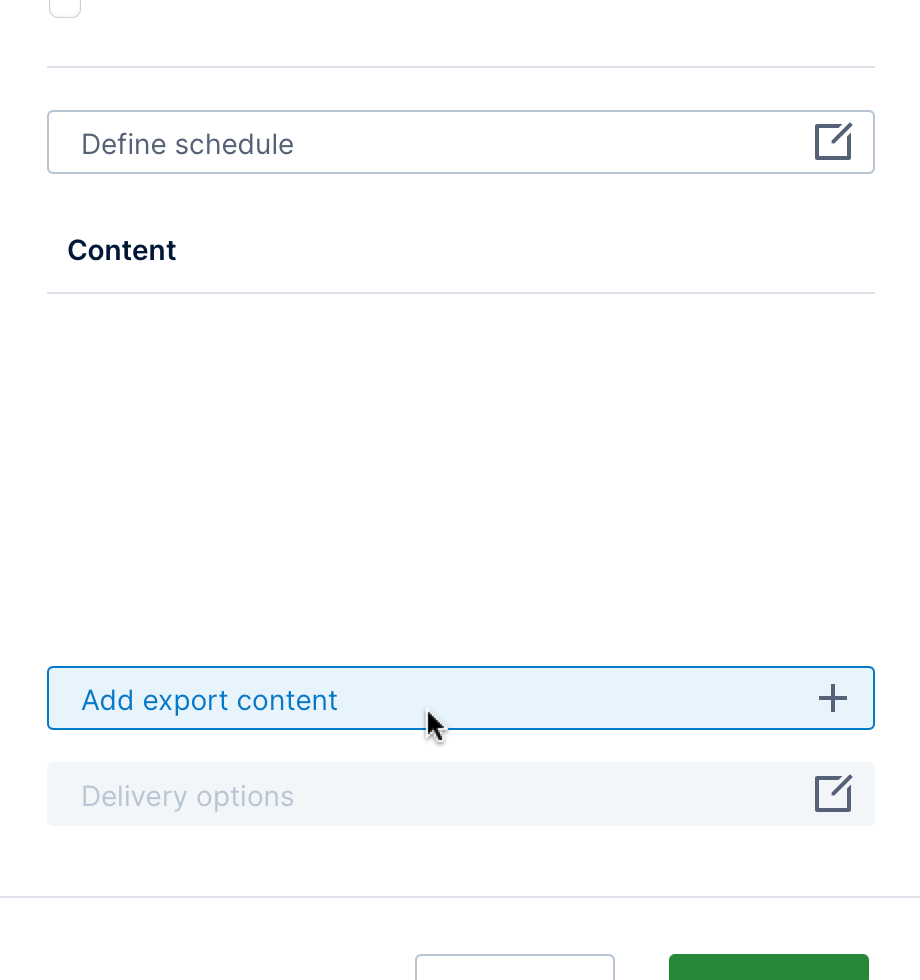
Enter a Name, then click Define schedule to configure the scheduling options. If you don't want to wait for the first scheduled event for the first notification, select the Run Immediately option.
Add export content and optionally customize the delivery options to finish the notification setup.
3.2. Note
A note-based notification lets you know when a user has added a note (annotation) to data in a visualization.
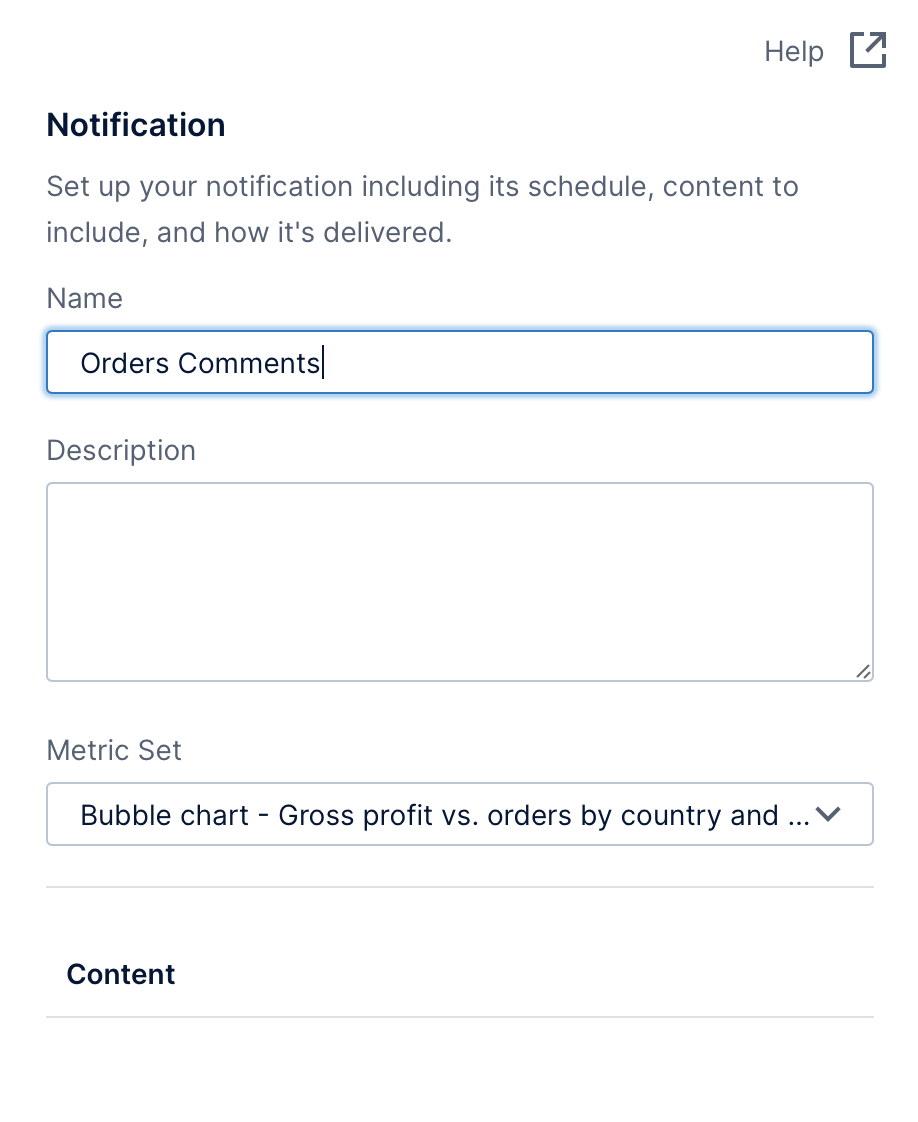
Enter a Name, then use the dropdown to select the visualization and metric set you want to monitor for notes.
Add export content and optionally customize the delivery options to finish the notification setup.
3.3. Data driven
A data driven notification occurs when a change in data is detected on a scheduled basis (i.e., polling).
You can choose from a variety of options for determining what conditions should occur in the data for you to be notified.
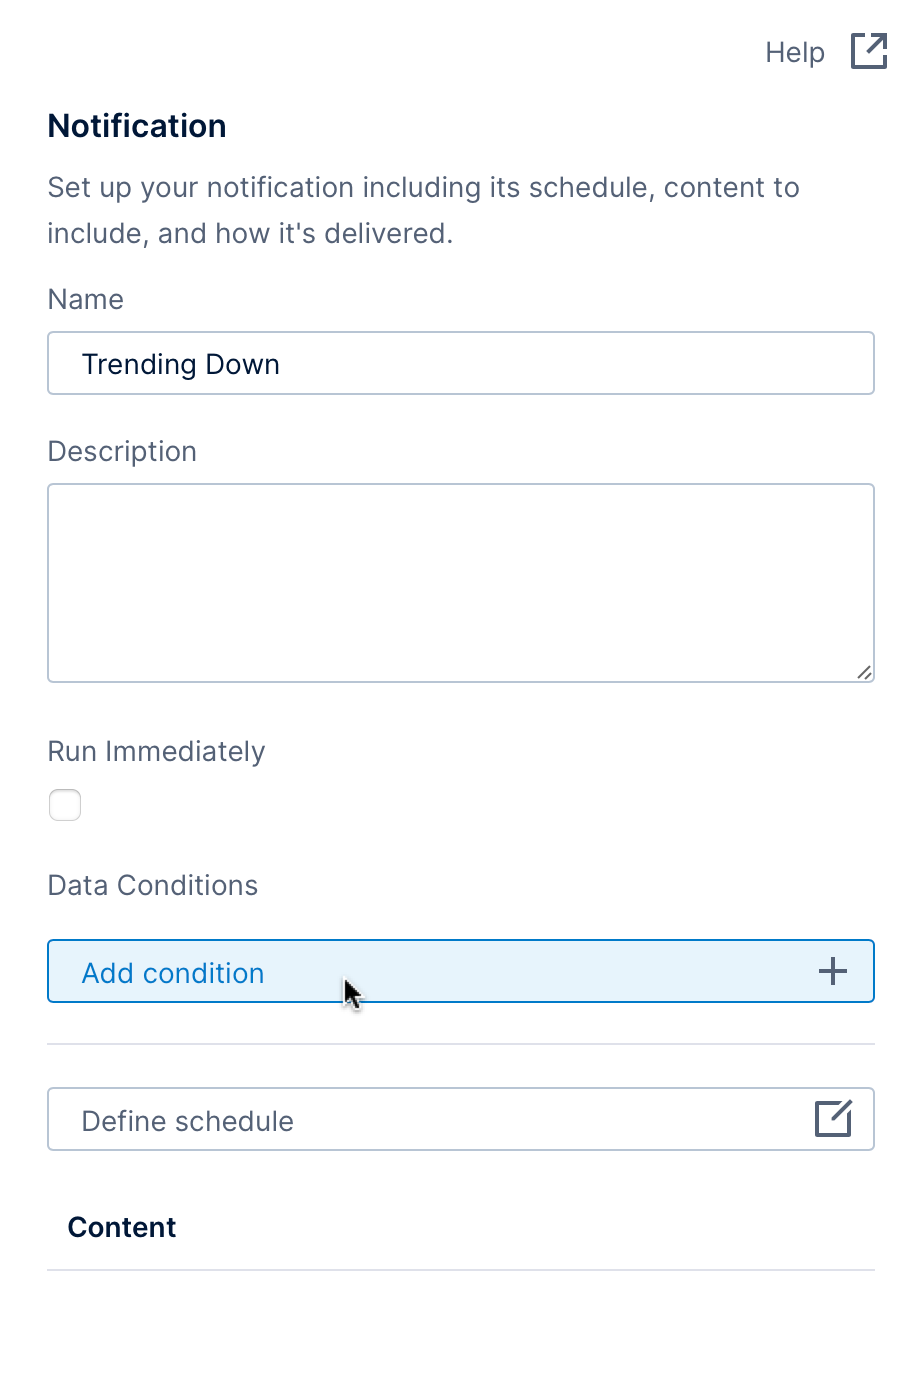
Enter a Name, then click Define schedule to schedule when to check for data changes. If you don't want to wait for the first scheduled event, select the Run Immediately option.
Click Add condition to choose what data changes you want to monitor (e.g., a value increasing for the past 3 days).
Add export content and optionally customize the delivery options to finish the notification setup.
3.4. Data correction
A data correction-based notification lets you know when a user has added a measure correction (data annotation) to a metric set.
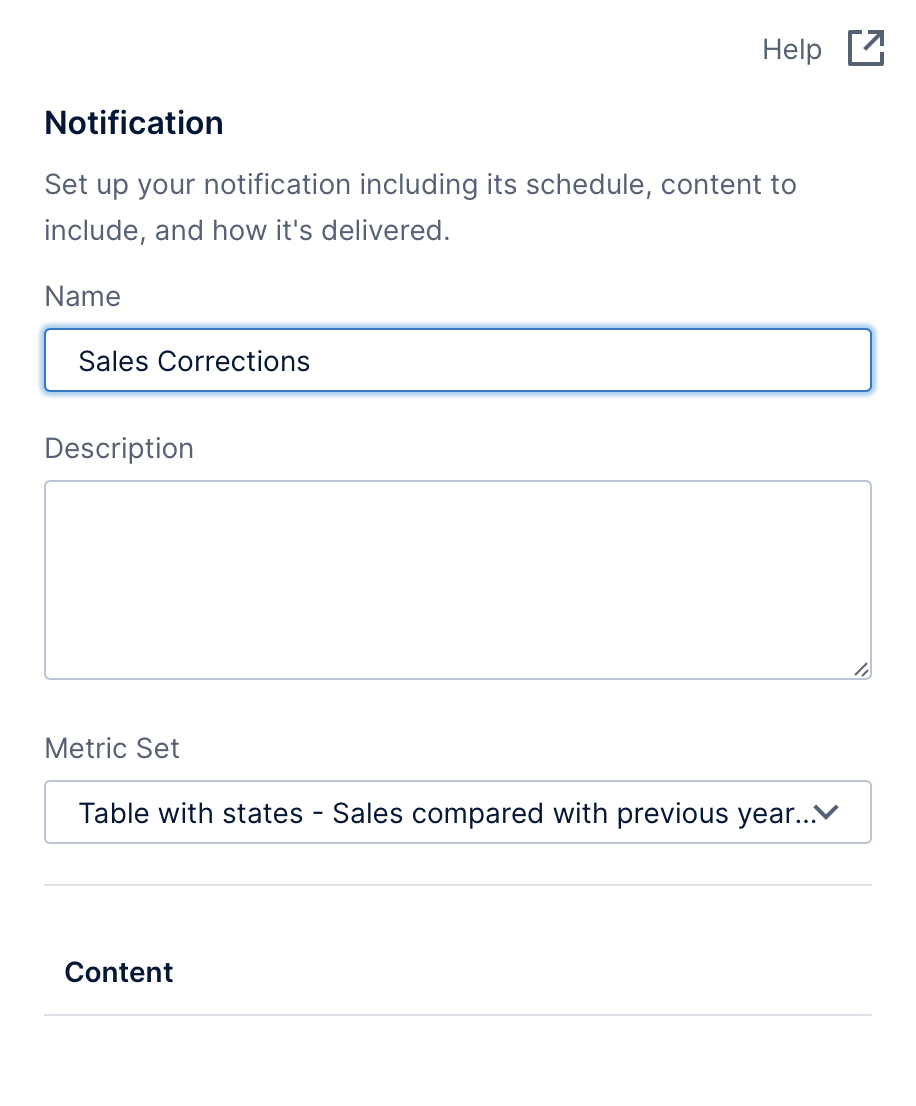
Enter a Name, then use the dropdown to select the visualization and metric set you want to monitor for data corrections.
Add export content and optionally customize the delivery options to finish the notification setup.
4. Notification options
4.1. Define schedule
This option is used both for scheduled notifications, and for determining when data driven notifications poll for data.
At the top of the Schedule Rule dialog, use the Enabled checkbox to enable or disable the schedule. This can be useful if you want to edit this notification later and suspend its schedule instead of deleting the notification.
To adjust the notification schedule for daylight saving time, select your time zone from the dropdown and select the Daylight Savings Time checkbox. Leave this unchecked if you prefer to avoid a missing or extra hour between notifications resulting from daylight savings time changes.
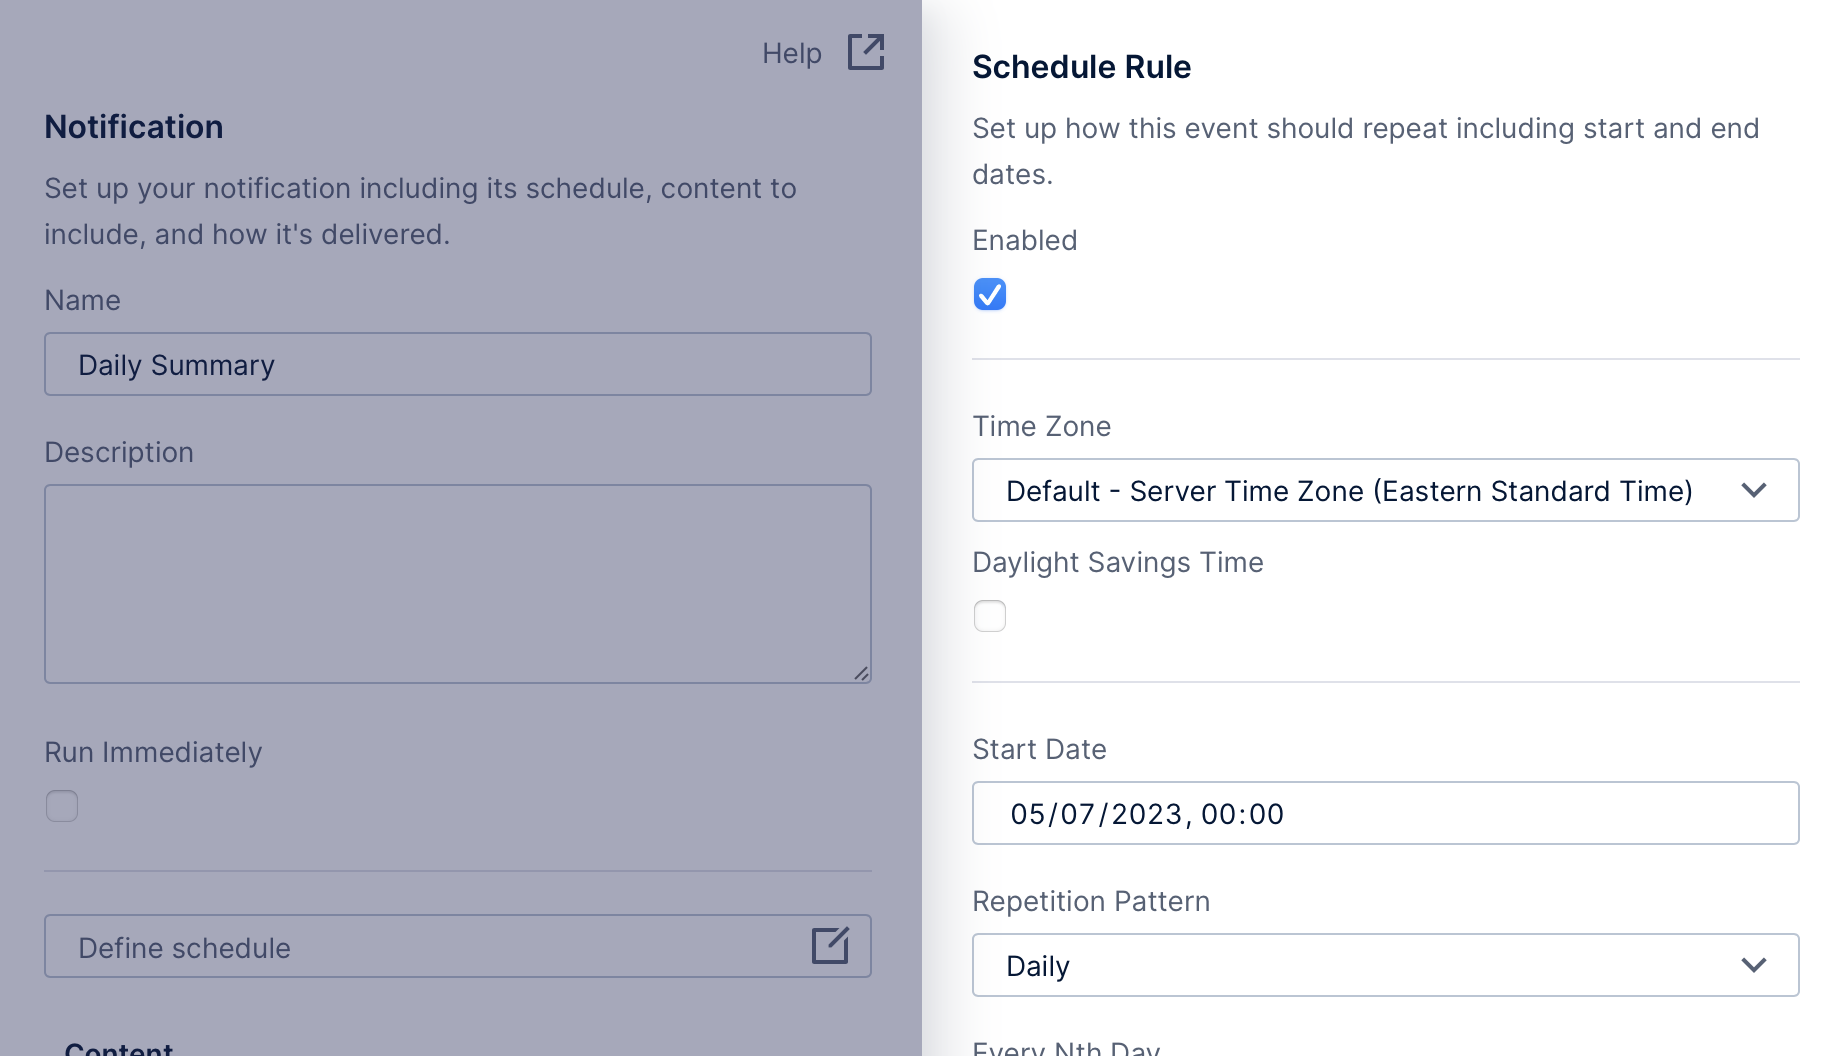
To define a schedule, first enter the Start Date and time for the schedule.
Choose a Repetition Pattern:
- Daily – occurs every day or every nth day.
- Weekly – occurs weekly or every nth week. Also select which day(s) of the week to run weekly (optionally multiple days of the week).
- Monthly – occurs once a month. You can choose which months to include and also which day(s) of the month using a variety of options, including a comma-separated list of days.
Select the Intra-Day Recurrence checkbox if you want to specify multiple times within a scheduled day, then click Add Occurrence to add specific times of day or change the dropdown to Minutes or Hours to set up a regular Recurrence Interval.
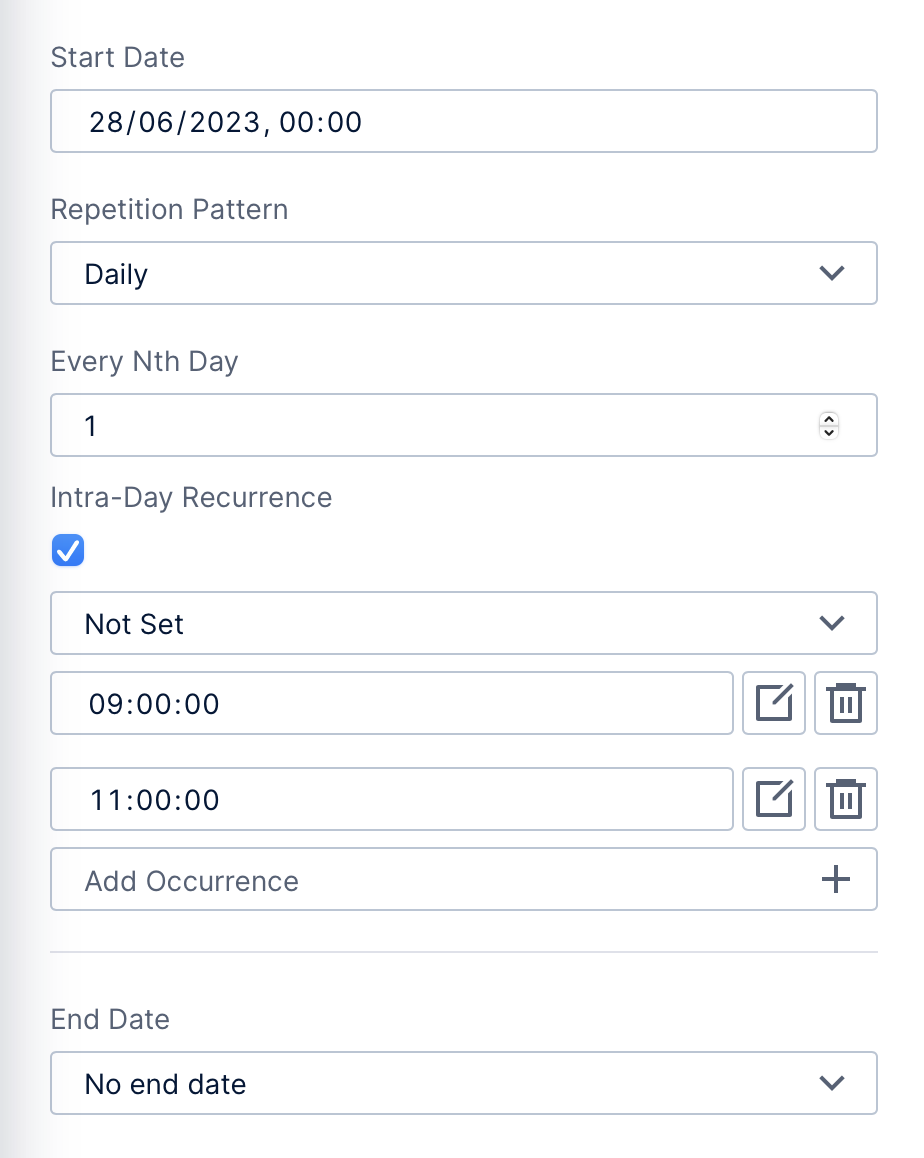
Finally, if you want to prevent the schedule from continuing forever, set End Date either to end after a certain number of occurrences or by a specific date.
4.2. Select export content
Notifications export the current view you have open to the formats of your choice and deliver it along with the notification.
Click Add export content when creating any type of notification, then set Format to one of the available file formats including:
- Excel
- Image (PNG)
- CSV
- PowerPoint
Optionally customize the Name for the content and choose whether to Use Name For Filename when it's delivered.
Depending on the format, you can choose to export the entire view (e.g., dashboard) or a selected data visualization. For more details about export options for each format, see Share or export your work.
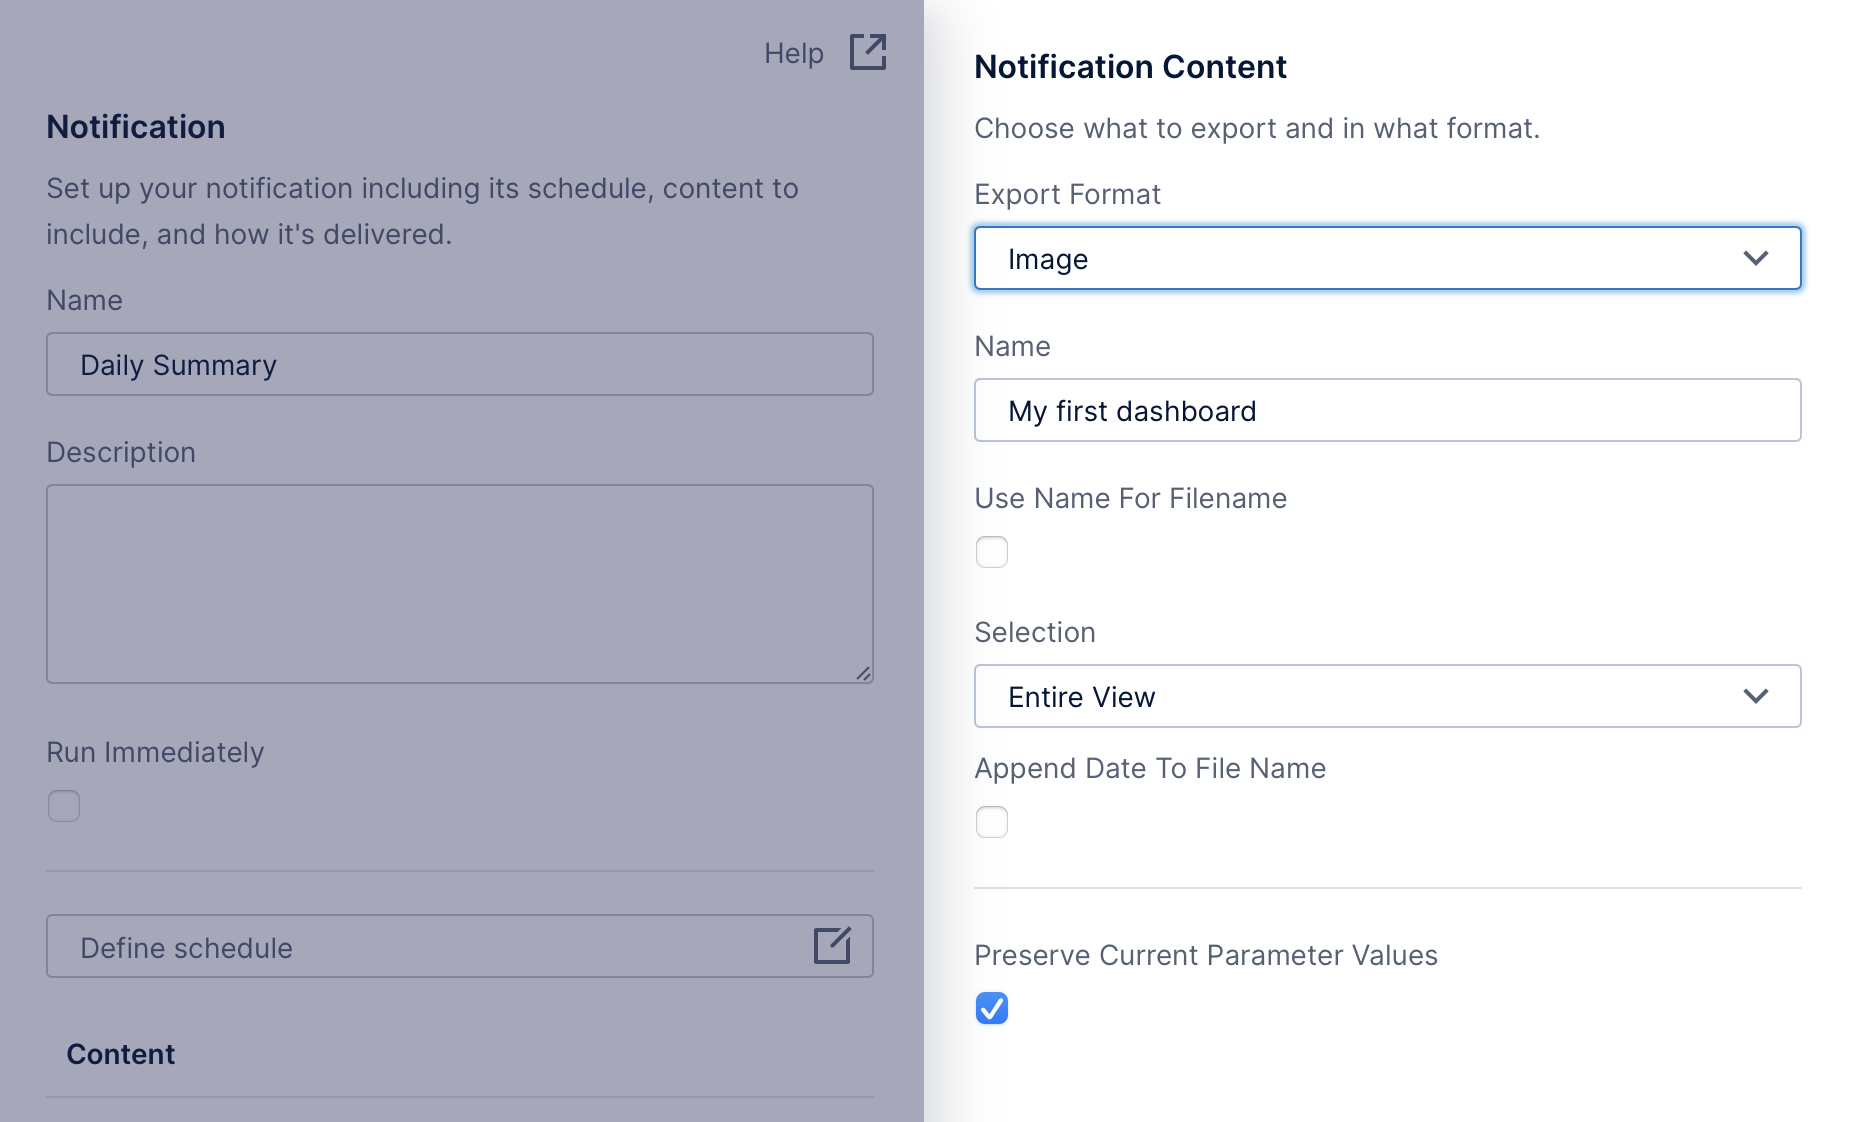
You can choose to store the current parameter (filter) settings to be used when exporting content by selecting Preserve Current Parameter Values.
Click to Save your content settings and return to the initial notification dialog. Optionally click Add export content again if you want to add more to this same notification – for example, in another format.
4.3. Set up delivery options
Click Delivery options after adding export content.
The Delivery Method is initially set to Email with the exported content delivered as an attachment, or it can be set to File to place it in a specified location. There may also be other delivery choices if an extension is installed.

4.3.1. Email notifications
By default, the notification is set up with you as the recipient. Click Add recipient to add other users, groups or email addresses to email, and optionally select the checkbox to allow them to unsubscribe.
Enter the subject and body text for your email message in the fields provided, or click Edit template in advanced editor to apply formatting to the email body. Right-click where entering text or click the + button above the textbox for a list of available placeholders you can insert:
- Recipient name – the user name of the email recipient.
- Creation date – the date when the notification was generated.
- User name – the name of the user who created the notification.
- View name – the name of the view (e.g., dashboard or report).
- View link – a link to access the view directly
- Embedded image – the exported image (only available if the export format is set to Image).
To customize the export for each user, also known as report bursting, you can use either of the following:
- When adding or editing a recipient, click Customize parameters to set specific filter settings for each recipient, which will override filtering set on the dashboard or other view. This option is available for administrators, and starting with version 25.3 for power users and higher.
- Or, to preserve row-level or other security already set up, select the option Export Using Recipient Account, which will use each recipient's account to access the view and its data when exporting. (An administrator may have enabled this option already on your behalf.)
You can deselect the Attachments checkbox if you prefer to send only an email message by itself when an event occurs or if you have embedded the image content in the message body. This checkbox may be unavailable if attachments are disabled by an administrator in configuration settings.
4.3.2. Create file
To have the notification delivered as an export file that is placed in a specified folder location, set Delivery Method to File.
Specify a Folder location for storing the generated files, which must be a location accessible to the application server such as a folder shared over your network.
The File Name Template is a prefix that will be used to compose the actual filenames.
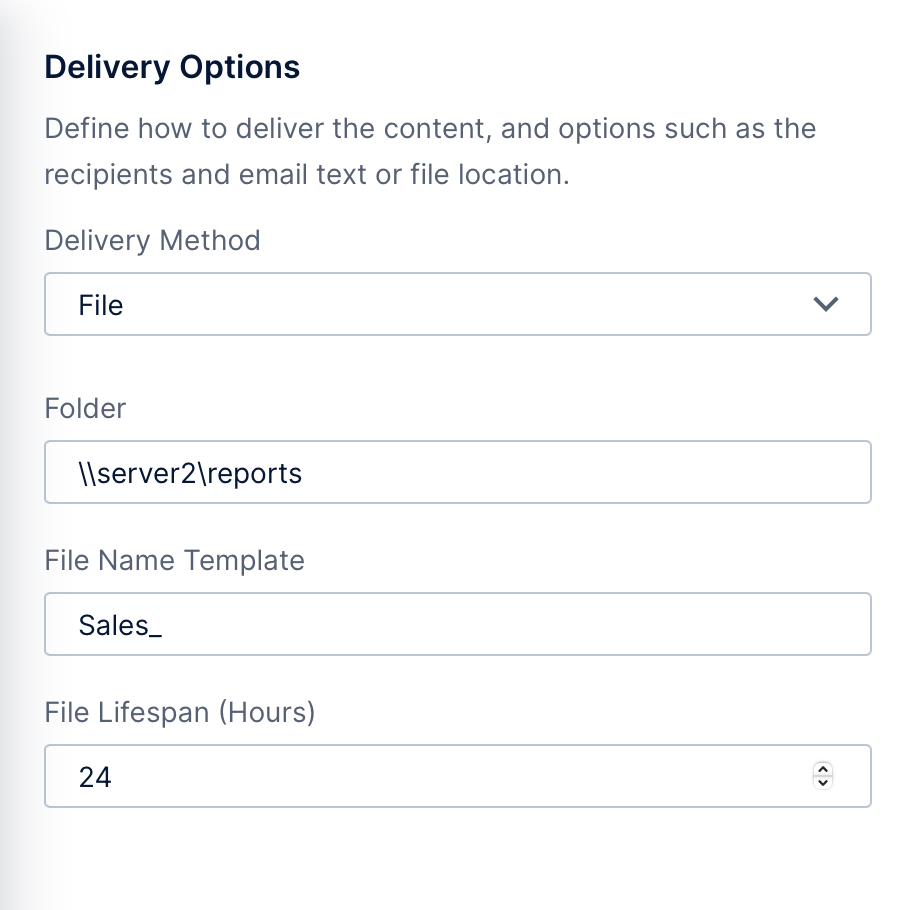
The File Lifespan option determines whether files from previous notifications are overwritten. If a notification occurs before the file lifespan expired for the previous one, a new file is generated with a different name.
4.4. Notified on failure
The option to set up a user to be Notified on Failure by email may appear if the notification runs on a schedule. This is in the main notification dialog below the delivery options button.
This option is available according to the Job Failure Email Policy set up by your administrator.
4.5. Data driven condition
The Data Driven Condition dialog is displayed when you add a new condition to a data driven notification. A data condition specifies the criteria for detecting or evaluating changes in data.
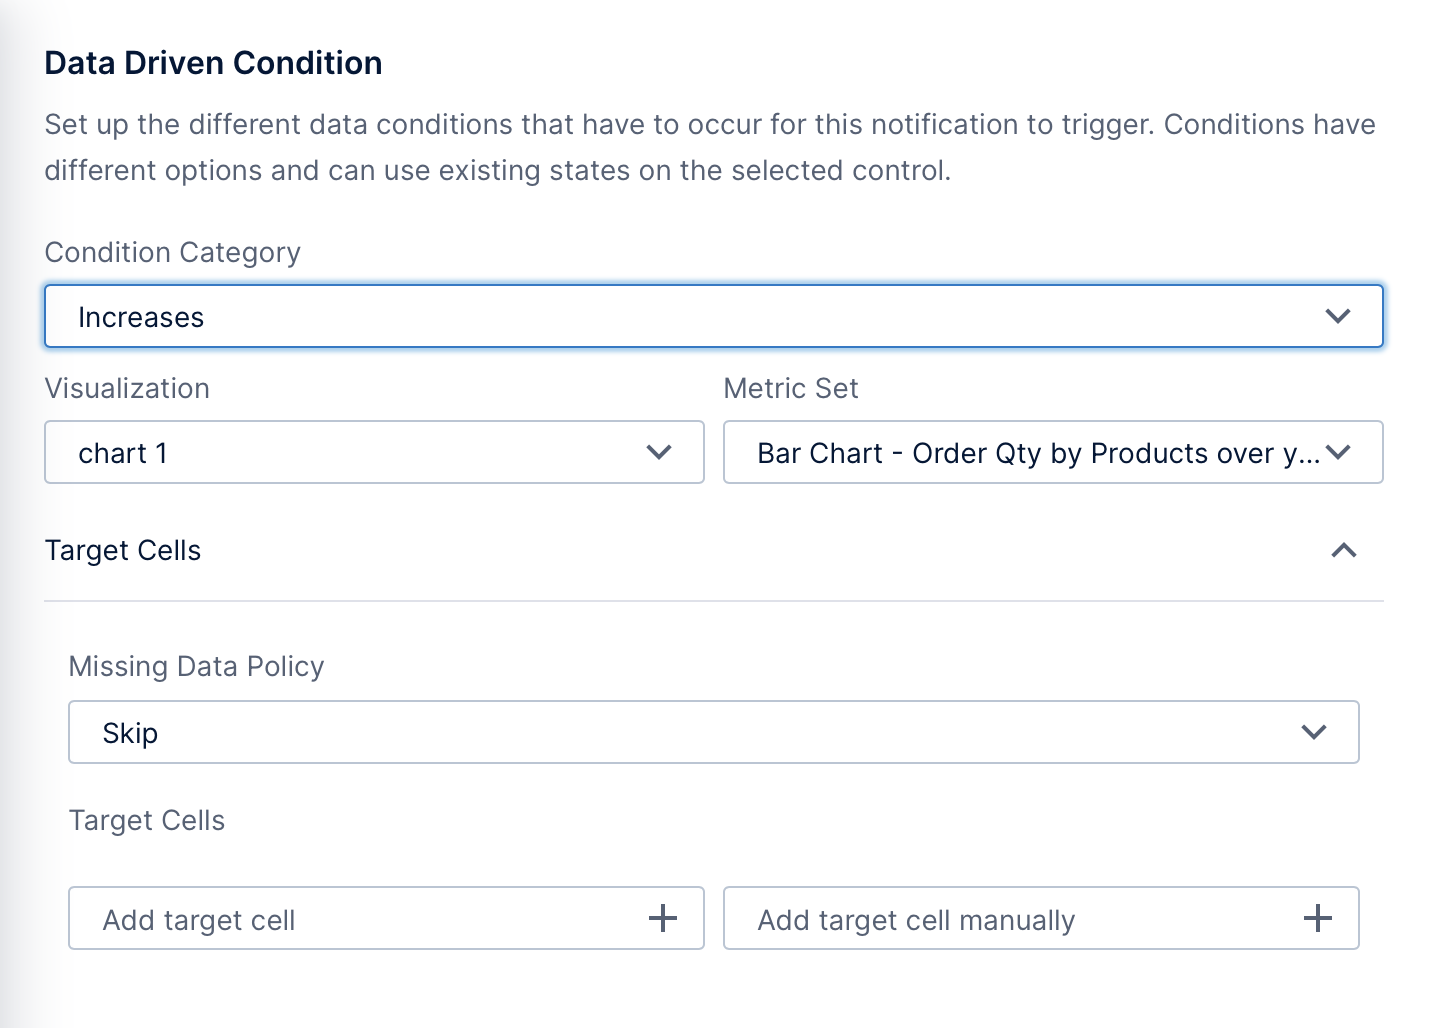
Select a Condition Category to determine when to notify the recipients:
- Increases – An increase is detected in the target data.
- Continuously Increases – Regular increases are detected in the target data over a specified period.
- Decreases – A decrease is detected in the target data.
- Continuously Decreases – Regular decreases are detected in the target data over a specified period.
- Enters State – The target data has entered a specified state.
- Exits State – The target data has left a specified state.
- Stays in State – The target data remains in a specified state for the specified period.
- In State(s) – The data is in the specified state.
The state of the data is determined by checking the values against some conditions of your choice.
When monitoring for a value that Continuously Increases or Continuously Decreases, you can either set the Previous Number of Polls that should show a value increasing/decreasing, or set the Hourly Interval to the number of hours during which the value should increase/decrease.
4.5.1. Choose data to monitor
Choose the Visualization and the Metric Set you want to monitor out of the list of visualizations that are currently displayed.
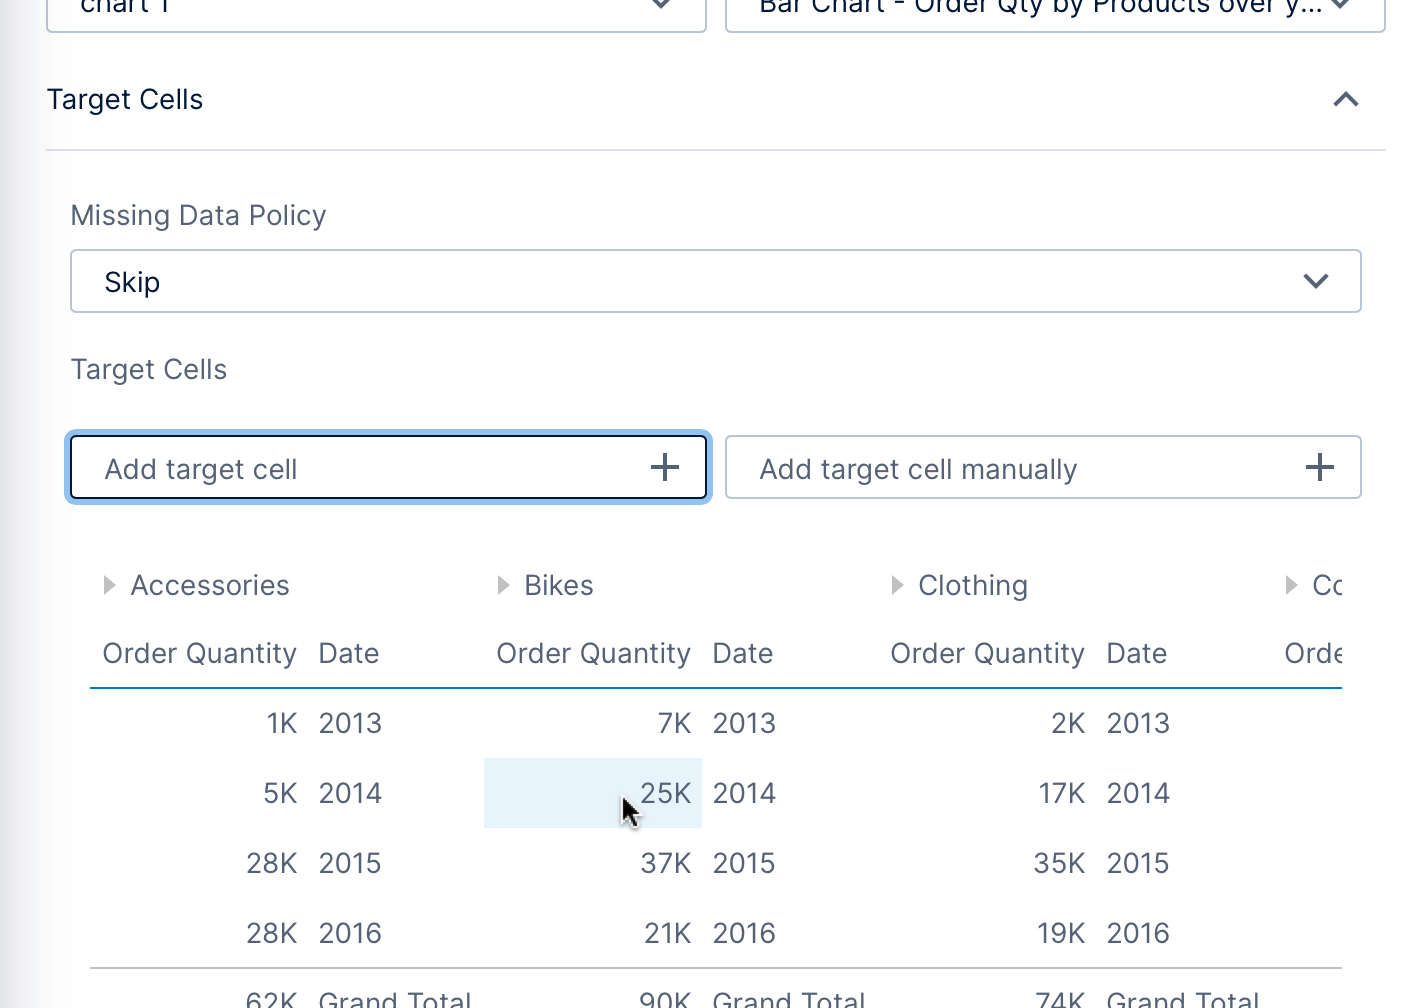
Under Target Cells, click one of the two buttons to choose which numeric data to monitor for changes.
If you click Add target cell, the current data is displayed in a table and you can click directly on the values to monitor. You can add target cells multiple times, or for some conditions click a column header to monitor an entire column of values when adding a target cell.
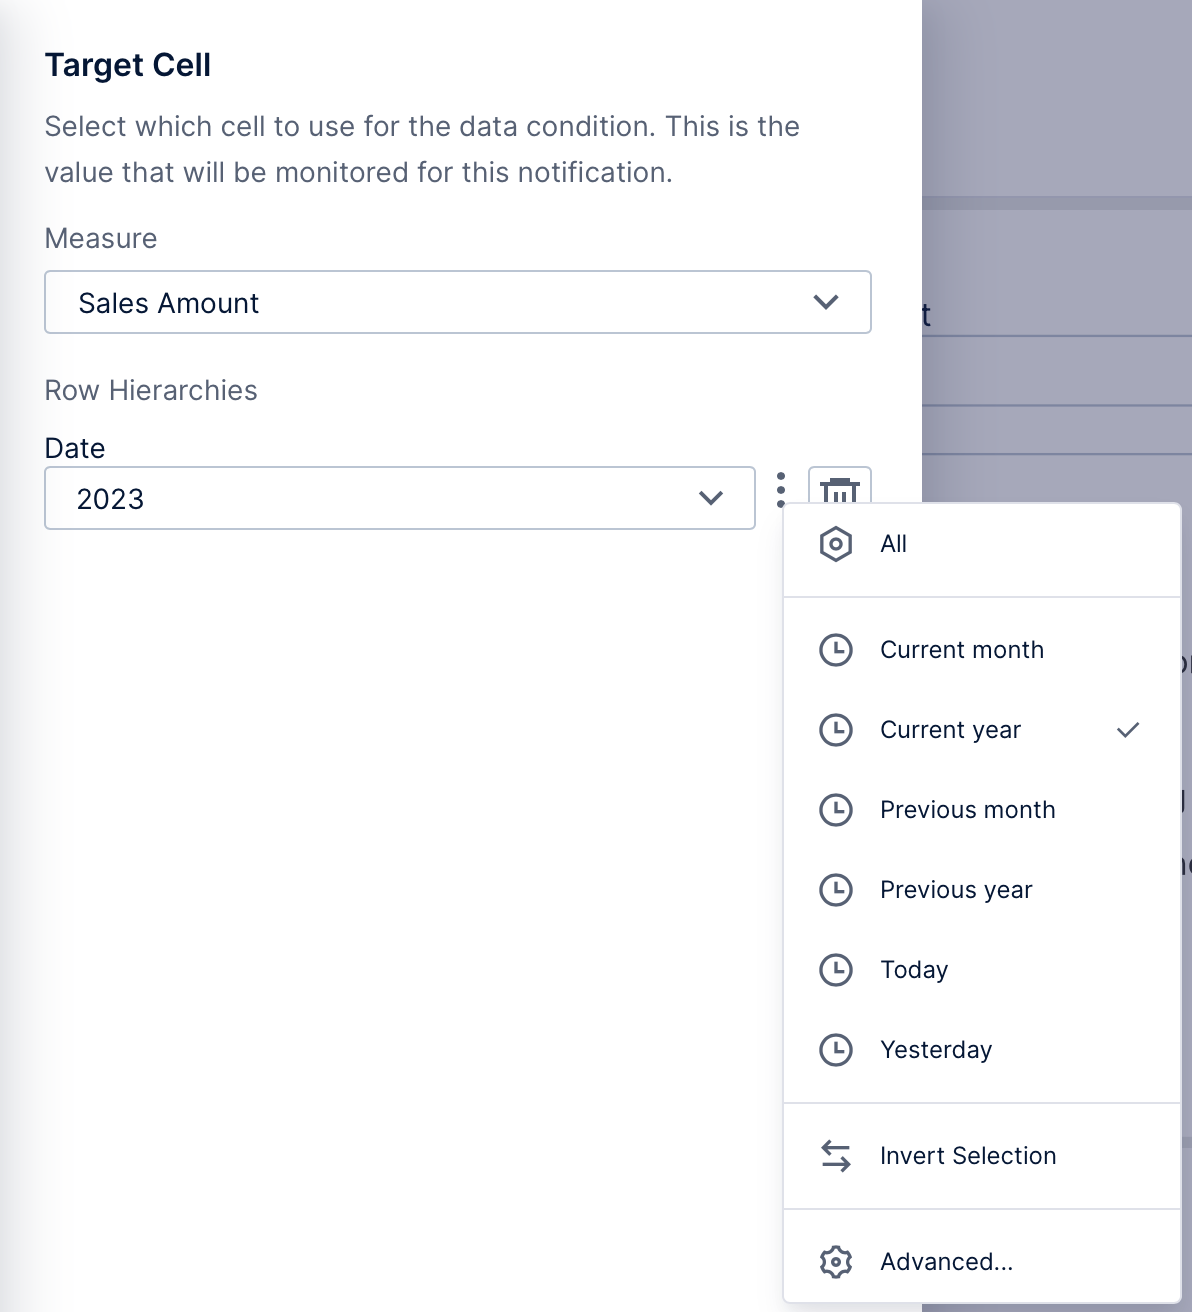
Click Add target cell manually to instead select numeric data to monitor according to the filters you set. Select which Measure values to monitor from the dropdown.
A filter will appear for each hierarchy currently displayed by the metric set & visualization, allowing you to choose filter values. For date/time data, you can click the token menu button to the right to choose relative time options that will automatically change over time, such as Today.
4.5.2. State conditions
If you chose a state condition category, expand the States section below to choose the conditions to check the numeric data against.
You can drag states that were already defined as part of the metric set, or click Add custom state to define your own conditions.
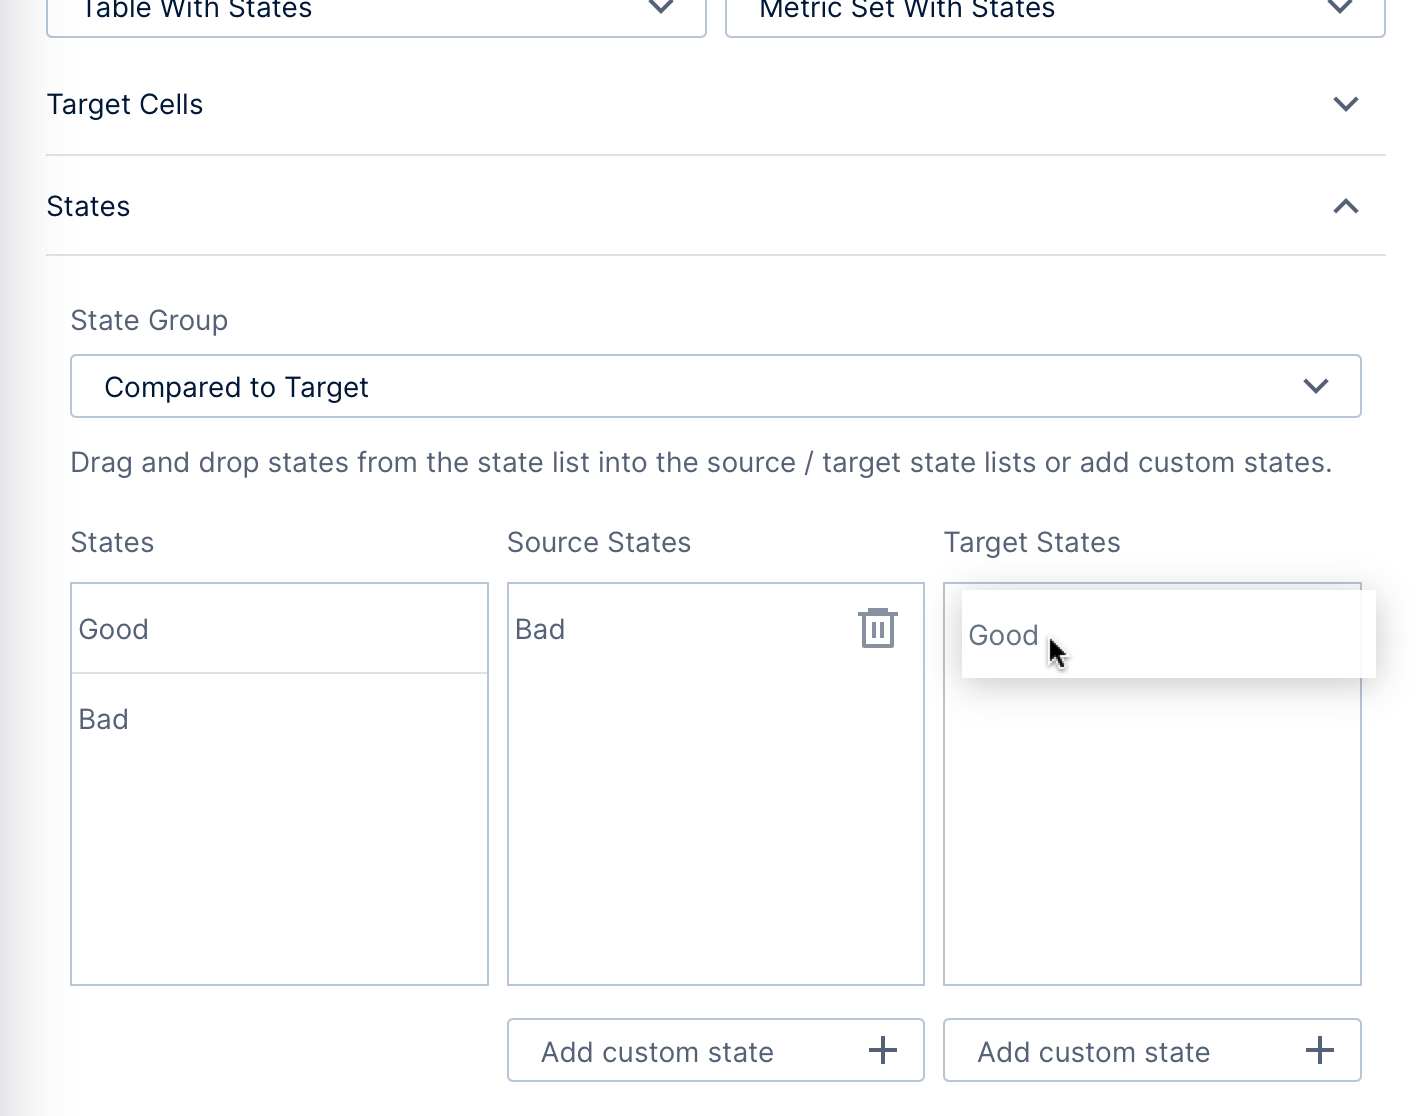
Drop or add a state under Target States to monitor data that enters that state (required for Enters State), or Source States to monitor data the exits that state (required for Exits State). When monitoring state transitions, you can optionally choose both a source and target: for example, the figure above shows the configuration for detecting a state transition from the Bad state to the Good state.
4.5.3. Multiple data conditions
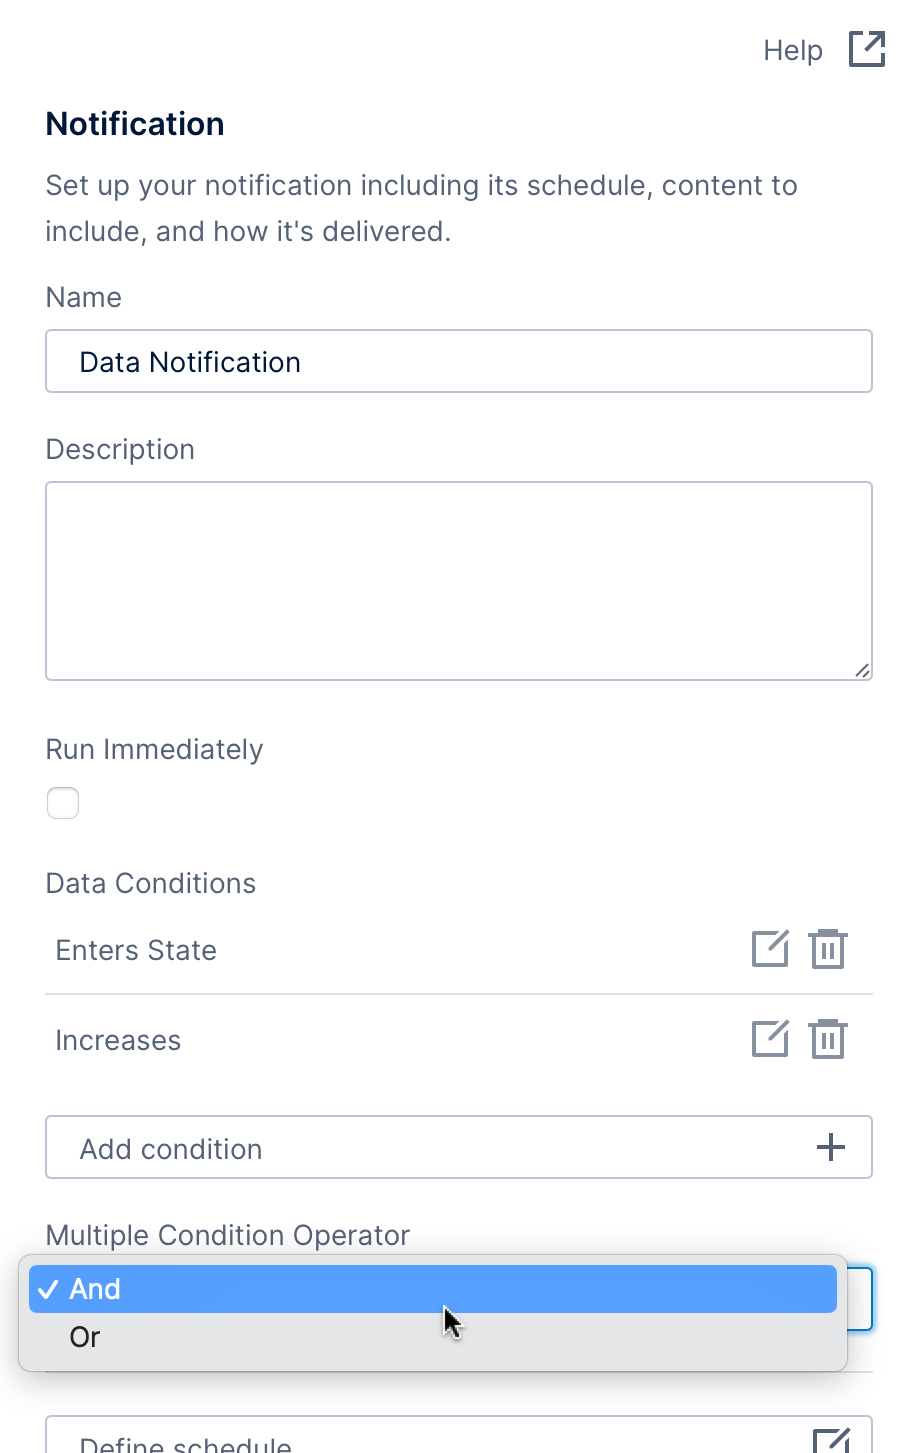
Click Save at the bottom of the Data Driven Condition dialog when finished.
You can add multiple data conditions for the same notification. With multiple conditions, use the Multiple Condition Operator to indicate whether all conditions (And) or just any condition (Or) must be met for the notification to occur.
5. View or update notifications
Existing notifications can be viewed and updated by you or your administrator.
5.1. Personal notifications
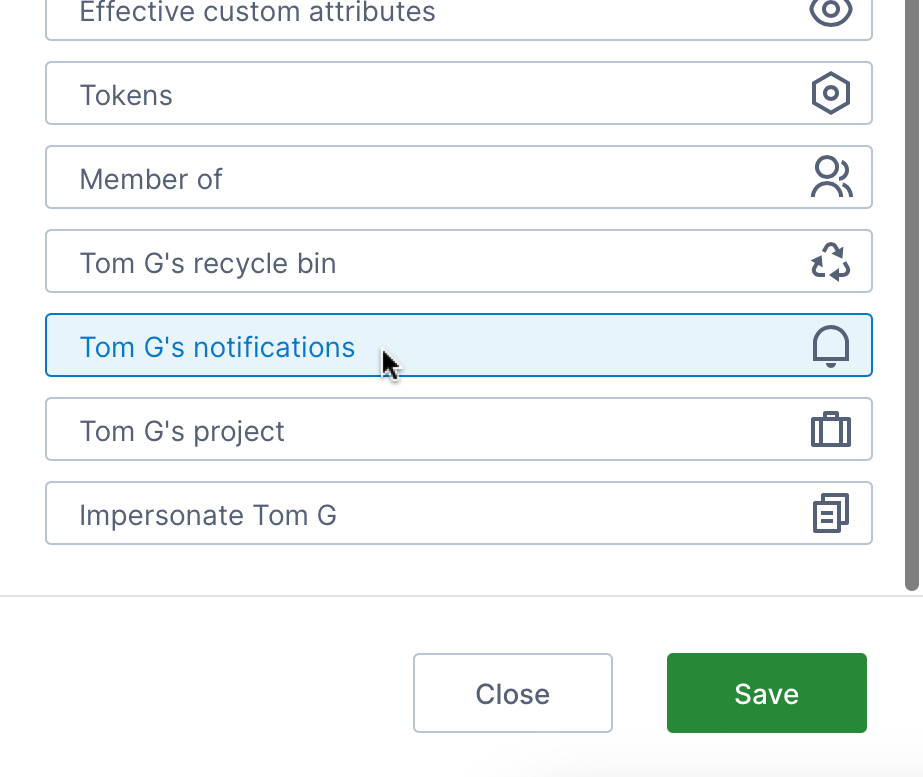
You can access your notifications from your profile, which you can access from the main menu on the left.
In the My Profile dialog, scroll down and click Notifications to view a list of your notifications.
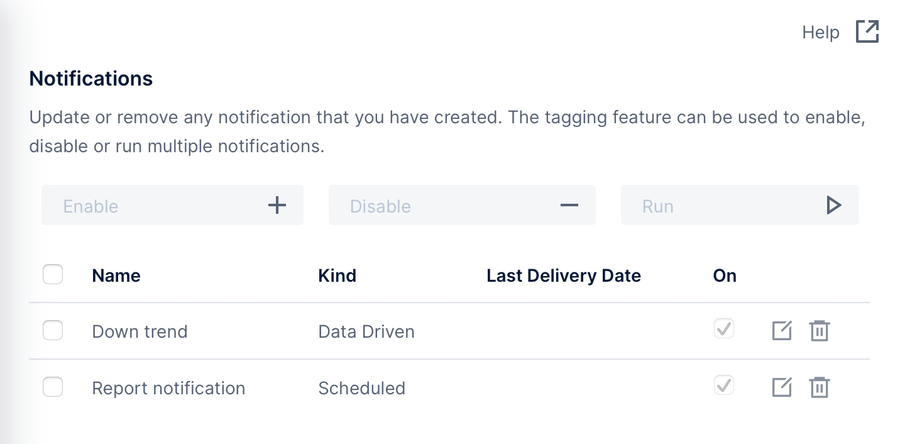
You can enable, disable, or run multiple notifications at a time by selecting the notifications and clicking one of these options at the top of the dialog.
Click the Edit icon for a notification to make updates to it.
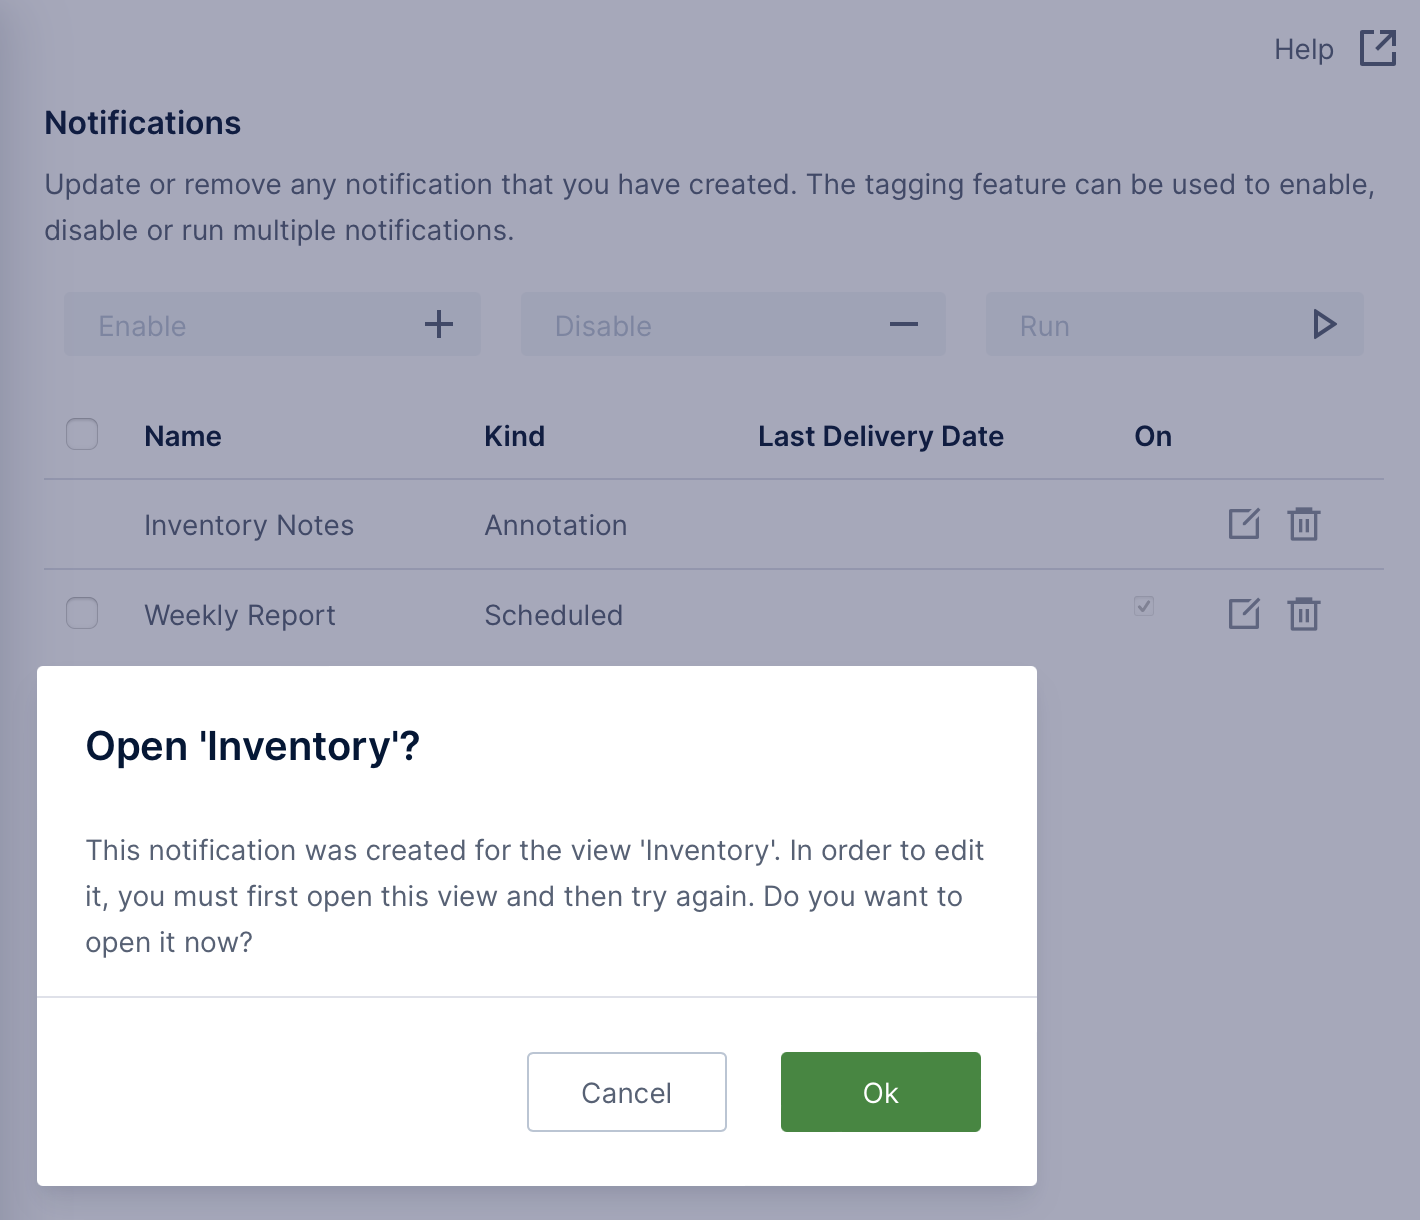
When you click to edit certain types of notifications or one of their options such as Select export content, it may be necessary to open the dashboard or other view that the notification was created from. If not open already, you'll see a prompt telling you this along with its name – click Ok to open the required view and continue.
5.2. Managing notifications
Administrators can view all of the existing user-defined notifications for this instance. You may also want to configure options that determine how and which users can share their content with other users.
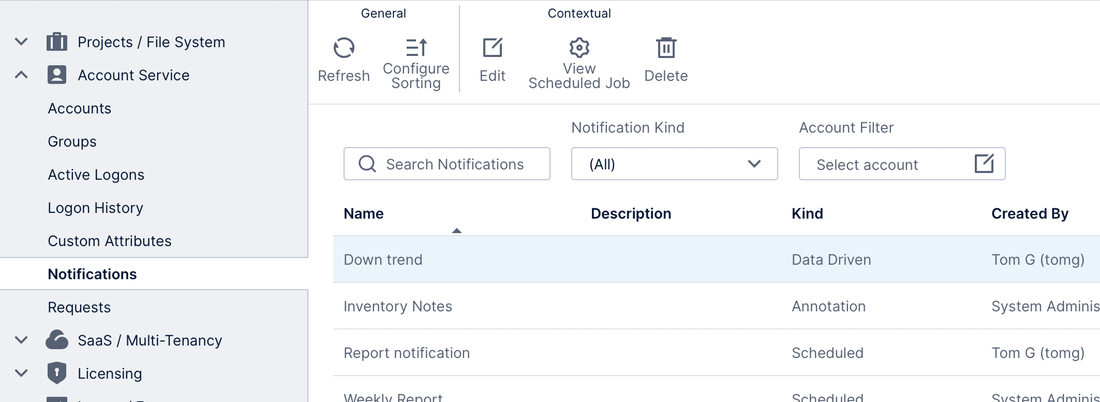
In the administration area, expand Account Service on the left and click Notifications. You can search, sort, and filter the list of notifications by tenant (if applicable), account, or the kind of notification.
With a notification selected, from the toolbar you can edit it or view the related notification job details if applicable.
Alternatively, an administrator can also view the notifications for an individual user when editing their account.