
1. Overview
To install Dundas BI on your own server computer, download and run the Dundas BI Setup program. This will install the Dundas BI Deployment application, which you then use to create and manage instances of Dundas BI.
A Dundas BI instance is a named version of the Dundas BI product. As an example, you can install one instance for development, testing or staging purposes, and then have a second instance dedicated to production usage. Multiple instances of Dundas BI can also reside on the same server.
This article walks through installing Dundas BI on Windows, but you can also install Dundas BI on Linux, use Docker images, or Helm Charts with Kubernetes. After installation, users can log on to access the entire application from any device running a supported web browser.
2. Install the Deployment application
Dundas BI Deployment is an all-in-one application that lets you create and manage instances of Dundas BI on your Windows server computer.
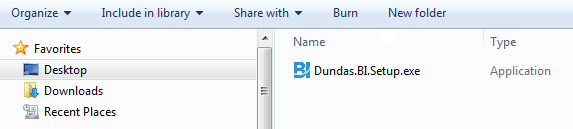
To install the Dundas BI Deployment application, run the Dundas.BI.Setup program. You can download it from the My Account page of this website after logging in with a free account (you can click Sign Up on the login page if you do not have one yet).
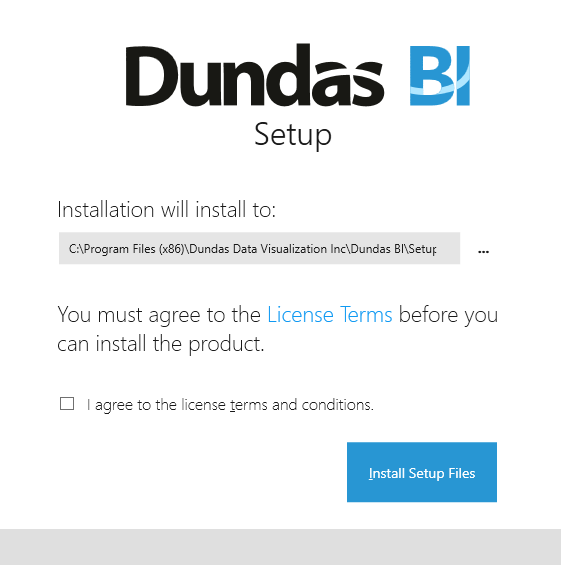
In the Dundas BI Setup screen, specify the Installation folder for the Dundas BI Deployment application. You can either accept the default folder or choose another one.
Read the License Terms by clicking the given link. If you agree with the terms, select the corresponding checkbox.
Click Install to begin installing the Dundas BI Deployment application.
When the setup is complete, click the Launch button to start the Dundas BI Deployment application.
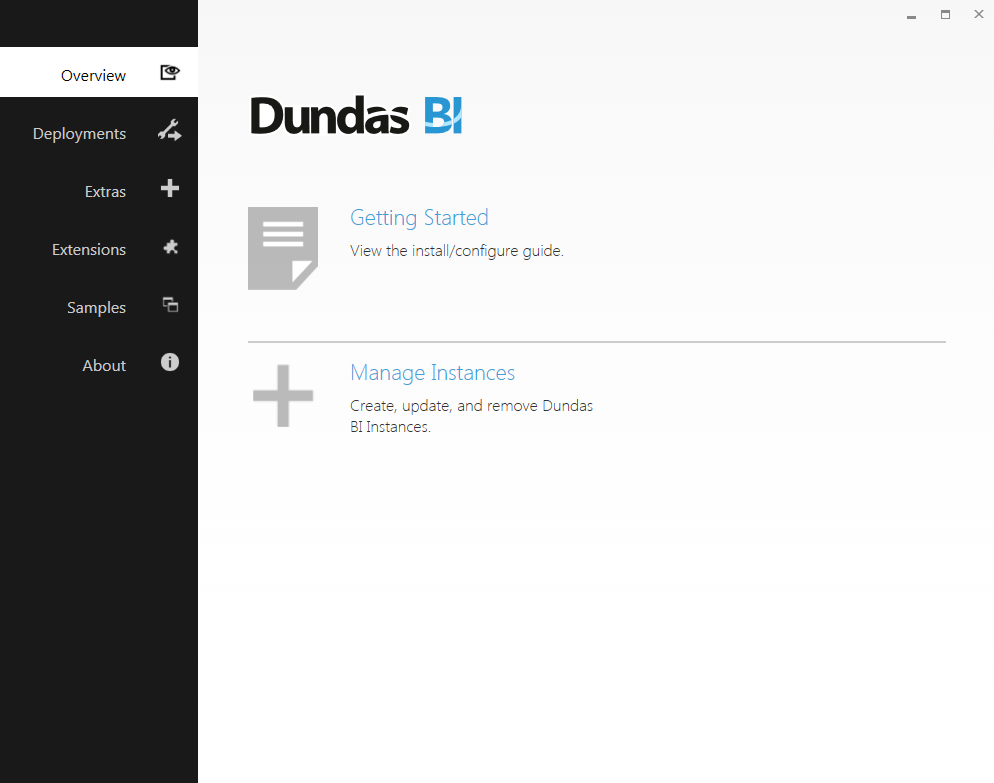
The Deployment application is also now available from the start menu on the server, and you no longer need the setup program used above.
3. Create a Dundas BI instance
To create a new Dundas BI instance, launch the Dundas BI Deployment application.
Click Deployments on the left, and then click Create an instance.
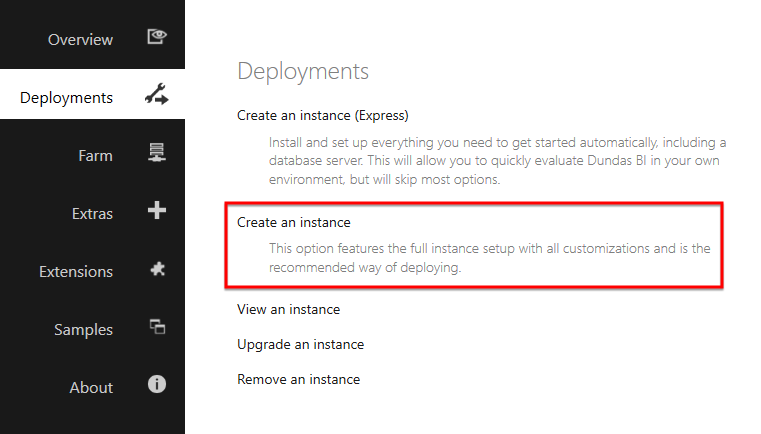
To quickly deploy an instance for evaluation purposes, you can click Create an instance (Express) instead, and most of the steps described below will be skipped. This option installs the database server PostgreSQL to provide the databases used to run Dundas BI, and applies an evaluation license.
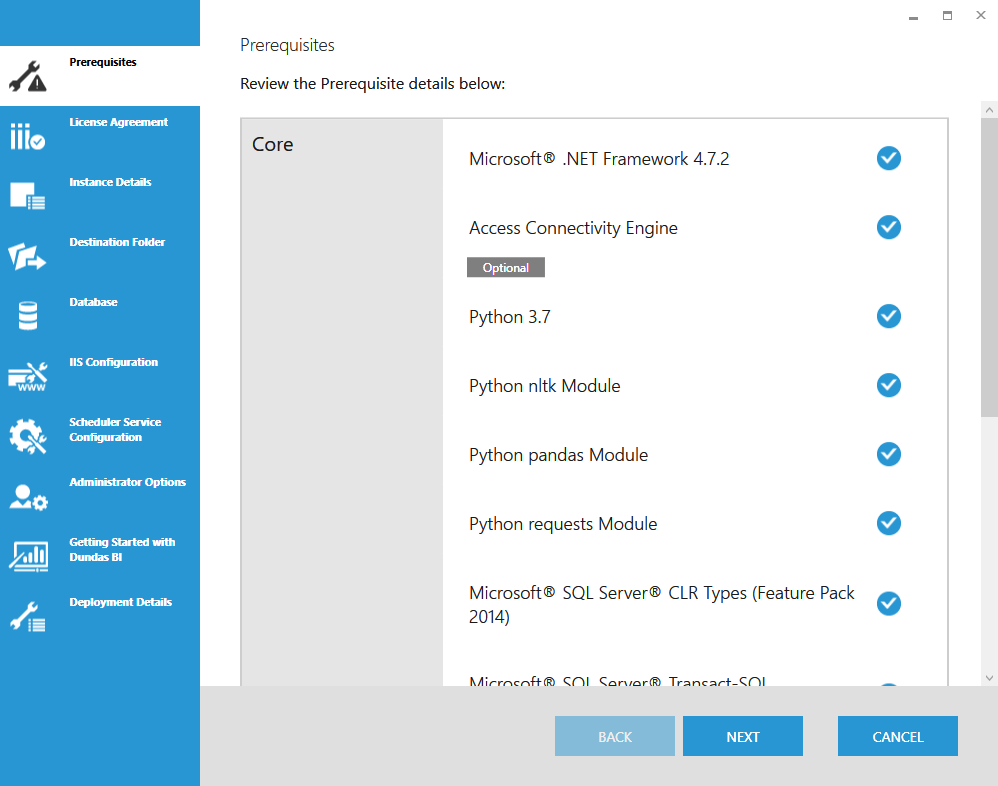
4. Prerequisites
The installation requires a number of prerequisites to be installed before it can proceed further. If your system has all of the prerequisites, simply click Next to continue.
If your system is missing some of the prerequisites, click to automatically install the missing prerequisites. Once all of the checks have passed, click Next to continue.
5. License Agreement
You must agree to the terms of the Dundas BI License Agreement before proceeding. If you agree with the terms, select the given checkbox and then click Next to continue.
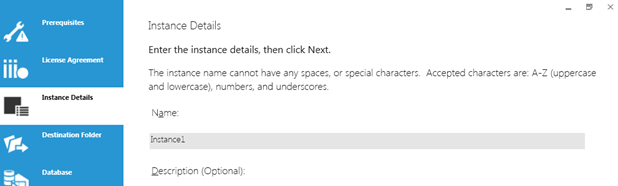
6. Instance Details
Give a unique name to the Dundas BI instance. The default name is Instance1.
Note that your chosen instance name cannot have any spaces or special characters. Valid characters are: a-z, A-Z, 0-9, and underscores.
Optionally, enter a brief description of your instance.
7. Destination Folder
Choose a destination folder for the instance installation. The default folder is set to
C:\Program Files\Dundas Data Visualization Inc\Dundas BI\Instances\{InstanceName}
You can accept the default folder or select another one by clicking (...).
8. Database
Dundas BI stores its own data internally using two databases: an application database and a warehouse database.
8.1. Application Database
The application database stores the configuration settings of the application and all of the objects that were created using Dundas BI.
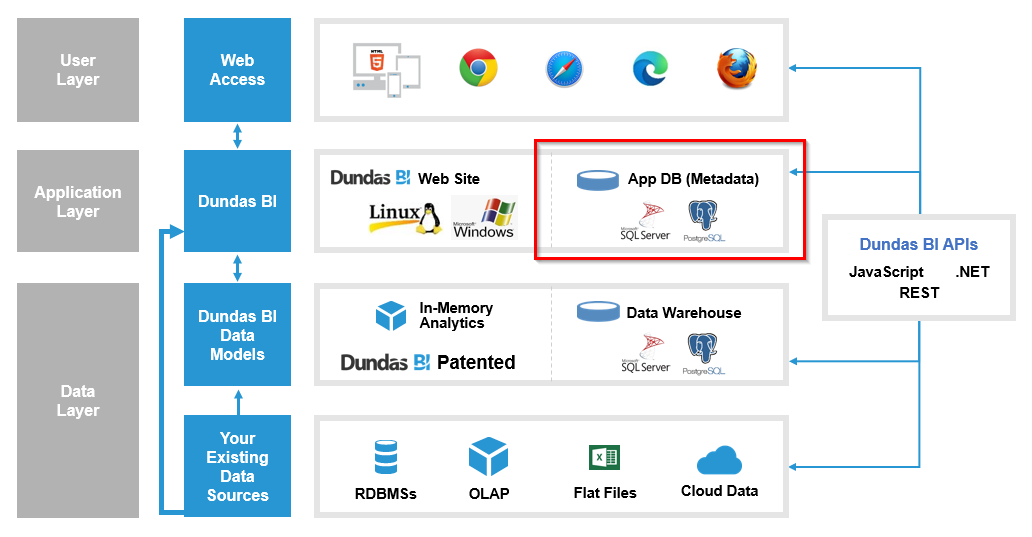
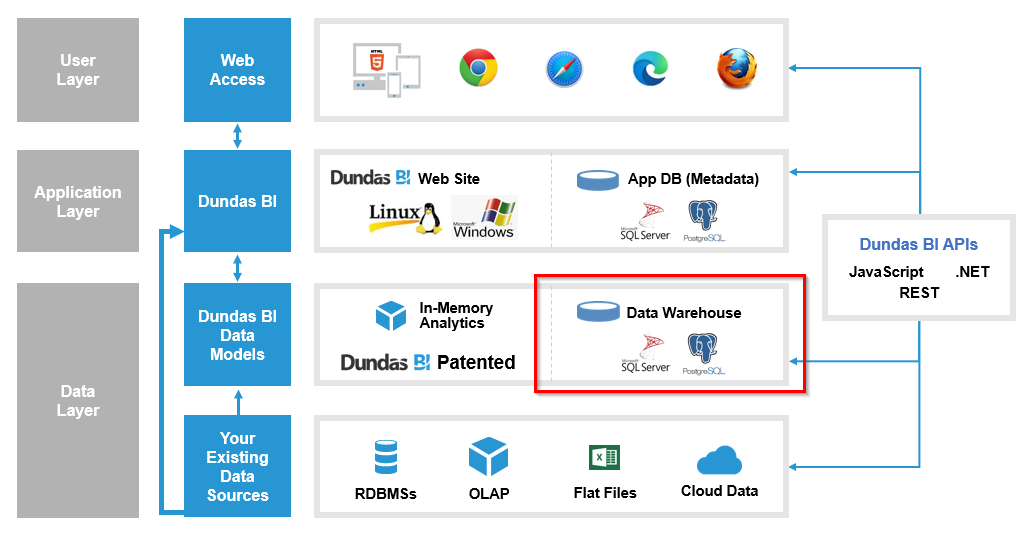
Note that the application database is different from your data source databases, as seen in the diagram below (indicated in red).
Choose whether to create a new application database or use an existing one if you have created it previously.
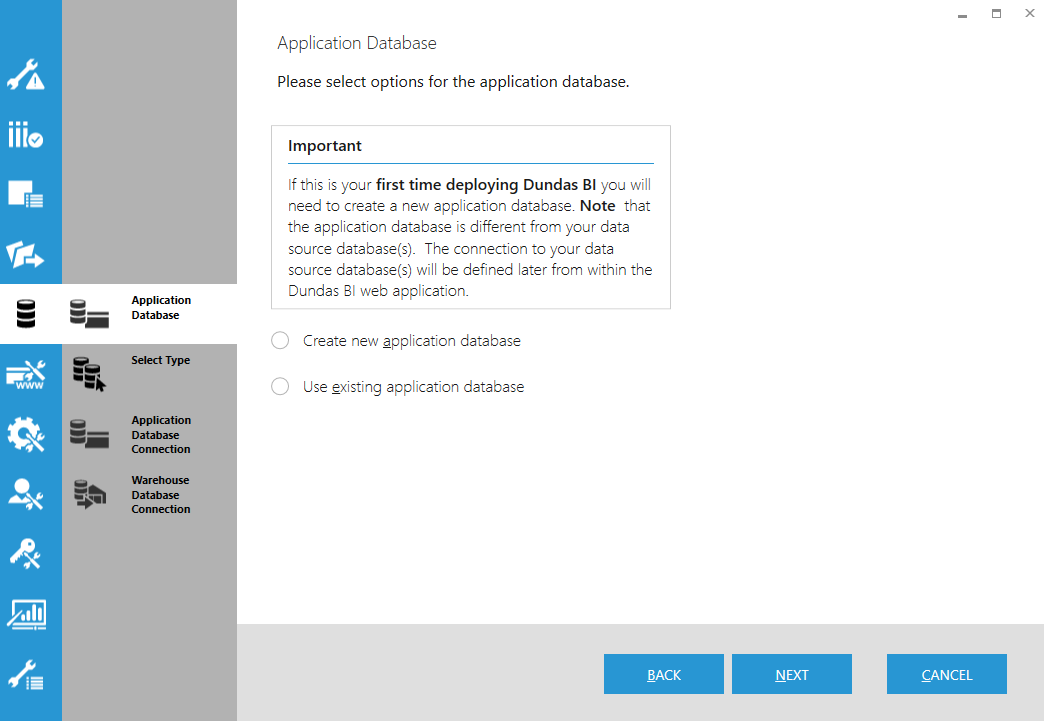
Depending on your selection, you are presented with additional options:
- Encrypt application database connection string - When selected, it will encrypt the application database connection string found in the dbi.config file.
- Backup databases before upgrade - The deployment application will upgrade existing databases to the latest version. When this option is selected, it will create backups of the databases before the upgrade. NoteWhen working with a PostgreSQL database (selected in the next step), backup is only possible if PostgreSQL exists on the local computer and is the same version as the one you are connecting.
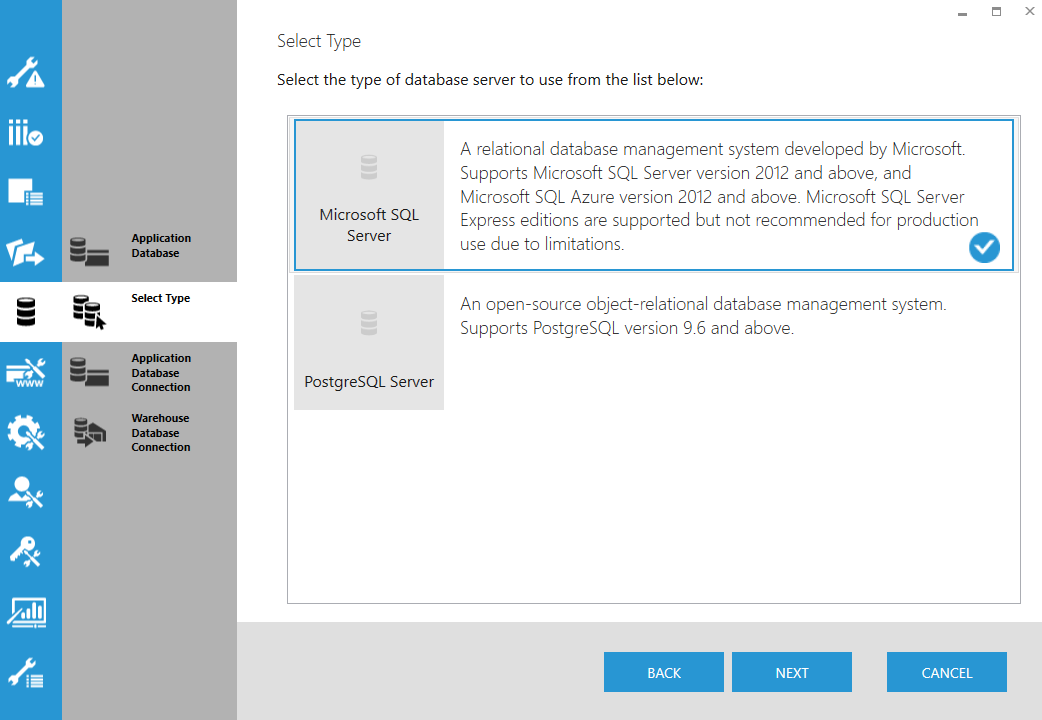
8.2. Select Type
Dundas BI can store its own data using Microsoft SQL Server or the open-sourced PostgreSQL.
Select the type of database server to use to run this instance.
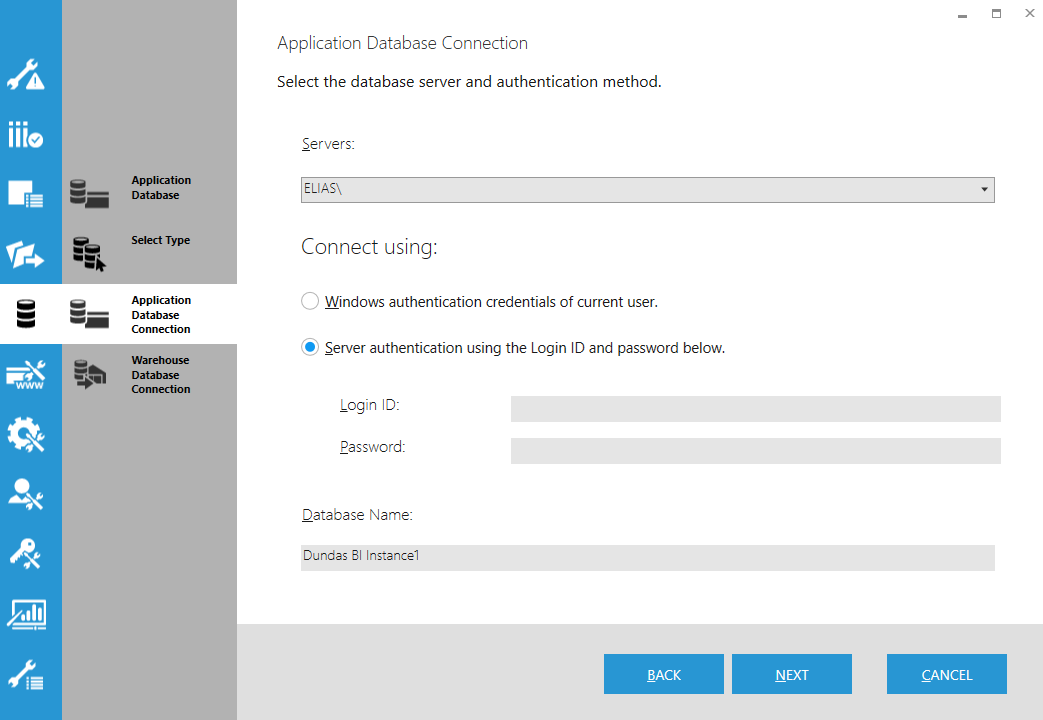
8.3. Application Database Connection
Enter the connection details for the application database, which will be used to run Dundas BI.
The server authentication option is recommended for security reasons. Using the Windows authentication (Windows Integrated security) option may be acceptable for evaluation purposes, however.
If you use the server authentication option, the login ID and password needs to correspond to a database server account that has db_create permissions for Microsoft SQL Server or usesuper permissions for PostgreSQL.
For more information about using server authentication with Dundas BI, see How to enable SQL Server authentication.
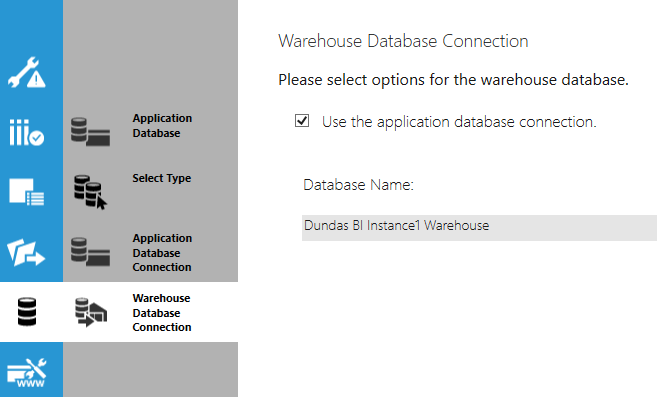
8.4. Warehouse Database Connection
The warehouse database is indicated in the diagram below in red.
For the warehouse database connection, select the checkbox to use the same settings as the application database (except for the database name, which must be different).
De-select the checkbox if you want to provide the connection settings directly as in the previous step.
9. IIS Configuration
Dundas BI is a web application that requires Microsoft IIS when it runs on Windows. Follow the steps below to configure the web application.
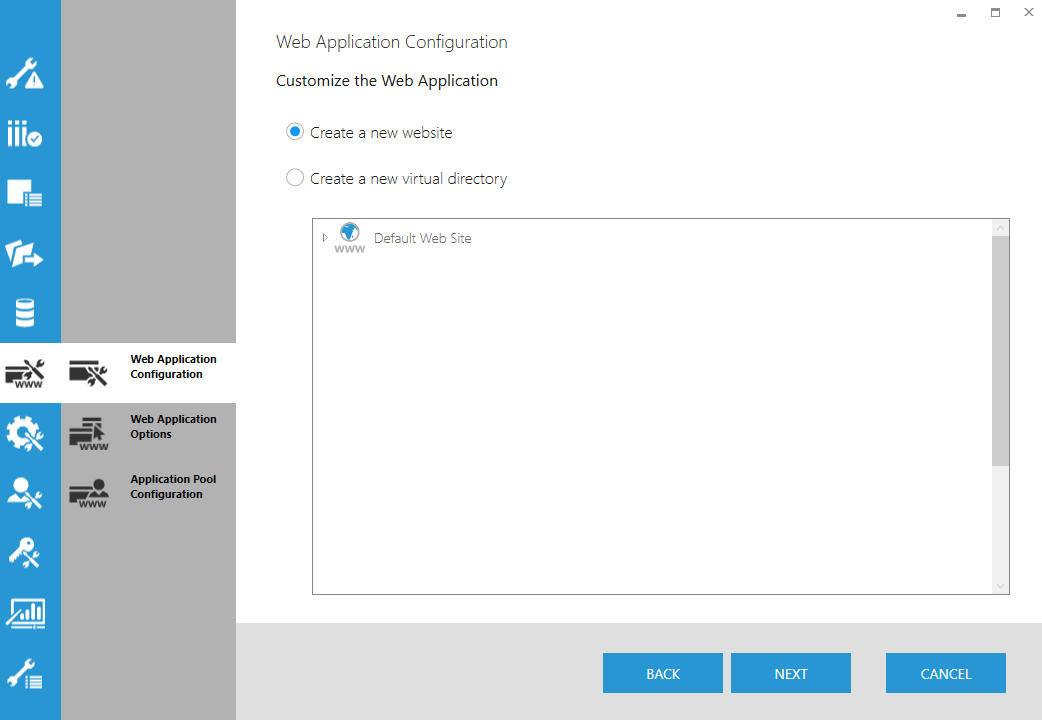
9.1. Web Application Configuration
You can install the Dundas BI web application as a new website, or as a new virtual directory. In the case of a virtual directory, you must select the parent website from the provided list.
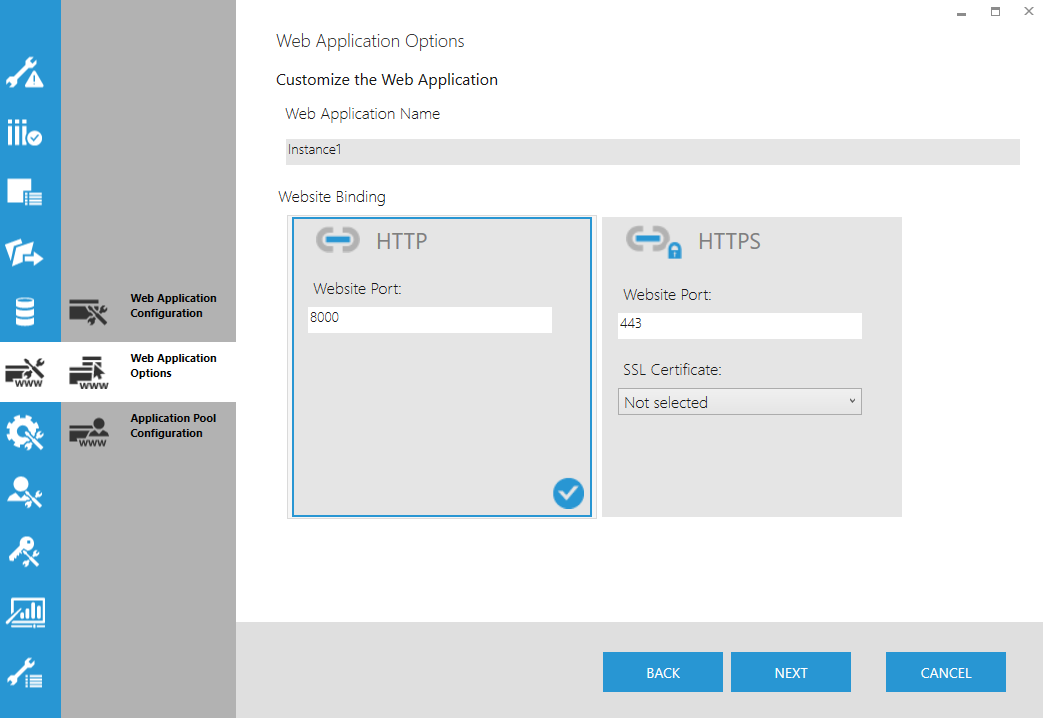
9.2. Web Application Options
Choose a name for the web application and the type of website binding (e.g., HTTP or HTTPS). In the case of HTTPS, you must also select a SSL Certificate.
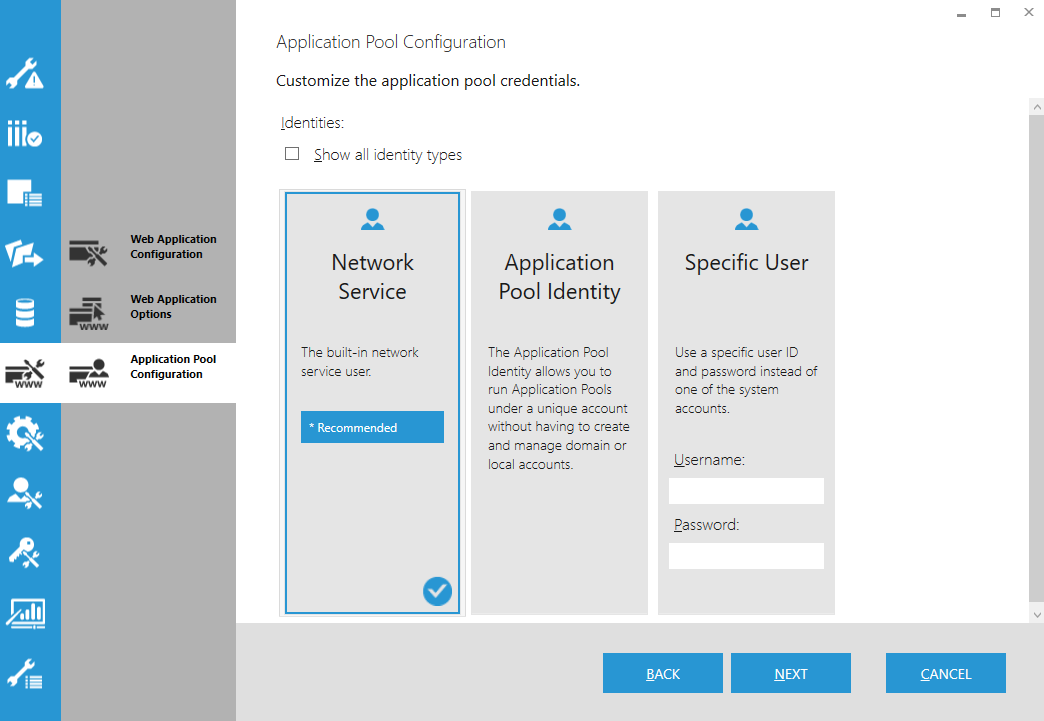
9.3. Application Pool Configuration
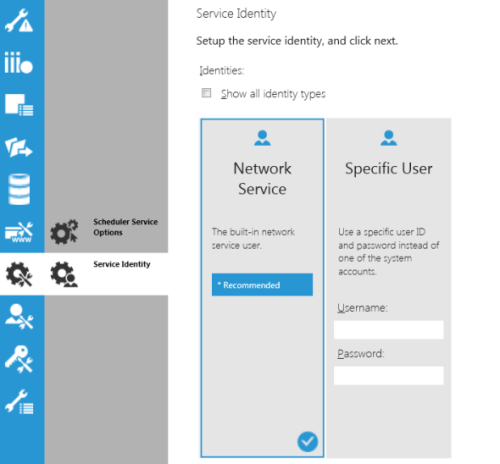
Choose an identity to run the Dundas BI application pool. The identity determines what permissions the Dundas BI application will have while running:
- Network Service is the default option and is usually what you want if your application database is on the same computer.
- Application Pool Identity allows you to run the Dundas BI application pool without having to create domain or local accounts.
- Specific User lets you use a specific user ID and password instead of one of the system accounts. This can be useful if your application database resides on another computer and requires a specific user for access. To specify a domain account, use the format: DOMAIN\username.
10. Scheduler Service Configuration
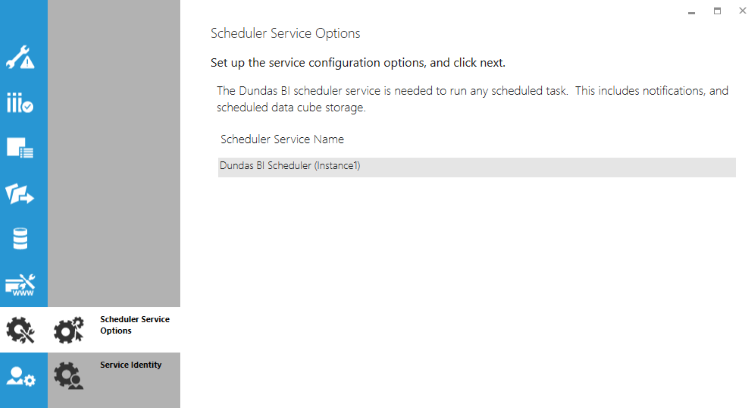
The Dundas BI Scheduler service is installed to enable features like notifications and data cube storage schedules to work.
10.1. Scheduler Service Options
You can customize the name of the service if preferred, otherwise just continue to the next step using the predefined name.
10.2. Scheduler Service Identity
Choose an identity to run the scheduler service. The identity determines what permissions the service will have while running.
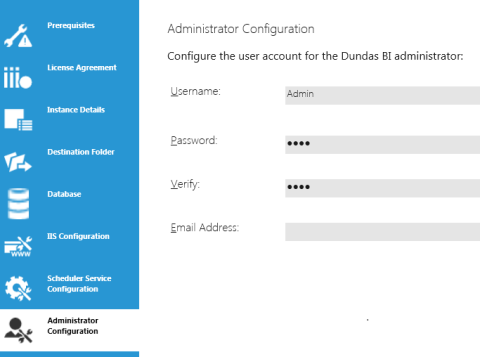
11. Administrator Configuration
Choose a username and password for the Dundas BI administrator account. By default, the username is set to Admin.
Enter the email address for the administrator as well.
The administrator username and password are required to log on to Dundas BI for the first time. After logging on, the administrator can change the password as desired.
12. License Configuration
In the License Configuration step, indicate whether you want to use an evaluation license or apply another license obtained from Dundas.
The evaluation license lasts for 25 days and includes the following seat types:
- Developer – 2 reserved seats (the administrator configured above reserves one initially)
- Power User – 2 reserved seats + 2 floating seats
- Standard – 10 reserved seats + 10 floating seats
(See Dundas BI licensing for more information about licenses and seat modes.)
You can always apply a new license or view the details of your existing license using Dundas BI after installing, as shown in Managing licenses.
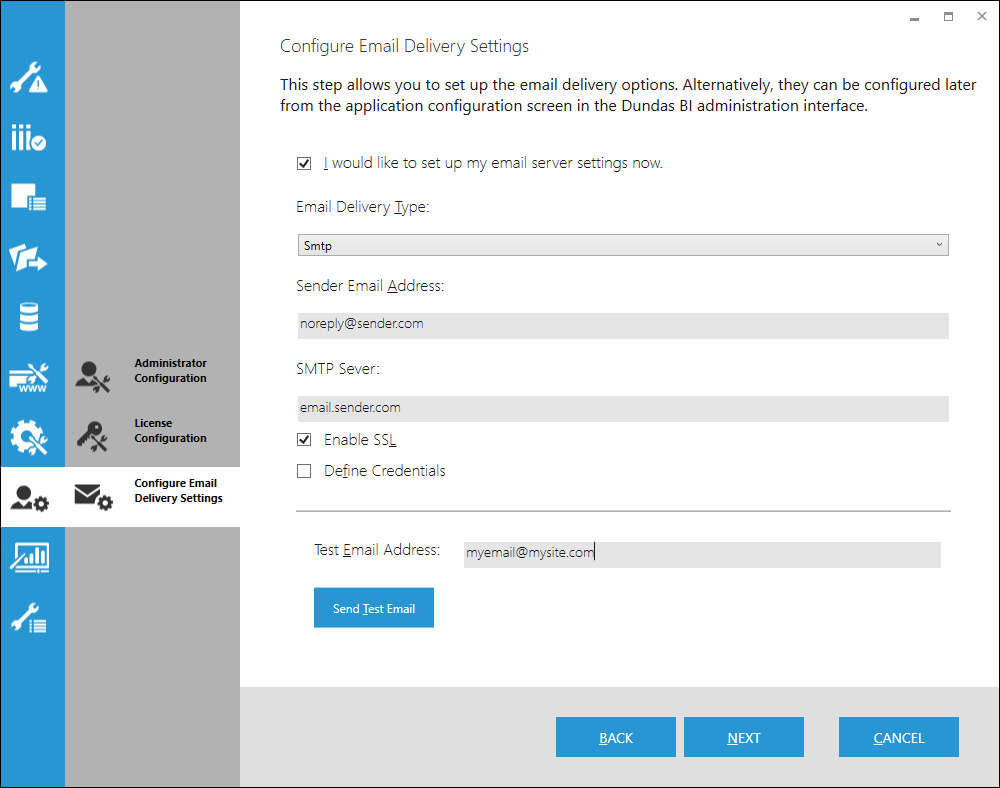
13. Configure Email Delivery Settings
You can set up the email delivery settings when installing, which are necessary for features like notifications. If you skip these when installing, you can set them later in the configuration settings.
There are two types of email delivery types supported during deployment:
- SMTP - This will require SMTP server information.
- DropFolder - This will require a mail pickup directory to be defined.
This screen also contains a Send Test Email button which allows for the settings on this screen to be tested and verified before proceeding. It will send an email to the Test Email Address defined on this screen.
14. Deployment Details
This step lets you review all of the options you selected one more time before proceeding with creating the instance.
You can also print the list of deployment details from this screen.
If everything looks fine, click Deploy to begin.
15. Adding instance to server has completed
When deploying is complete, click the provided website link to begin using Dundas BI. From now on users with access to this server can simply navigate to this web address from their devices.
You can also review the installation logs from this screen.
Click Finish to return to the Dundas BI Deployment application.

16. Next steps
After installation, you'll want to:
- Log on for the first time as the administrator (admin).
- Get familiar with the various admin-related functions such as managing user accounts.
- Review configuration settings (including email settings used for features like notifications) and configuration best practices.
- Apply a retail license if needed.