
1. Overview
You can use a gateway to connect to your on-premise data from an instance of Dundas BI running in the cloud.
Once the gateway is installed on your local network and then configured, users can create data connectors to access the following on-premise data sources via the gateway:
- dBase (DBF) files
- Flat files
- IBM Db2
- JDBC (install JDBC drivers to use for additional data sources)
- MemSQL
- Microsoft Excel
- Microsoft SQL Server
- MySQL
- OData
- ODBC (install ODBC drivers to use for additional data sources)
- Oracle database
- PostgreSQL
- Teradata
- XML files
2. System requirements
Some data sources may require drivers to be installed on the same computer as the gateway. The gateway also has minimum requirements for the operating system and for .NET that are similar to the server requirements for a Dundas BI instance, but the minimums listed for evaluation use can also be suitable for a gateway.
See the system requirements for the list of these requirements.
3. On Windows
3.1. Installation
Download BIGateway.msi from the My Account page on this support site, then run it on a computer that can be used to provide access to your data sources to start the Gateway Setup Wizard.
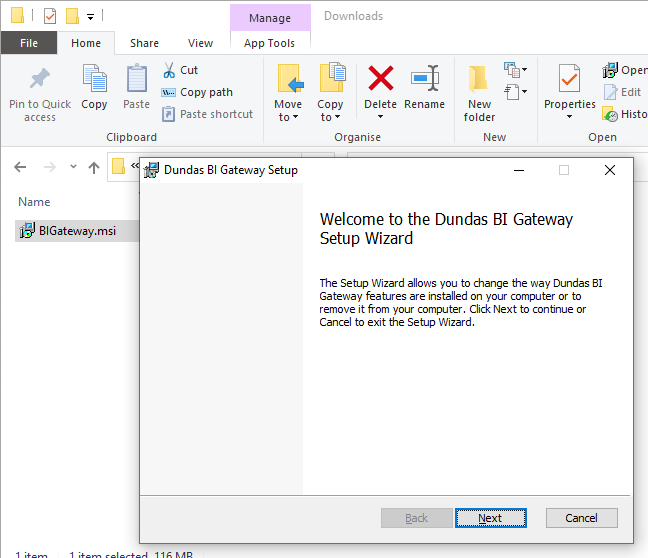
Follow the steps of the wizard. When complete, the Gateway Manager will be installed on the computer.
When a new version of this installation file becomes available, you can download it and run it again to upgrade your gateway manager to the new version, then use the gateway manager to update your gateway(s) as described below.
3.2. Managing gateways
On the computer where it was installed, run the Gateway Manager from the Start menu.
You can create a gateway for each instance of Dundas BI that you want to be able to access your local data sources through this computer.
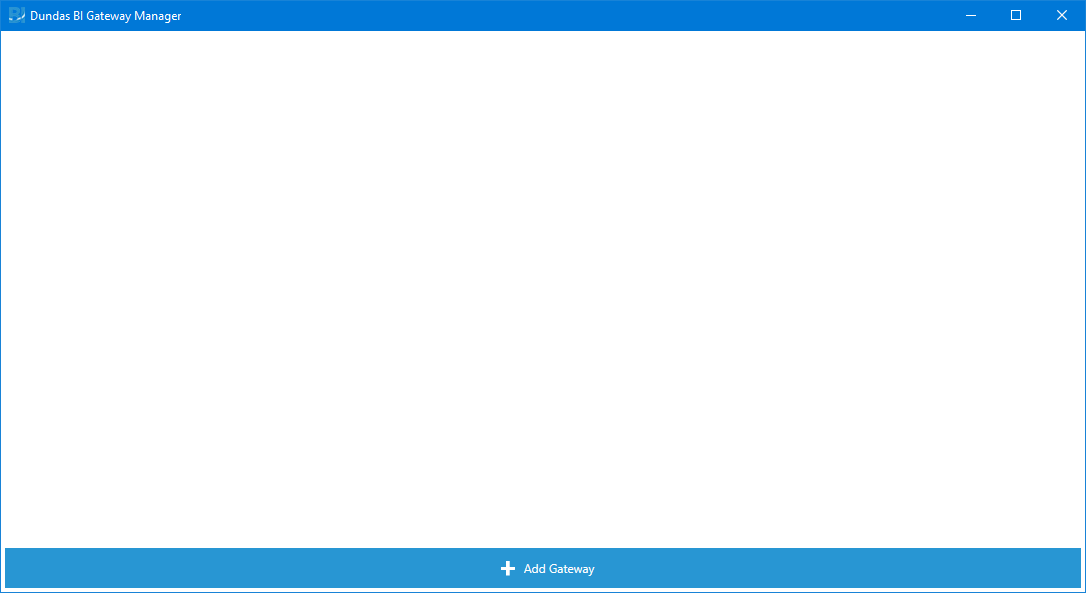
Click the Add Gateway button to create a new gateway for a particular application instance in the cloud.
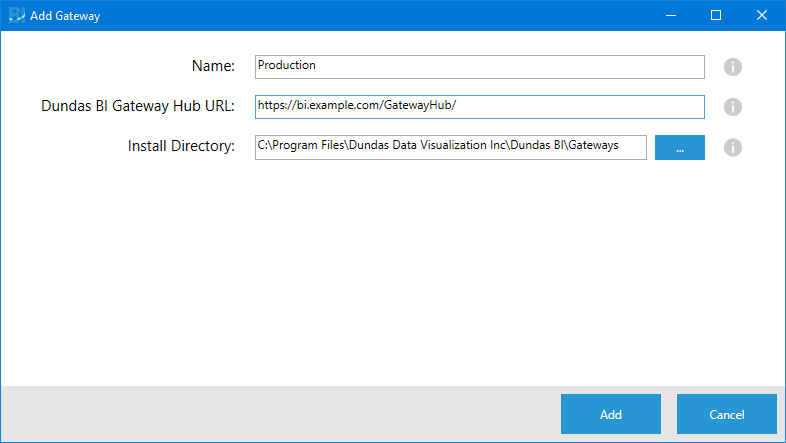
Enter the instance Name (for your reference), and the Dundas BI Gateway Hub URL based on the address you use to access the application with /GatewayHub/ added. For example, if you can navigate to Dundas BI at https://customanalytics.example.com/, enter https://customanalytics.example.com/GatewayHub/.
The Health Check Port is optional to run health check endpoints: to enable them, enter a port number not already in use on this system.
You can customize the installation directory if preferred, then click Add to install the gateway files and service.
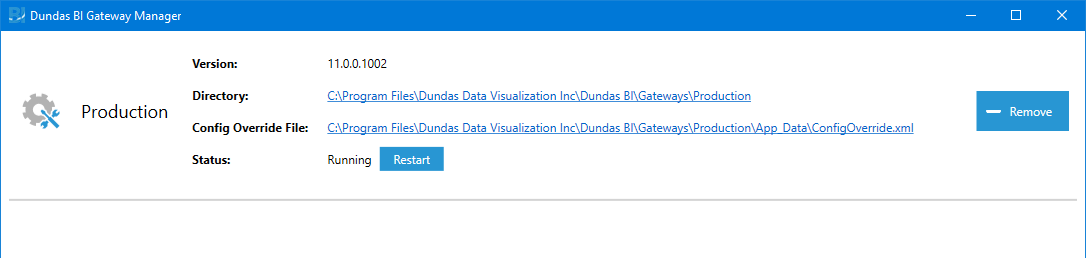
Once the process is complete, the new gateway is listed in the Gateway Manager along with its status, and a clickable link to the gateway's installation folder and its subfolders such as Logs in case of errors or issues. You can click to Restart the service if required for new installed drivers, for example, or click to Remove the gateway. After installing a new version of the Gateway Manager, you will also be able to click to Update the gateway to the newest version.
Next, click the link for the Config Override File to open it in a text editor, and note the GatewayId and PreSharedKey values located inside the <Setting> elements, which you will need to enable the configure the gateway.
4. On Linux
4.1. Installation
The Deployment Wizard is used to create and manage gateways installed on Linux.
Follow the instructions in Installing Dundas BI on Linux for downloading and installing the Deployment Wizard for your distribution of Linux, but do so on a computer that can be used to provide access to your data sources. Rather than launching the wizard to create a full application instance, you will create a gateway as shown below.
When a new version becomes available, you can download and install the new version of the Deployment Wizard, then run the step to upgrade your existing gateway.
4.2. Managing gateways
Launch the Deployment Wizard in a terminal using the --gateway option. For example:
sudo dundasbi --wizard --gateway
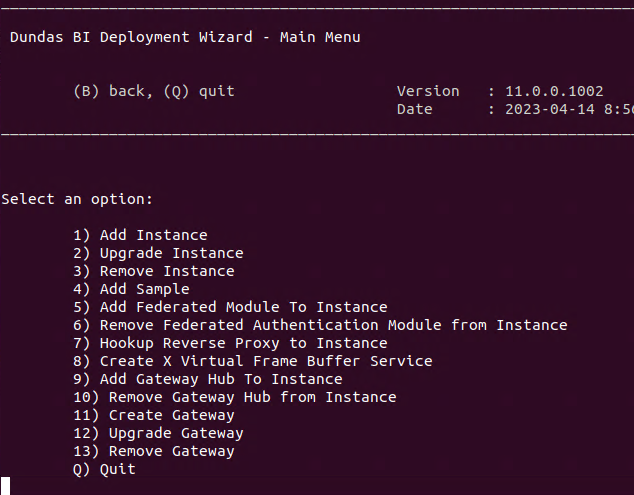
To create a new gateway, type the number indicated for the step Create Gateway followed by the enter key. There are also steps available to Upgrade Gateway and Remove Gateway.
A prerequisites check may run. Follow the prompts, or type y and the enter key to continue if the check passed.
You will be prompted to enter a Name for the application instance that will connect to data using this gateway (for your reference), followed by the Dundas BI Gateway Hub URL based on the address you use to access the application with /GatewayHub/ added. For example, if you can navigate to Dundas BI at https://customanalytics.example.com/, enter https://customanalytics.example.com/GatewayHub/.
The Health Check Port is optional to run health check endpoints: to enable them, enter a port number not already in use on this system.
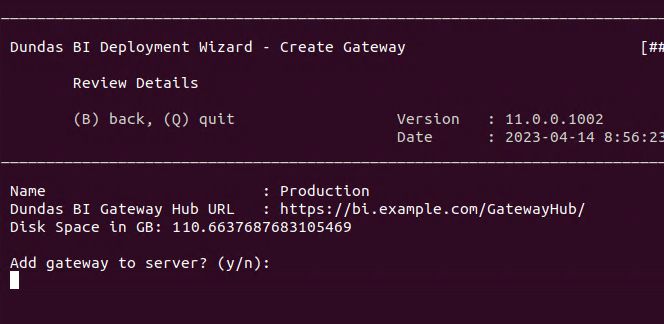
These details will be displayed back to you next and you can type y followed by the enter key to confirm and create the gateway.
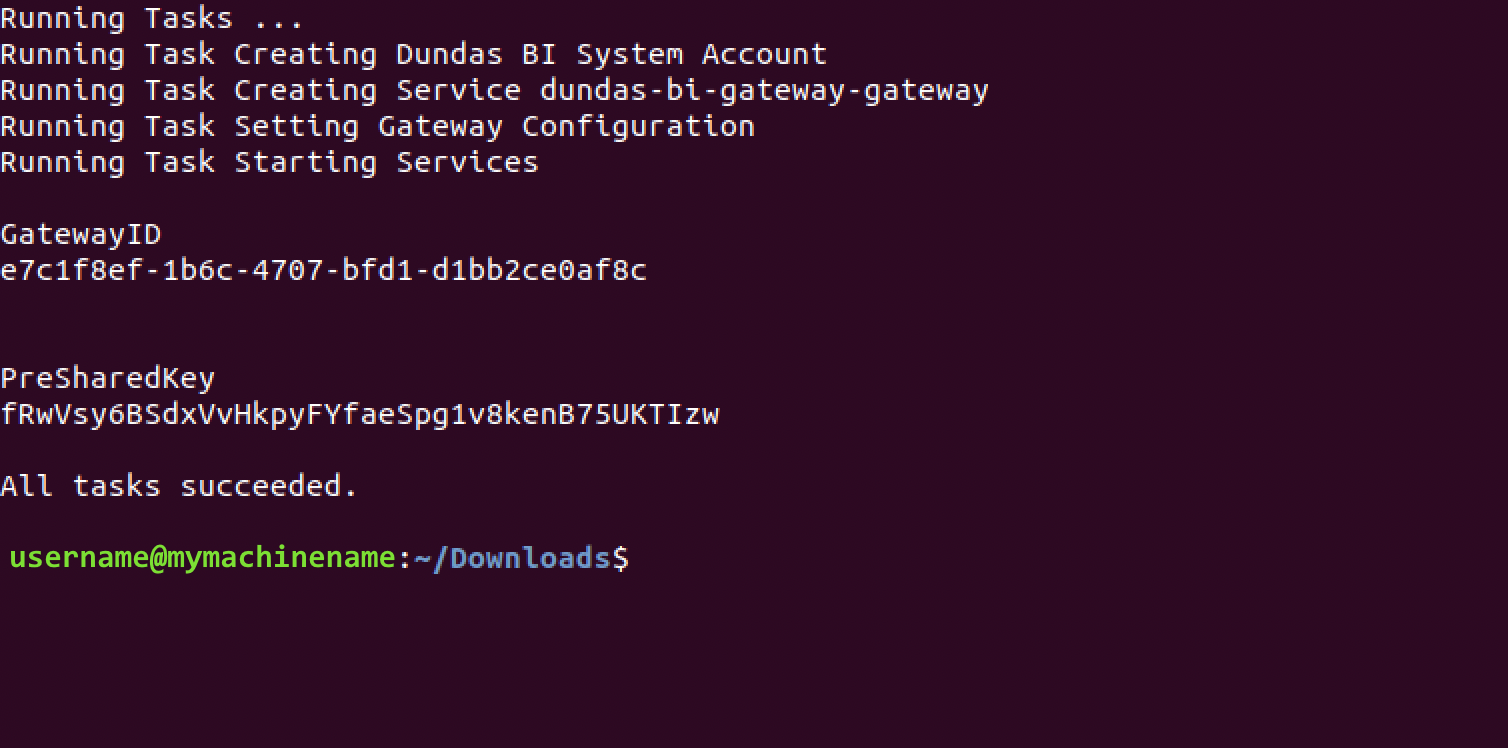
Once the tasks are complete, note the GatewayID and PreSharedKey values indicated in your terminal, as you will need these when enabling and configuring the gateway. If you need to find them again later, they are also defined within the ConfigOverride.xml file in the App_Data folder.
Once created, your gateway's App_Data directory is located at:
/usr/share/dundas/bi/Gateways/Files/{InstanceName}/App_Data
In some cases, drivers may need to be installed in subdirectories created under this directory if indicated in links from the data sources section of Dundas BI's system requirements. There is also a Logs subdirectory with files that may record errors.
A service is also installed that needs to continue running in order to provide access to your data sources. You can control or check the status of this service using the following commands (you may need to use the sudo command in front):
| Command | Result |
|---|---|
systemctl stop dundas-bi-gateway-{InstanceName}.service
|
Stops the gateway service. |
systemctl start dundas-bi-gateway-{InstanceName}.service
|
Starts the gateway service. |
systemctl restart dundas-bi-gateway-{InstanceName}.service
|
Restarts the gateway service. |
systemctl status dundas-bi-gateway-{InstanceName}.service
|
Get the gateway service status. |
5. On Docker
Like other Docker images, the gateway can run as a Docker container using the image dundas/dundas-bi-gateway. This allows you to run on other machines that can access your data sources besides the supported Windows and Linux environments if compatible.
The gateway is configured using environment variables set when starting the container:
| Environment Variable | Description |
|---|---|
| DUNDAS_BI_EXTERNAL_APPLICATION_URL | The URL to your Dundas BI instance, e.g.: https://customanalytics.example.com/ |
| DUNDAS_BI_GATEWAY_ID | A unique ID to identify this gateway. You could generate a UUID for this value using uuidgen in a terminal or online. |
| DUNDAS_BI_GATEWAY_PRESHARED_KEY | A strong pre-shared key value matching the one you configure in Dundas BI as described below to ensure only your gateway is granted access. You can generate one or find tips here. |
| DUNDAS_BI_AGREE_TO_TERMS_OF_GATEWAY_EULA | You must accept the terms of the Dundas BI Gateway Application Licence Agreement to run the gateway. Set to true to confirm your acceptance. |
| DUNDAS_BI_PRINT_CONFIG_OVERRIDE | (Optional) Prints configuration XML text containing the gateway ID and pre-shared key you specified, as confirmation. |
| DUNDAS_BI_GATEWAY_JDBC_DRIVER_PATH | (Optional) The path to JDBC driver files you intend to use with the JDBC data provider, mounted as a volume or added by extending the image. |
| DUNDAS_BI_FAST_RECONNECT_TIMESPAN | (Optional) Set in the format 00:00:01 to a length of time to allow for 'fast' connection attempts in version 25.3 or higher. |
| DUNDAS_BI_FAST_RECONNECT_ATTEMPTS | (Optional) Set to the number of fast connection attempts to try before falling back to a 'slow' connection in version 25.3 or higher. |
| DUNDAS_BI_SLOW_RECONNECT_TIMESPAN | (Optional) Set in the format 00:02:00 to a length of time to allow for a 'slow' connection attempt in version 25.3 or higher. |
| HEALTH_ASPNETCORE_URLS | (Optional) Set to a URL that can be used to run health check endpoints for diagnosing connection issues in version 25.3 or higher, typically localhost with your choice of port number, e.g., http://localhost:10105. Publish the port by adding -p to docker run, e.g., -p 10105:10105. |
You should set up the Gateway Manifest as described in the next section first using the gateway ID and pre-shared key you plan to set as environment variables, and then start up your gateway container.
Here is an example for starting the container using docker run:
docker run -it \
-e DUNDAS_BI_EXTERNAL_APPLICATION_URL="https://dundas.example.com/" \
-e DUNDAS_BI_GATEWAY_ID="b3f999b0-5dc5-4790-bc9c-3a2e97d8701f" \
-e DUNDAS_BI_GATEWAY_PRESHARED_KEY="h9LR6yUxFpdXAserzdXjVxB4DQdNl3rTdKDj2Mxr" \
-e DUNDAS_BI_AGREE_TO_TERMS_OF_GATEWAY_EULA="true" \
dundas/dundas-bi-gateway
6. Enable the gateway
Dundas BI must be set up for gateways before you can use them, by installing a gateway hub and configuring it for your on-premise gateway.
6.1. Install the gateway hub
Add the gateway hub to your application instance on the server where it was installed, which will add support for connecting with your gateway running on-premises.
Use the same installation tool you used to install the application:
- For Kubernetes deployments, use the dundas.bi.gatewayhub Helm chart options.
- On Windows, run Dundas BI Deployment (available from the start menu on the server) and go to the Extras section to find and choose the option to add the gateway hub.
- When Dundas BI is installed directly on Linux, run the Dundas BI Deployment Wizard and choose the option to add the gateway hub. If you are using your own reverse proxy configuration rather than the Deployment wizard's provided one, it will need to be updated for the gateway hub.
- If you are running Dundas BI containers yourself with Docker directly, configure your reverse proxy for the dundas-bi-gateway-hub container to be accessible as the subpath /GatewayHub under your instance.
6.2. Configure your gateway
Log into the application as an administrator user and access the Administration area from the main menu on the left.
Click to expand Setup and then to navigate to Config to access configuration settings.
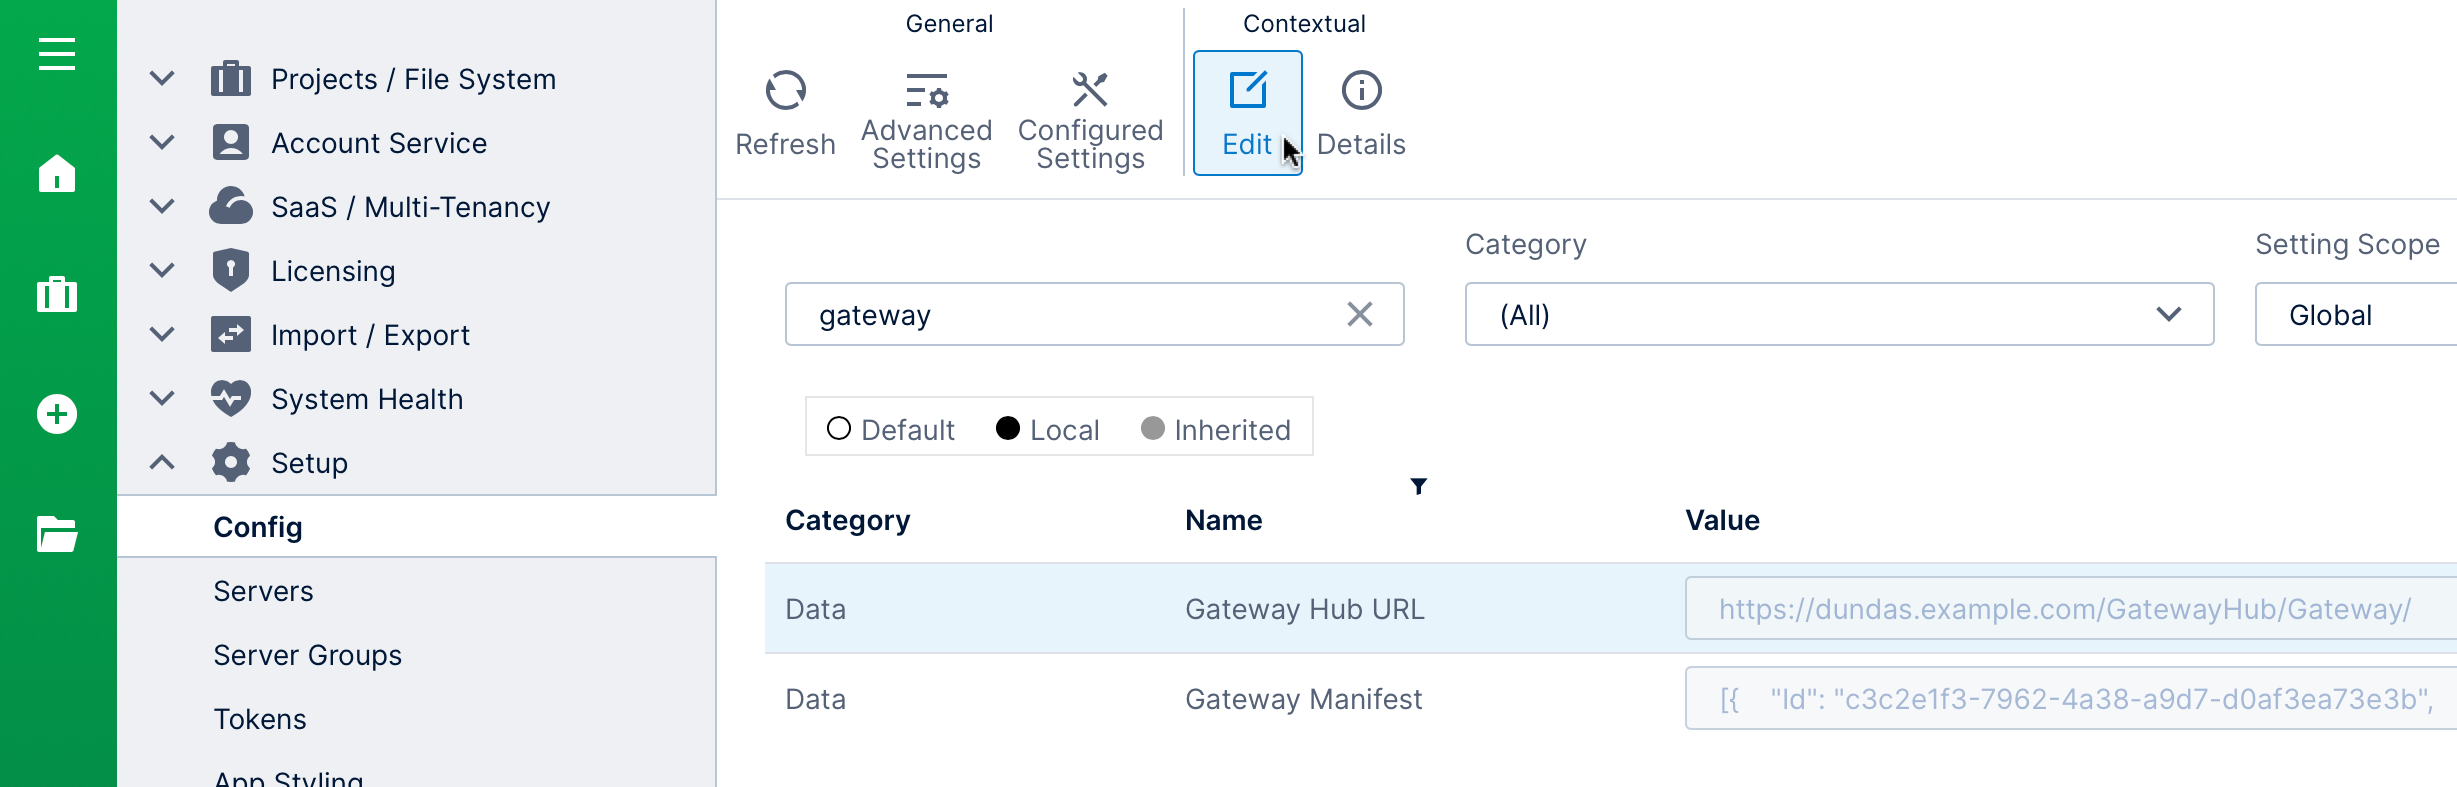
Find or search for the Gateway Manifest setting, located in the Data category, then double-click it or select it and click Edit.
In the configuration dialog, click Edit value, and then enter your configuration into the text area below as a JSON array like the following:
[{
    "Id": "c3c2e1f3-7962-4a38-a9d7-d0af3ea73e3b",
    "DisplayName": "Office",
    "PreSharedKey": "Ut5x8VGGPolxpylVmF5h5iVgmgDlphkJXiRUiTnf",
    "ipAllowList": "192.0.2.0/24"
}]
If you have multiple gateways, you can provide multiple comma-separated objects as defined within curly braces { }. Each object should provide the following details for a gateway:
- Id - The gateway ID provided to you earlier, from your gateway's Config Override File or from your terminal after adding the gateway on Linux.
- DisplayName - The name used to identify this gateway when using it in a new data connector.
- PreSharedKey - The pre-shared key value provided to you earlier along with the gateway ID.
- ipAllowList - (optional) If specified, incoming gateway connections are only accepted from the specified comma-separated list of IP addresses and/or IP address ranges. An IP address range may be specified using CIDR notation (e.g., 10.10.10.0/24) or as two addresses separated by a hyphen (e.g., 10.10.10.0-10.10.10.255).
Click to Save in the dialog for the configuration to take effect.
Depending on your scenario, you may also wish to review the other Gateway configuration settings available, such as the min/max pool size and timeout settings. These can be adjusted as necessary in case of issues connecting to data through the gateway.
6.3. Configure the gateway hub
Also in configuration settings, ensure that the Gateway Hub URL is set to the /GatewayHub/Gateway/ subpath under your application instance. For example, if the address for these administration pages including configuration settings begin with https://customanalytics.example.com/Admin/, the gateway hub URL should be https://customanalytics.example.com/GatewayHub/Gateway/.
6.4. Restart services
You may need to restart the website's application pool, service, or container for the changes to take effect once the gateway and gateway hub are configured.
7. Connect to your gateway
Once your gateway and gateway hub are set up and any necessary drivers are installed, users can use that gateway to connect to on-premise data sources in data connectors when using Dundas BI.
When creating or editing a data connector with Data Provider set to a supported data source, select the Use Gateway checkbox and then select your Gateway from the list that appears.
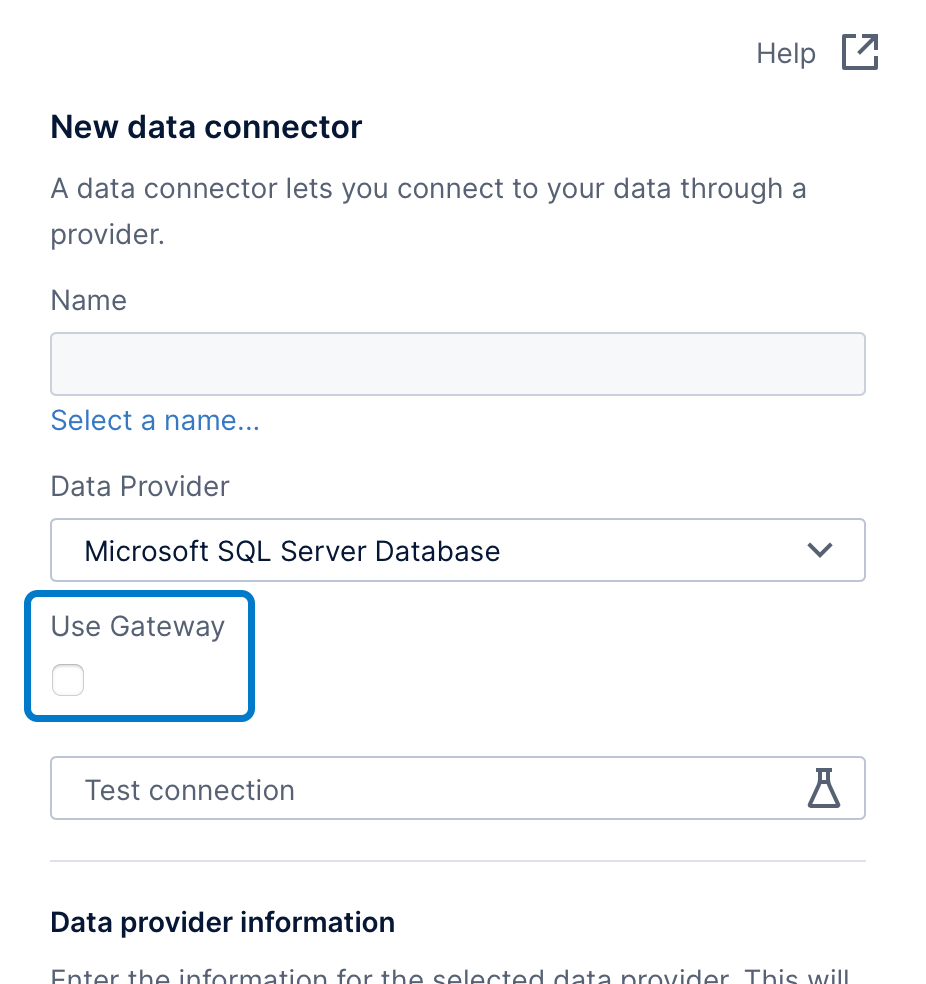
Now you can enter the connection details your gateway should use to access your data source.
7.1. Health check endpoints
If a Health Check Port was specified when adding a new gateway using version 25.3 and higher or with Docker, you can access it to verify its status in case of any issues. If you do not remember the health check port for Windows or Linux, you can check for it in the installation log files created when the gateway was added, at the end of the log file for creating the service.
- Access http://localhost:<Health Check Port>/healthz to check the overall health status of the remote gateway.
- Access http://localhost:<Health Check Port>/healthz/connection to check the health status of the connection to the Dundas BI gateway hub.
To check the health status of the Dundas BI gateway hub:
- Access /healthz under the gateway hub URL to check its overall health, e.g., https://customanalytics.example.com/GatewayHub/healthz
- Access /healthz/connections under the gateway hub URL to check the status of its connections in version 25.3 and higher if configured, e.g., https://customanalytics.example.com/GatewayHub/healthz/connections
7.2. Reconnect settings
In your gateway's Config Override File, or your Docker environment variables, you can adjust the FastReconnectTimespan, FastReconnectAttempts, and SlowReconnectTimespan settings if needed in version 25.3 and higher. For more details on these options, see their descriptions in the Docker environment variables.
8. Security
- The gateway uses only outgoing connections, so your environment where the gateway is installed does not need to support incoming or inbound connections for the gateway.
- Your gateway connects to the URL you specified when adding it. Your Dundas BI application instance should be configured to use HTTPS encryption to secure this traffic with a URL that starts with https://.
- Trust is established between your cloud application instance and your gateway through the pre-shared key used during configuration, so that the cloud application will only accept incoming connections from your gateway.
- When data source connection details need to be communicated to your gateway, a pre-shared key is used with AES encryption and a SHA-512 hash function.
- You can further improve the security for incoming gateway connections by specifying ipAllowList in your gateway manifest.