1. Overview
This article describes how to get started and navigate your options once you log in.
There is a main menu on the left, and an assortment of other options you can choose from.
2. Main menu
The main menu is always displayed on the left side of the screen and lets you switch projects, create and open items, edit your user profile, and other main functions.
This menu is available even after you create or open an item so that you can continue using it the same way as you work.

- When the main menu is expanded, the Search box at the top allows you to search through all types of items in all projects. Hover over a search result to see its location.
- Otherwise, one project is used at a time when creating and opening items (known as files) in the main menu and when editing. Click Projects whenever you want to switch projects, then choose one from the list.
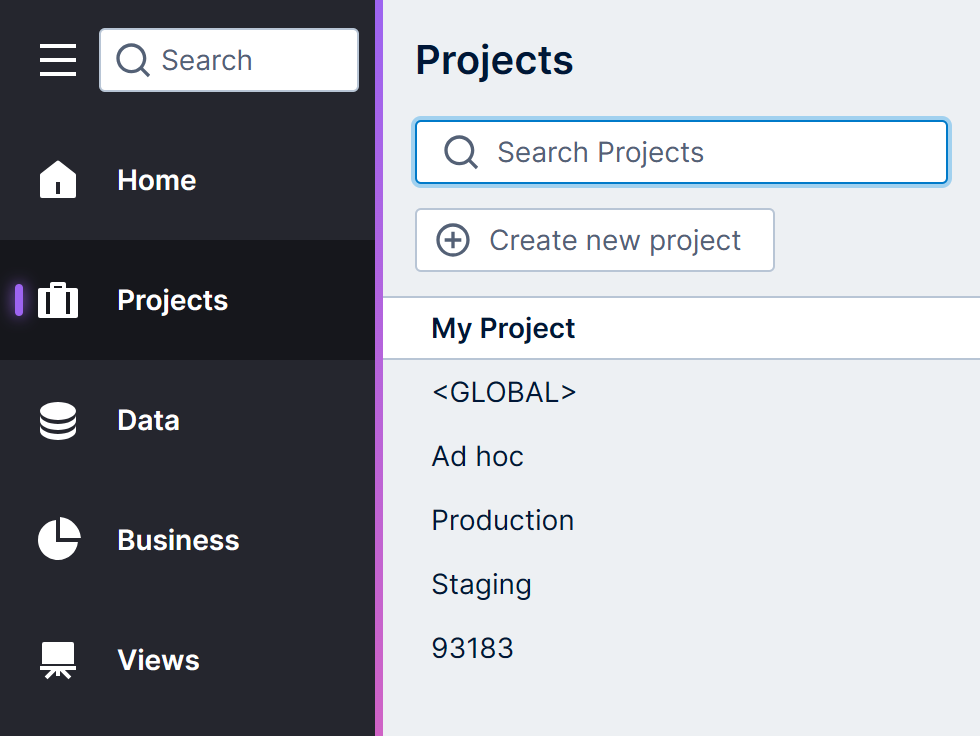
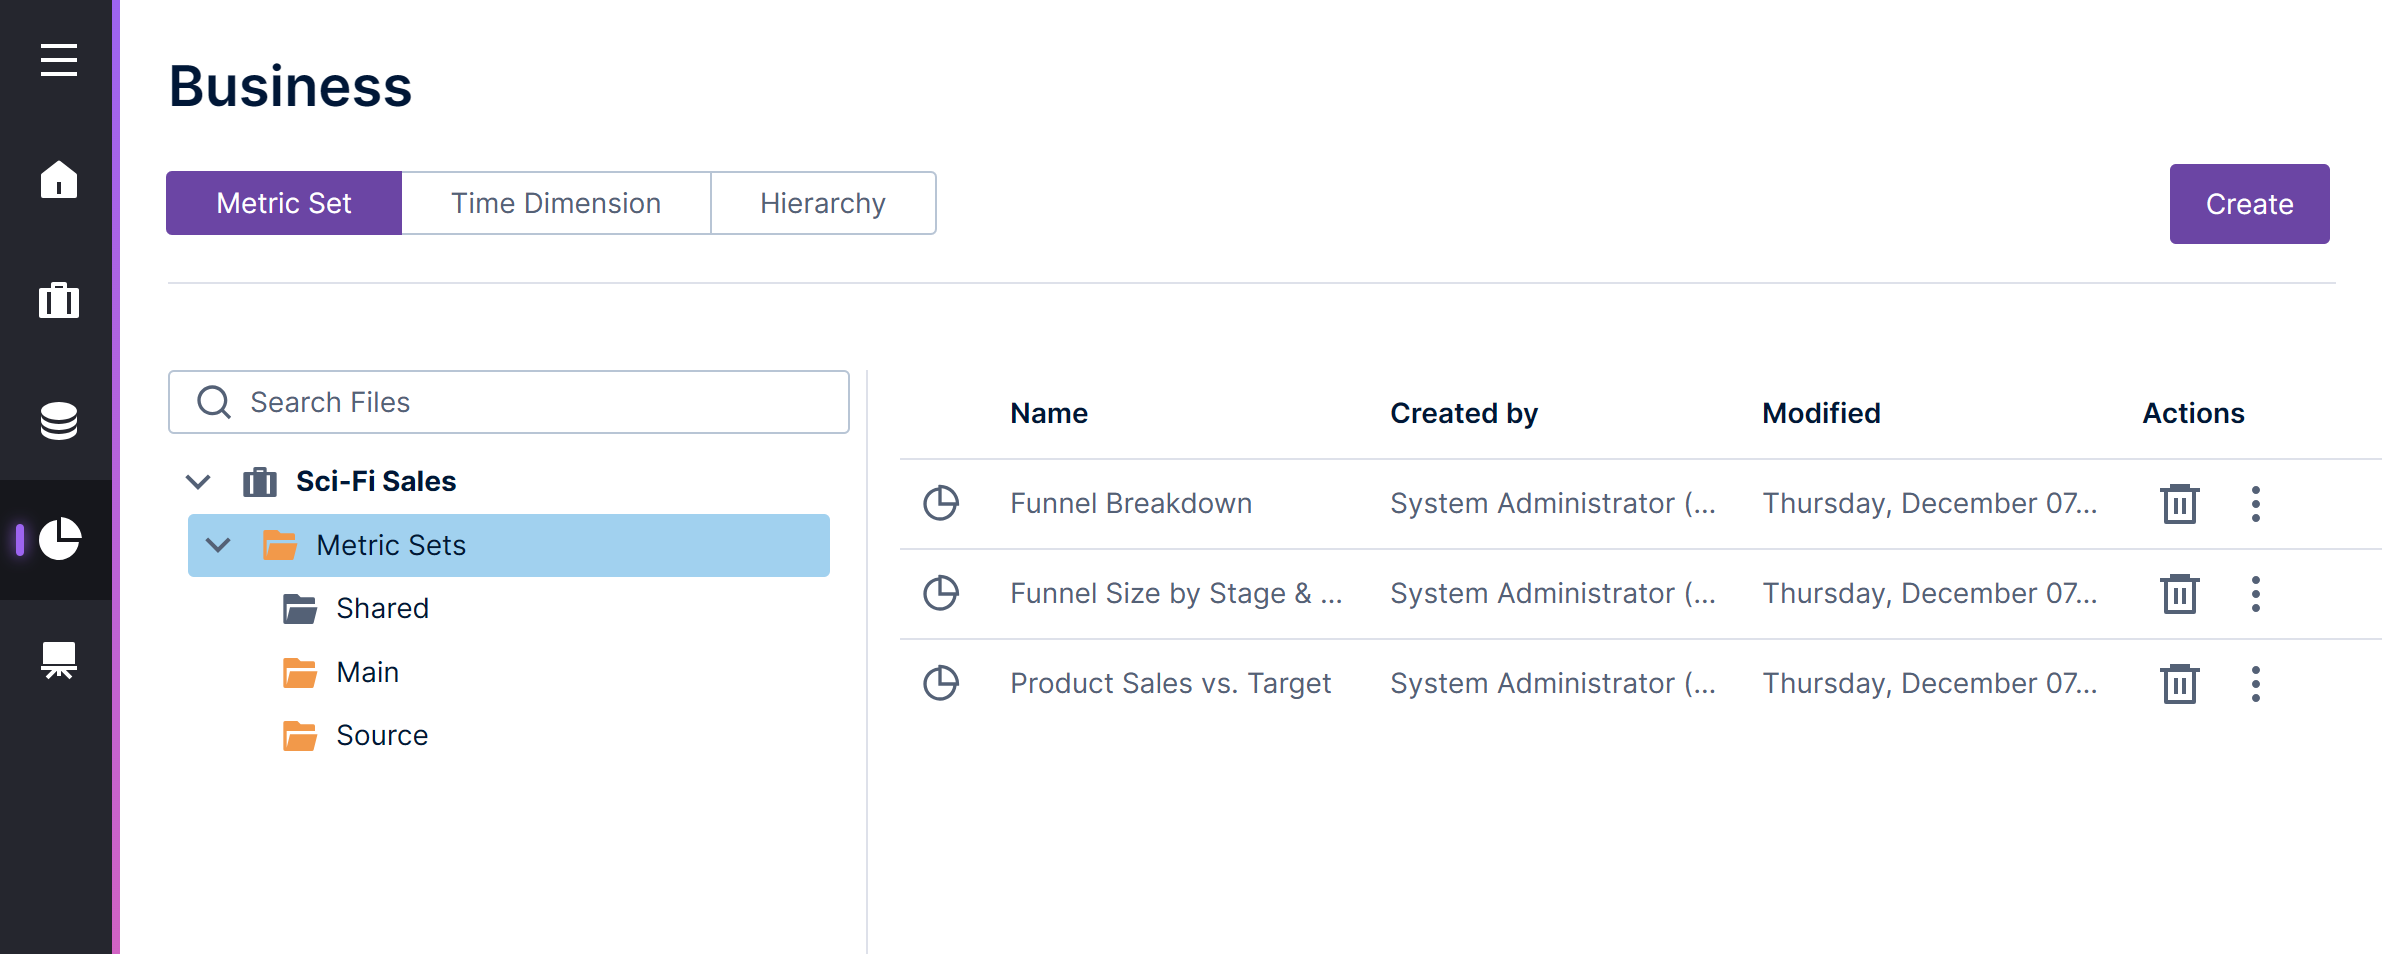
Changing the current project - Create or open different types of files within the current project by choosing between Data connectors and data cubes, Business definitions like metric sets and hierarchies, or Views like dashboards and reports. In the page that opens:
- Switch between the different file types at the top of the screen (e.g., dashboards & reports).
- If there are different folders listed on the left, click one to list its contents or create a file within it. You can right-click a folder to create a New Folder.
- On the right, click on an existing item in the list to open it, choose from the available action buttons, or click Create above to create a new item.
Creating and opening metric sets TipTo learn more about the different types of files and how they work together, see Understanding the data model.
- Click on Help in the main menu to open a page in this documentation specific to the screen you currently have open.
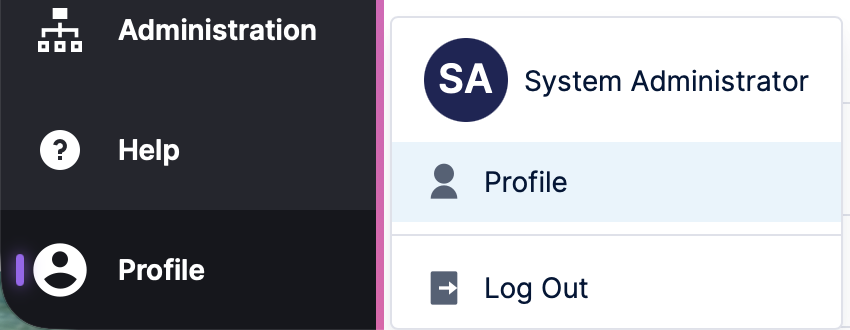
- The Profile button at the bottom of the main menu is used for everything related to your account, including editing your profile and logging out.
3. Default home screen
There are a few different pages you may be navigated to by default when you first log in. You can always switch between them or to another page using the main menu on the left:
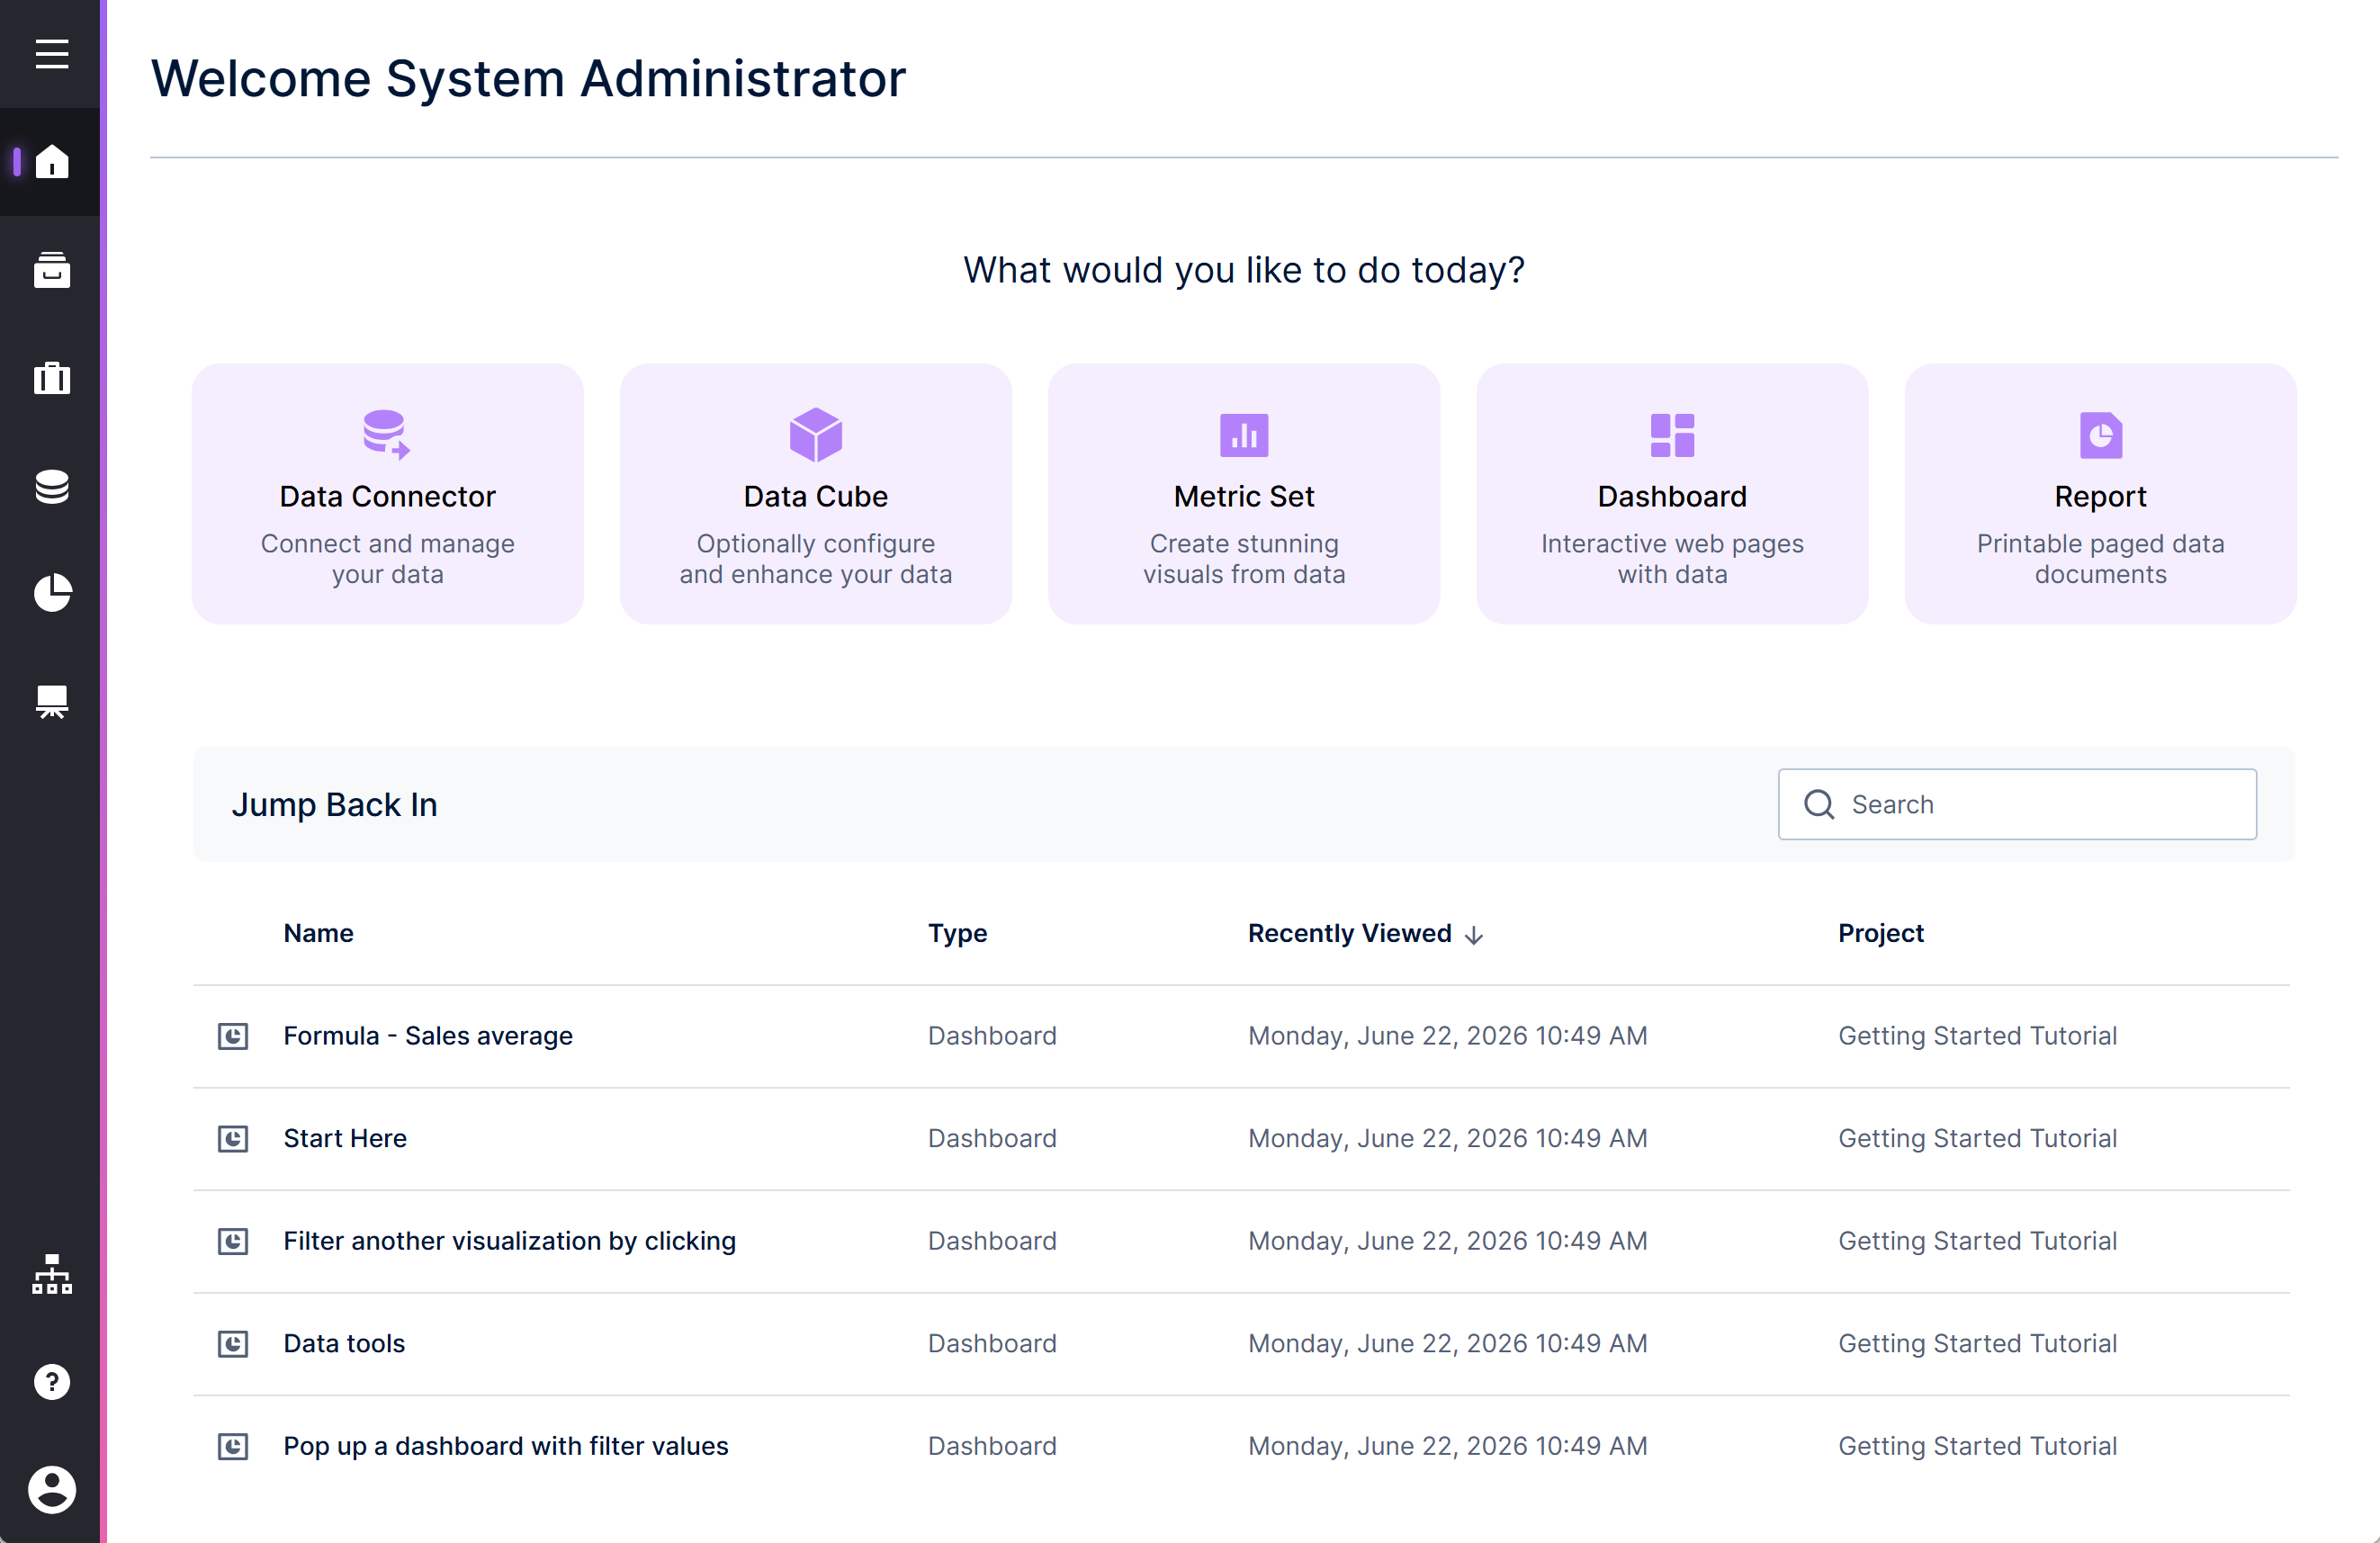
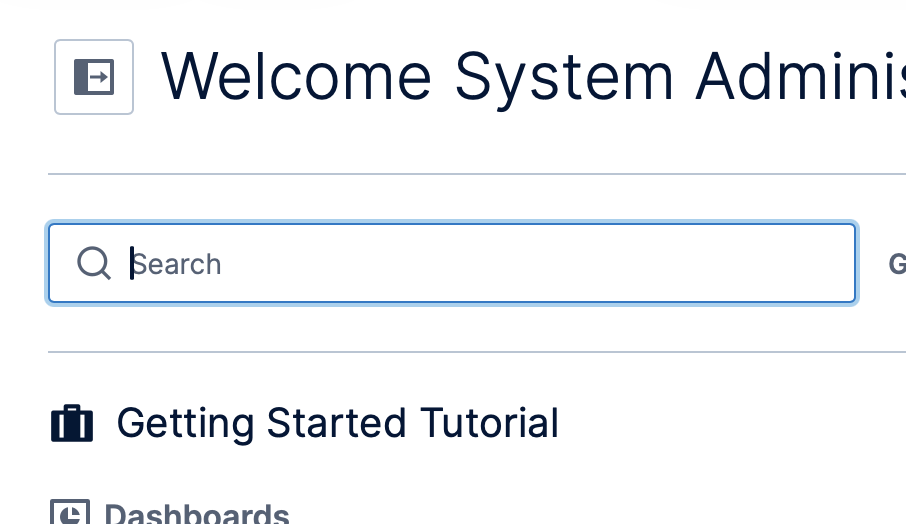
- If enabled by your administrator, Home lays out common types of items you can work with along the top, and Jump Back In lists recently opened items below. Different options may appear based on your seat type.
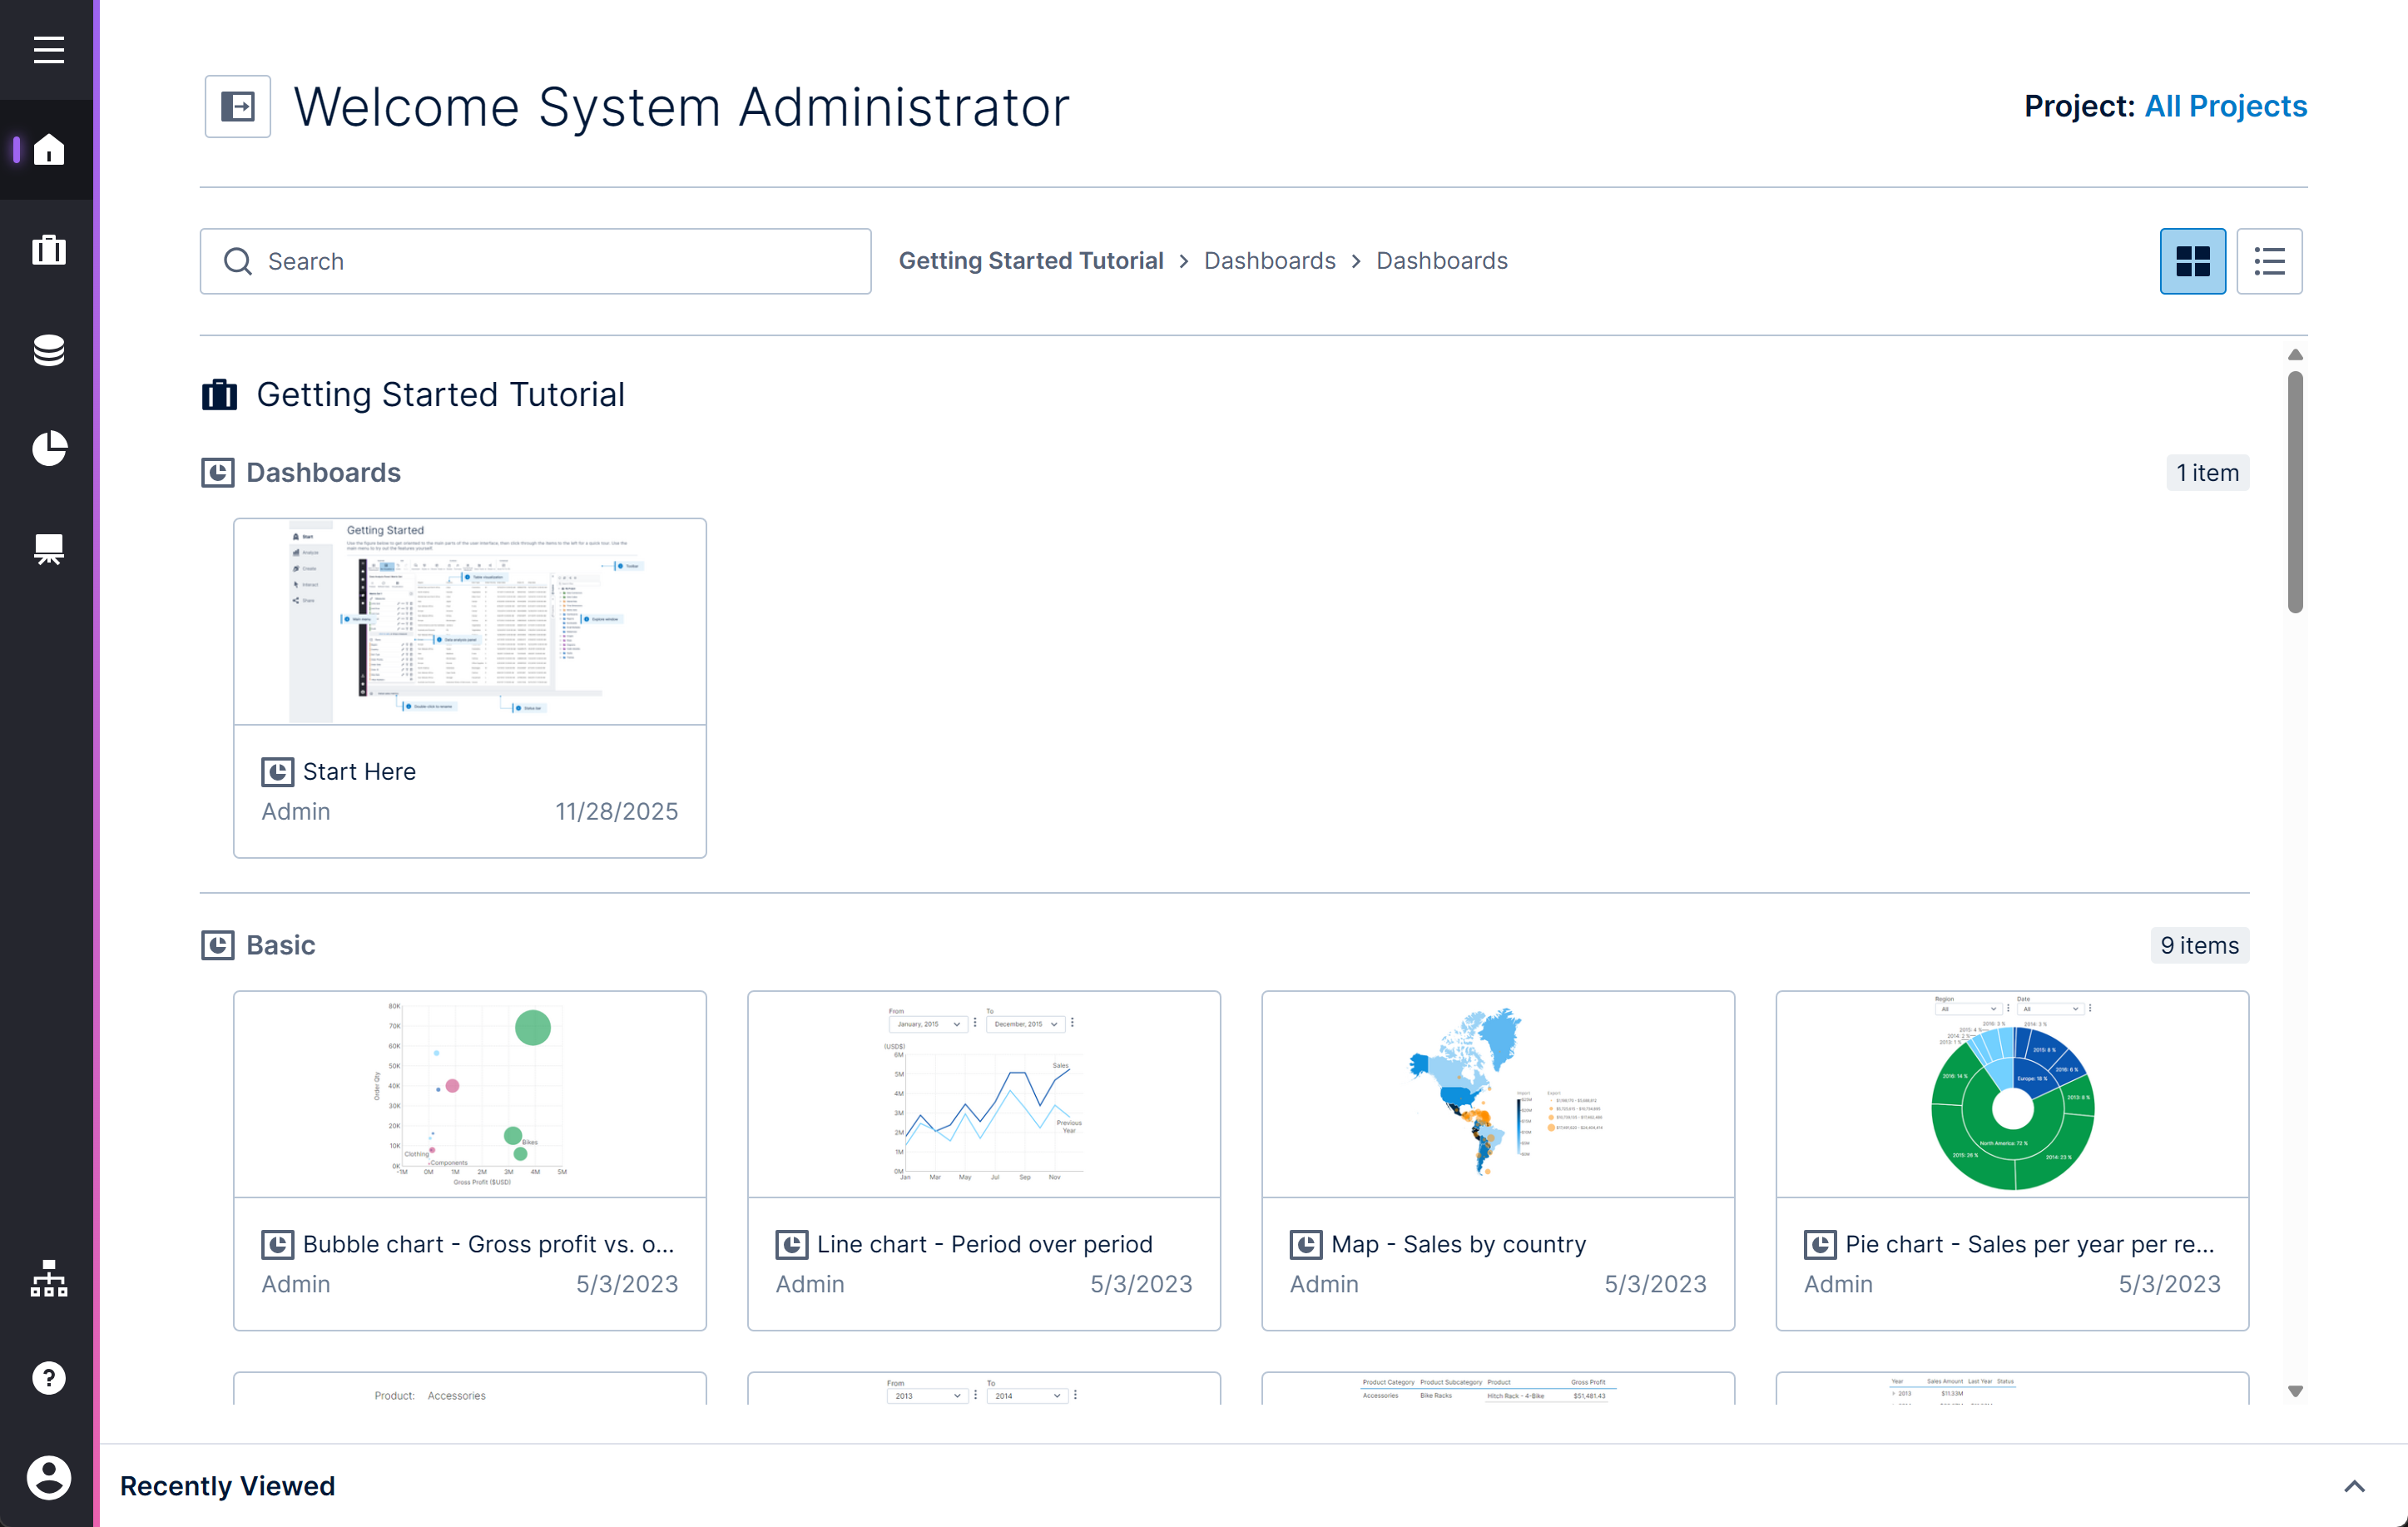
Workspace-oriented Home page - All Content features a visual list of all content available to you displayed with thumbnail preview images, described further below. If the one above is not enabled, this acts as Home instead.
- You can also configure a default view to open such as an important dashboard or a custom view you created. As an example, the Getting Started Tutorial may be set up to open on your first login. You can also choose whether you prefer to see Home or All Content after login.
4. All content
Dashboards, reports, and other views available to open with a click are displayed by default as tiles with thumbnail preview images, and organized by folder. As you scroll, the breadcrumbs displayed above will update and you can click on a folder in the path to scroll back to the top of that section.
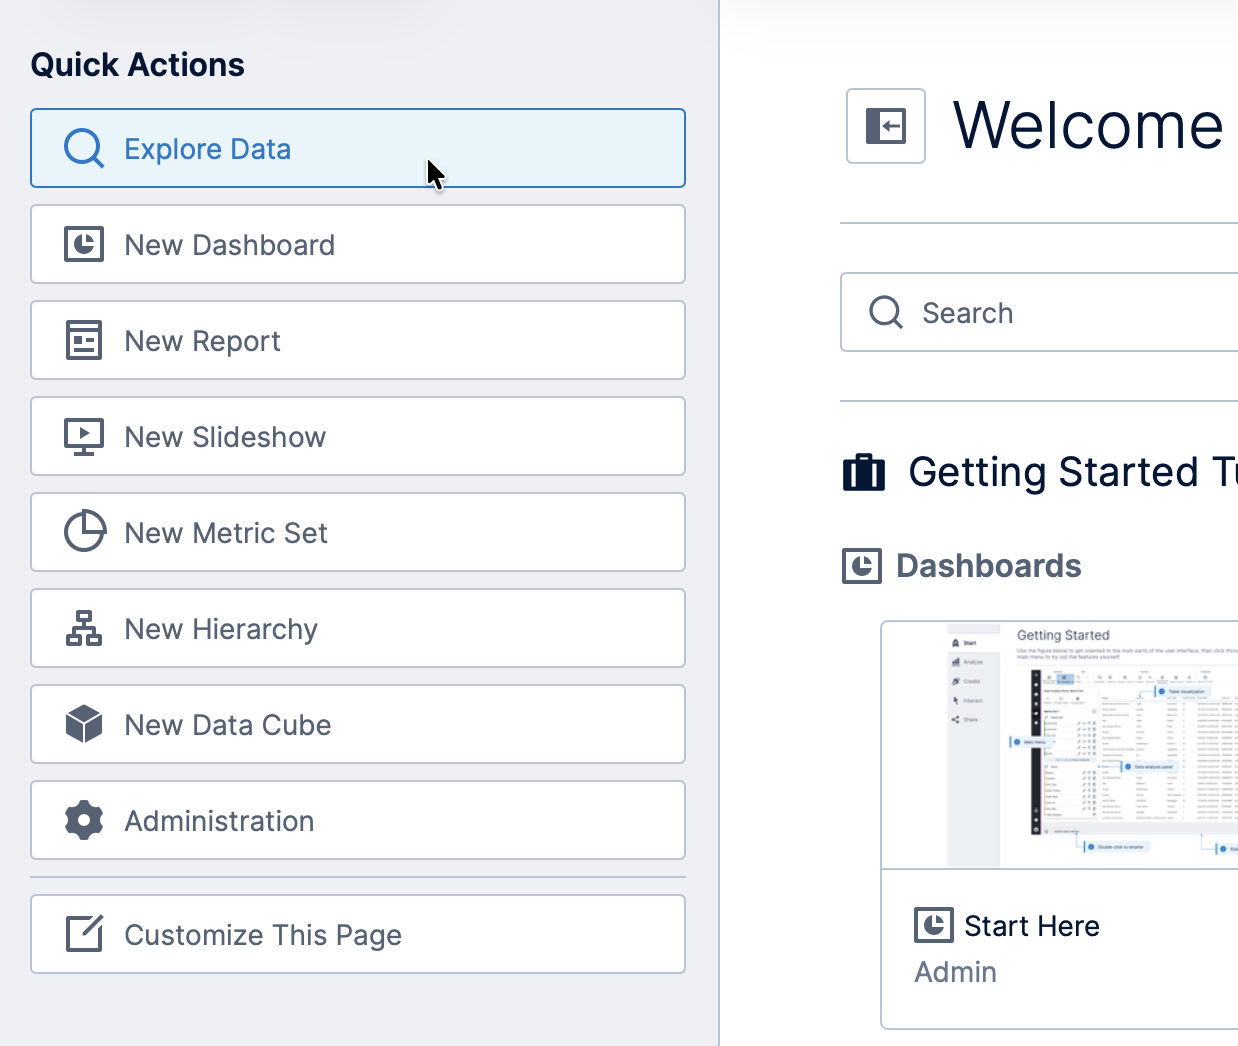
There is a list of Quick Actions you can access along the left, expanded by clicking the button in the top-left next to the Welcome message. Different options may appear depending on your seat type.
To start working with data right away, click on the Explore Data quick action button. This opens either a full-screen Metric Set (for power users or developers) or a new Dashboard (for standard users).
4.1. Thumbnails
If you created a view that has never been checked in, it may appear here with only an icon and no preview image of the content itself. Once the view is checked in so that other users can see it, a 'thumbnail' preview image of the view is generated and shown on the corresponding tile.
4.2. List mode
You can switch between displaying tiles or a table listing more details using the icons near the top-right of the screen.
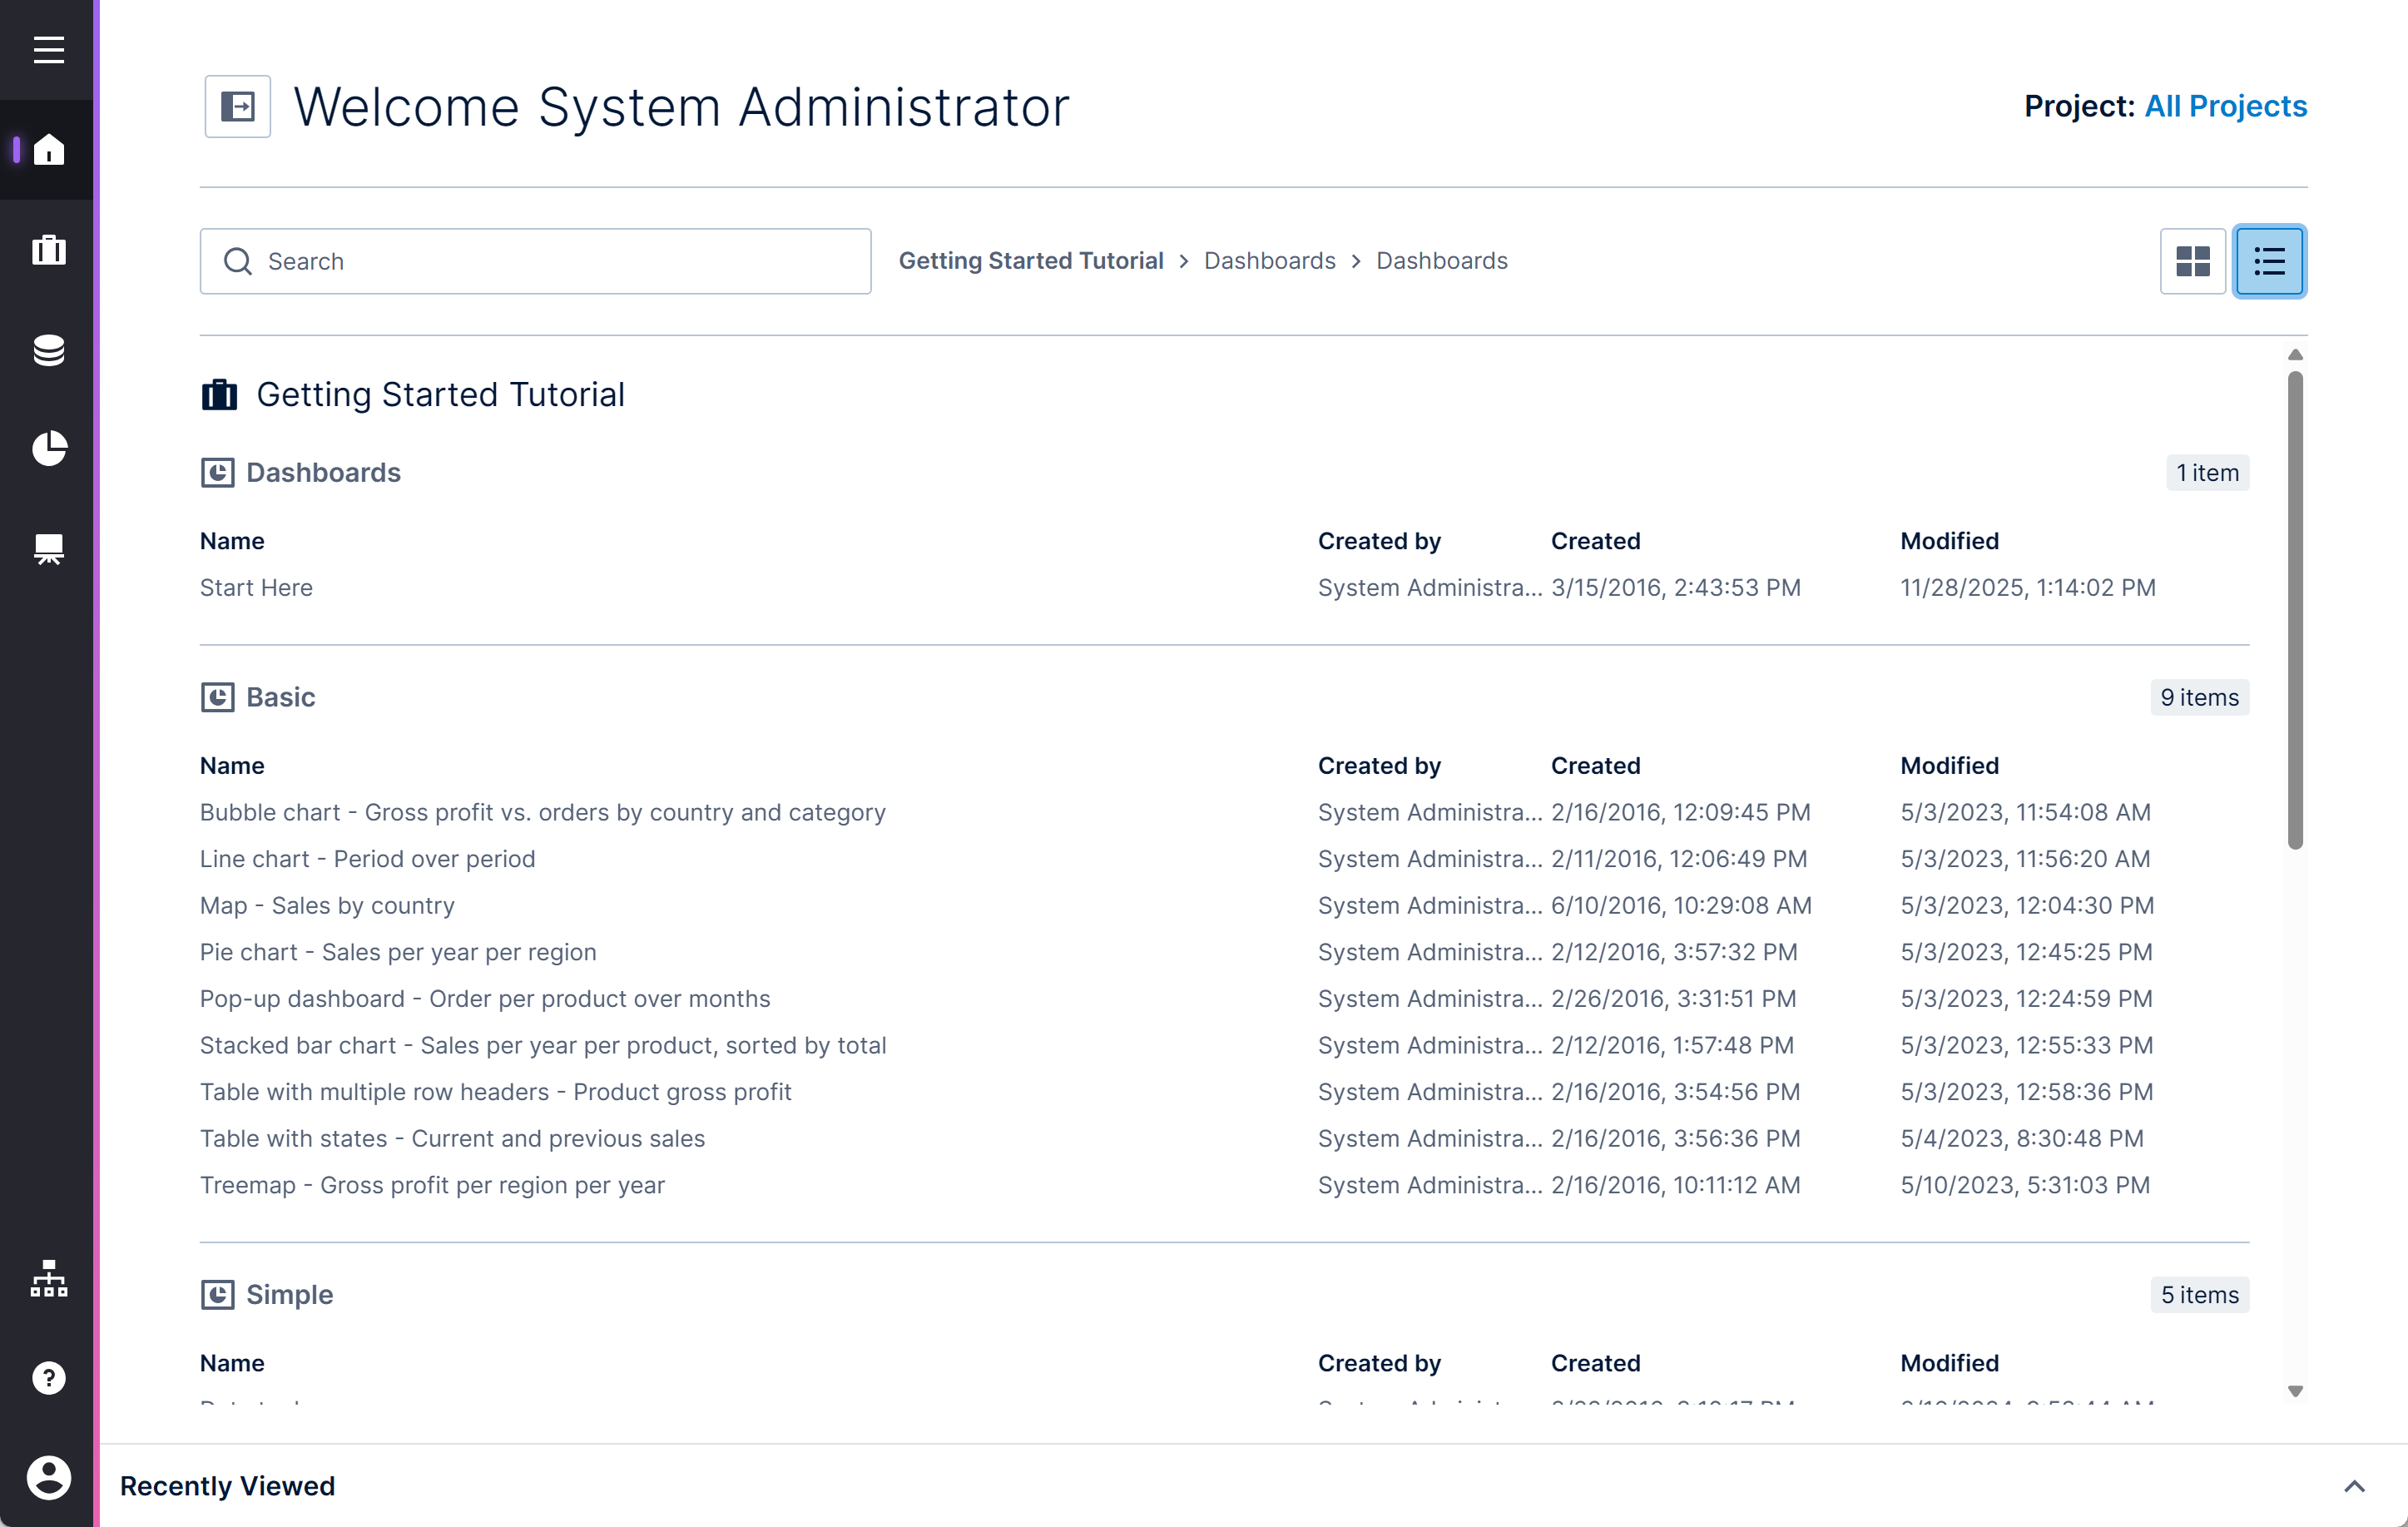
When shown as a list, details such as Created by, Created date, and Modified date information will be included.
4.3. Search and filter
This screen initially shows all of the views you can access but may change as you switch between projects.
To change the items on this screen, click on the Project filter in the top-right corner and select an individual project, or choose All Projects if you want to scroll through all of them together.
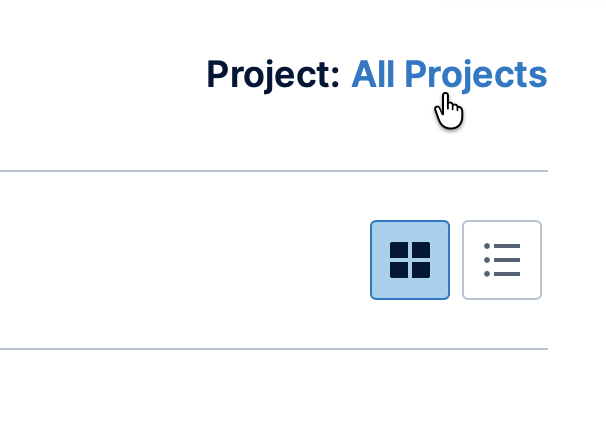
You can further limit the views shown using the search field.
4.4. Customize and favorite
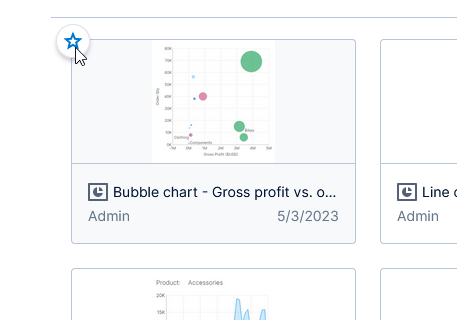
If you want to pin some views to the top (in a Favorites group), you can hover over the view and click the star icon in the top left corner.
You can further customize the the page by opening Quick Actions on the left (using the button next to the Welcome message) and clicking Customize This Page (previously Customize Home).
Click the hide icon in the top-left corner of a view to remove it from this page. Removed views are moved to a Hidden group listed only while customizing, where you can click the icon in a view's top-left corner to show it again.
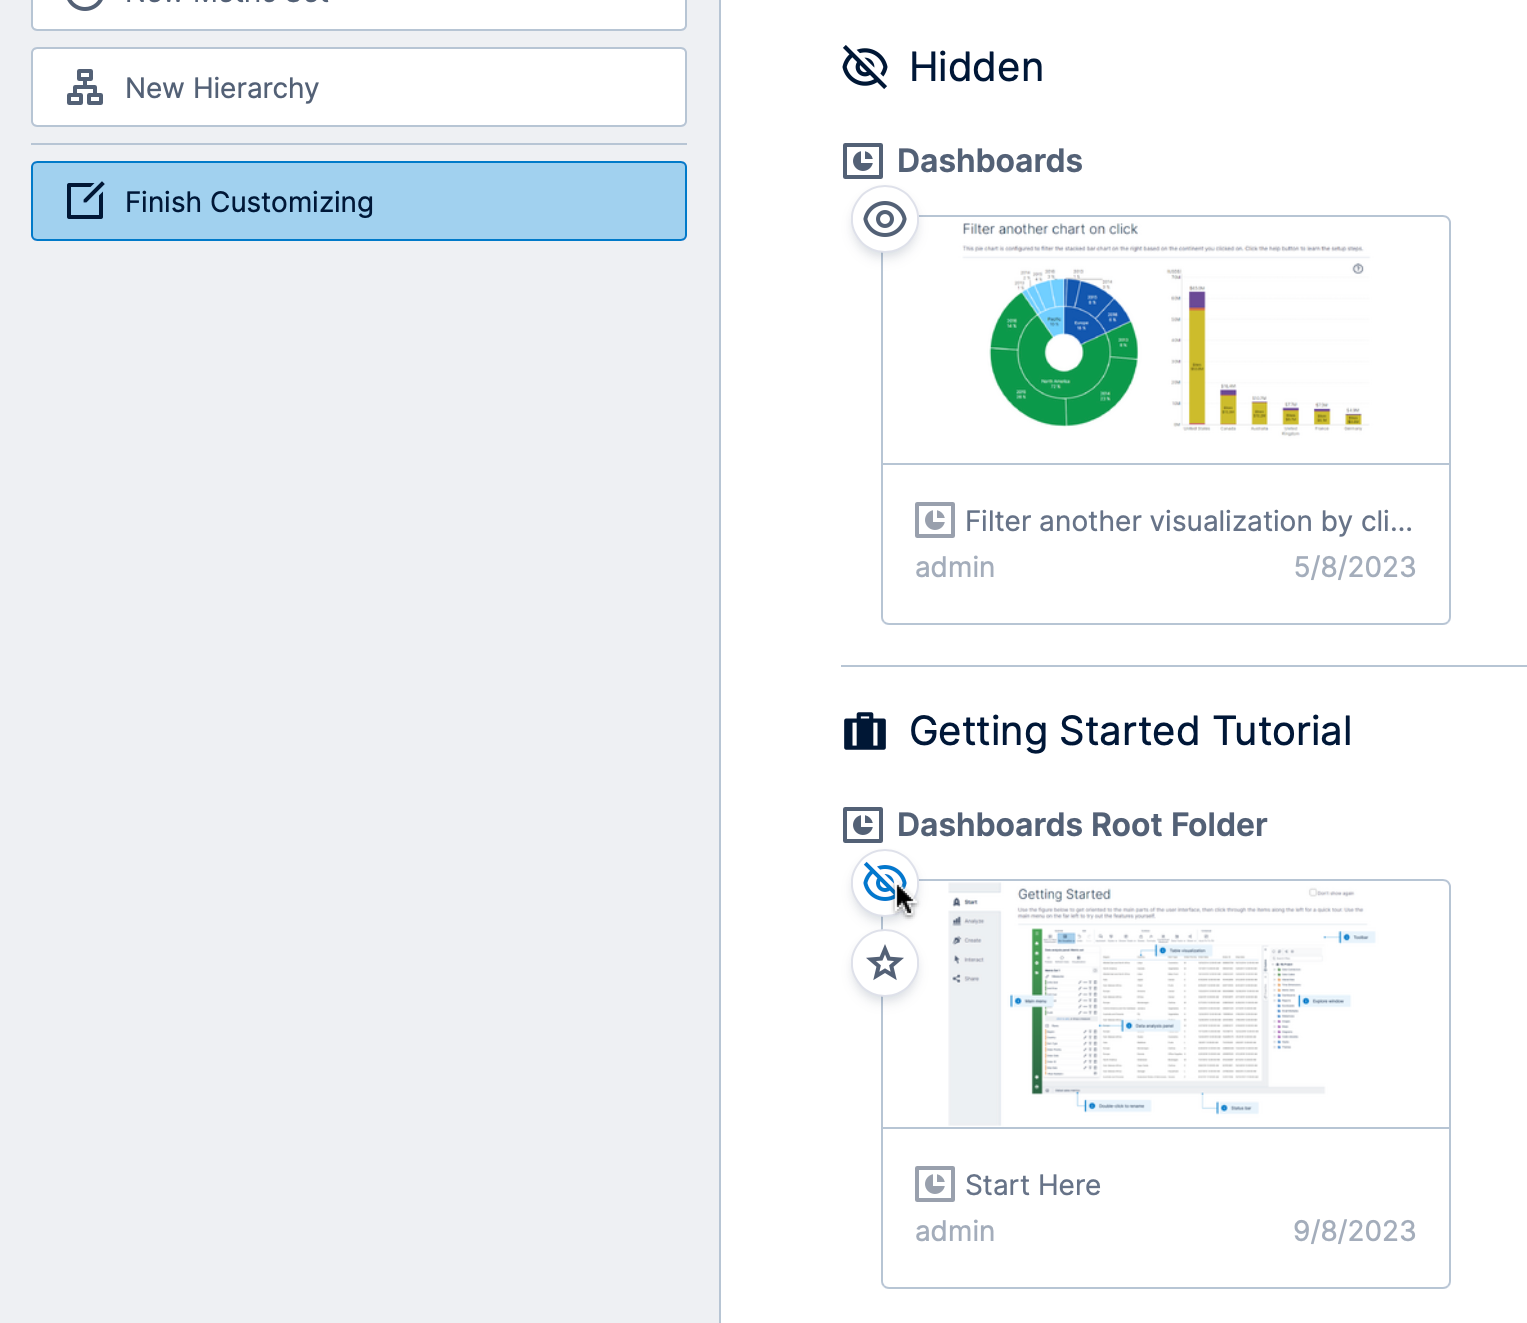
Click Finish Customizing on the left when you are done with your changes.
5. Choose a different home screen
As an alternative to the customization options described above, you can set a view such as a dashboard as your landing page using the Default View setting in your profile. You can also choose whether to open Home or All Content by default, if available.
Administrators can use configuration settings to change the home screen and/or what users see after logging in. For example, Enable Workspace Home Page enables separate Home and All Content pages in version 26.2 and higher, or administrators can configure a custom Default Home Page and whether to Always Use Custom Home Page.
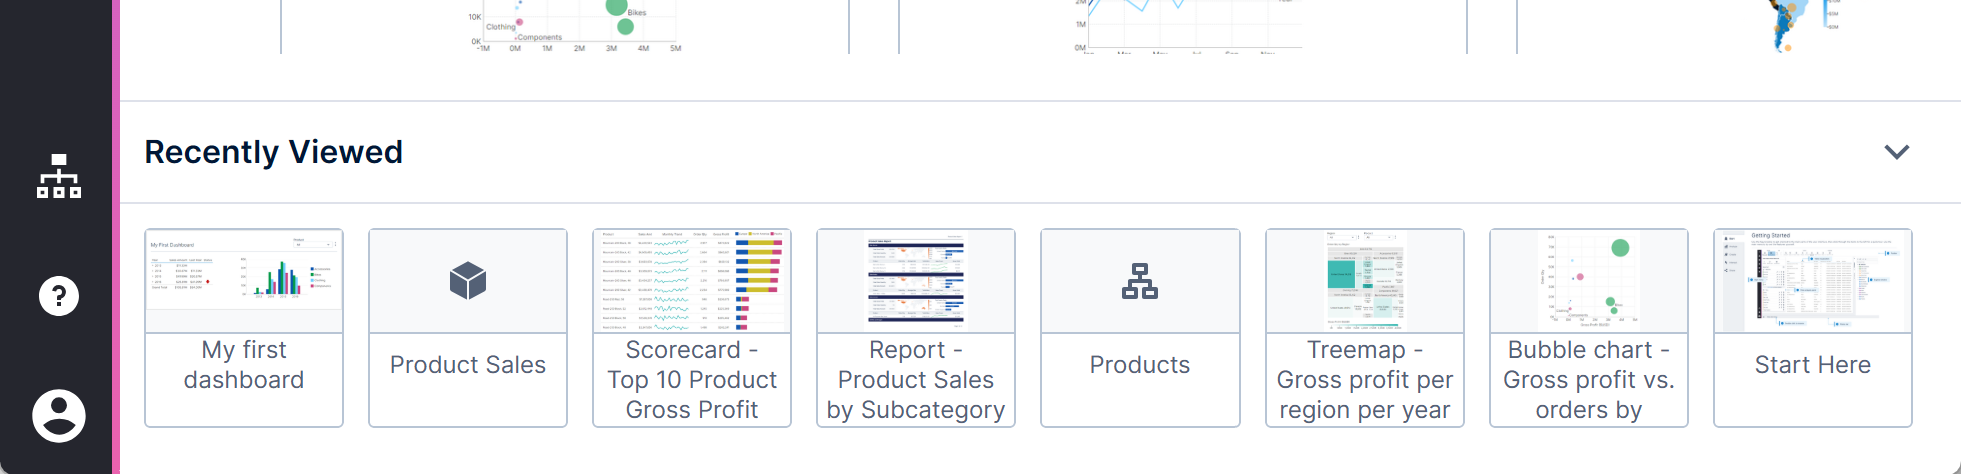
6. Recently viewed items
At the bottom of the Home and All Content pages, Jump Back In or the expandable Recently Viewed section allows you to quickly access dashboards, metric sets, data cubes, and other items you recently opened.