
1. Overview
As shown in Automatic joins and hierarchies, you can create a hierarchy in Dundas BI from the main menu (sometimes called a 'user hierarchy' as it is user-defined) with settings such as multiple levels, attributes, and sorting. In many cases, such as when the data source contains multiple columns or there are relationships defined, the levels are automatically detected and added.
This article is a continuation that shows in more detail how to customize the hierarchy's levels in case they are not automatically detected as needed or you want to change them.
2. Example data
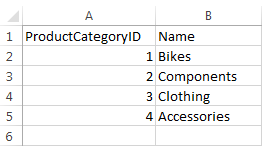
In the example depicted below, an Excel file with three different sheets is used as the data source:
- ProductCategory
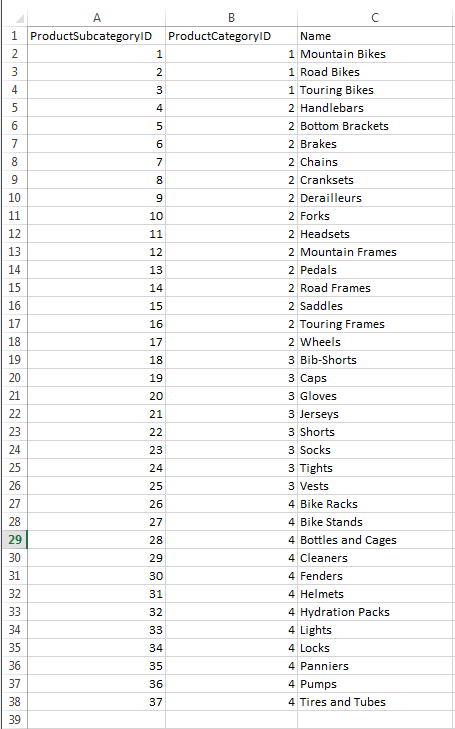
- ProductSubcategory
- Product

In this example, each sheet contains an ID column with unique values, so that one of these ID values in a lower level or another data source will be enough to find the corresponding hierarchy member.
3. Steps
3.1. Set up the first level
If you are starting with a new hierarchy, create a new Hierarchy from the main menu as shown in Automatic joins and hierarchies. Otherwise, your existing level can be edited as shown further down.
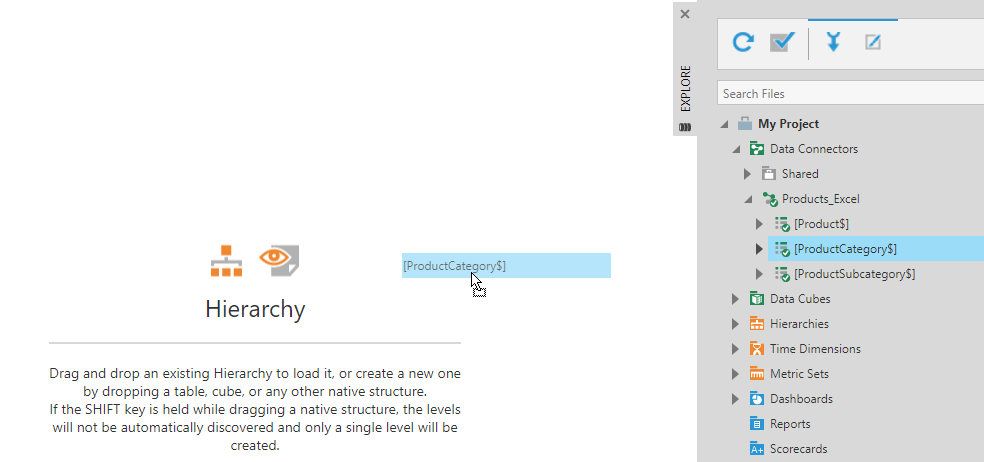
Expand your data connector in the Explore window and find the data with the first level's values (e.g., the Excel sheet named ProductCategory$), then drag it to the canvas.
Your data source can be different for each level or the same for all levels, but either way each level below the first must include parent key values that match the keys of the level above.
If you want to ensure additional levels are not added automatically, press Shift on the keyboard while dropping. Otherwise, you can select unwanted levels to delete them from the toolbar.
The first level can now be previewed.
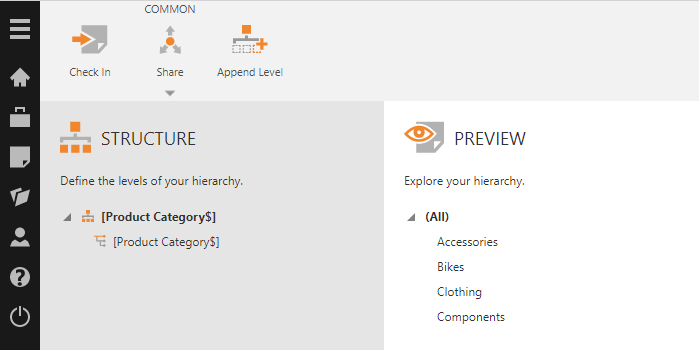
Click on the first level under Structure to open its settings, used to determine the values or 'members' of the hierarchy at this level. Confirm or change these details:
- Level Name - The name used to identify this level in the Explore window, metric sets, and filters.
- Description - (Optional) Displayed in a tooltip popup when hovering over this level in the Explore window.
- Member Caption Source - The values used to identify the hierarchy members in this level when displayed in visualizations and filters.
- Member Key Source - The values used to uniquely identify the members in this level and match them with other data sources. These may be different than the caption values if you have dedicated IDs, for example.
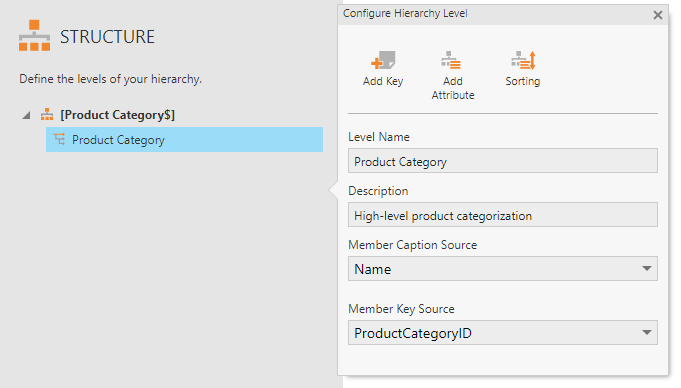
In our example, Name values such as Accessories will be displayed in filters and visualizations as captions, while ProductCategoryID values are meant to uniquely identify each category and will be used to match with product category IDs in the lower level.
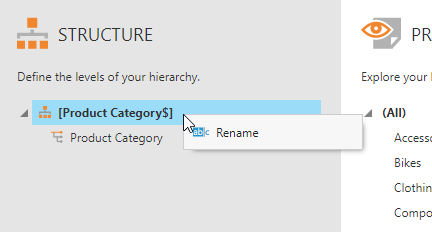
You can right-click the hierarchy and choose Rename to give the hierarchy a different name within this editor.
To rename the hierarchy file as shown in dialogs and the Explore window, double-click the name in the status bar at the bottom of the screen.
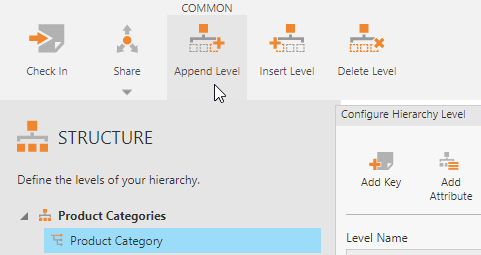
3.2. Add the second level
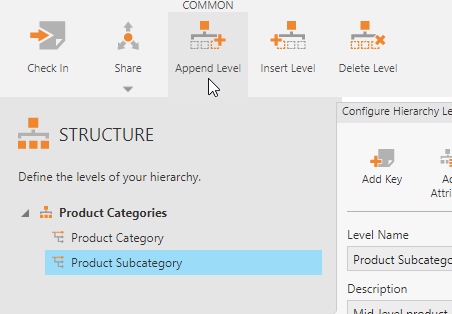
To add another level, select the first level and click Append Level in the toolbar.
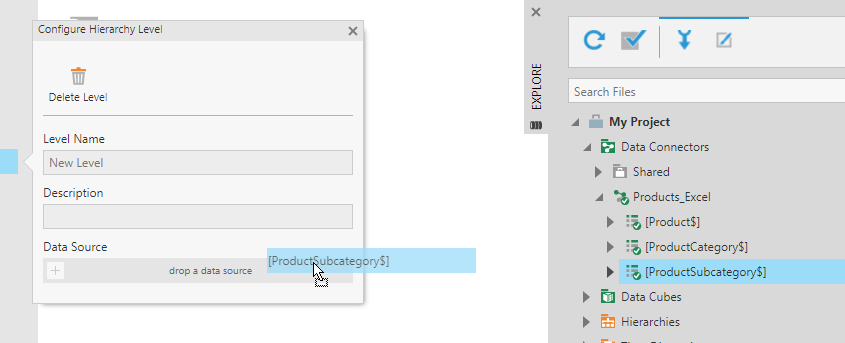
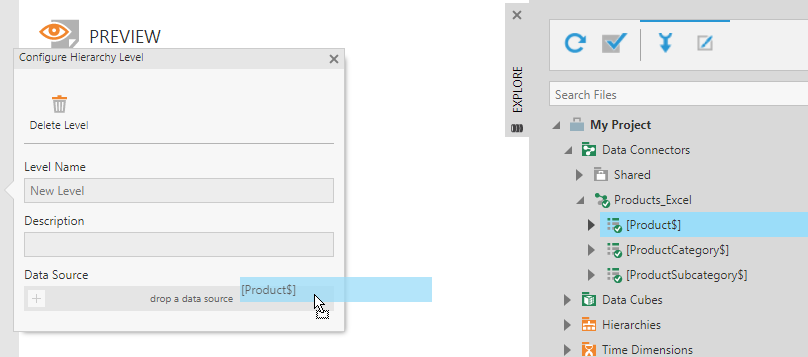
Drag and drop the data source for the second level (e.g., ProductSubcategory$) onto drop a data source.
Confirm or update the level's details. The settings are similar to those of the top level but there is an additional one:
- Member Parent Key Source - The values in this level's data source that can be used to find the matching member in the level above. The values you choose should match the values of the Member Key Source of the upper level.
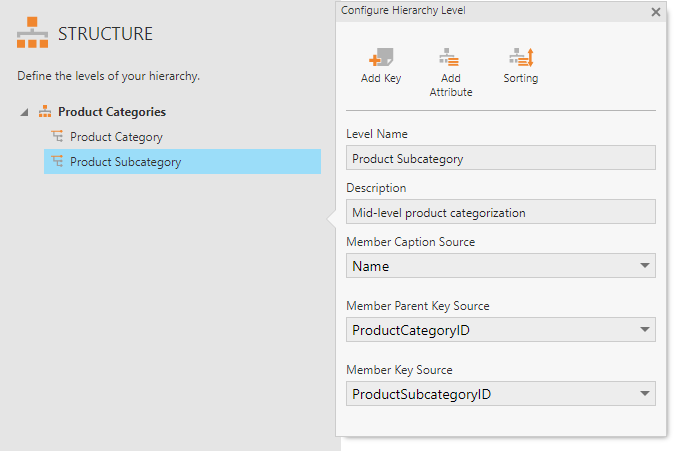
In our example, the data source for the subcategory level contains ProductCategoryID values that match the category level's member key values. These are selected as the Member Parent Key Source.
We use ProductSubcategoryID values as Member Key Source to uniquely identify each subcategory and match with data from the lower level.
3.3. Add the third level
To add a third level, select the second and then choose Append Level in the toolbar.
In our example, we drag and drop the Product$ sheet onto drop a data source.
Set up the level as described previously but for this level's data source.

In our example, the data source for the product level contains ProductSubcategoryID values that match the subcategory level's member key values, which are chosen as the Member Parent Key Source.
The unique set of ProductID values are selected as the Member Key Source, allowing this hierarchy to be used with any data source that has matching product IDs.
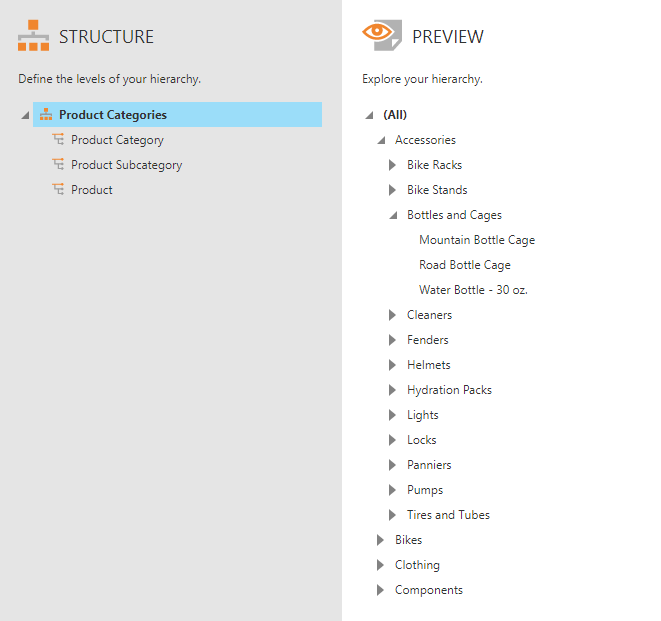
4. Preview
Click the x button to close the level popup if one is open. Under Preview, expand the members to preview the multi-level hierarchy.
5. Using the hierarchy
This hierarchy can now be used to replace a regular column of data with values that match the Member Key Source of a level, such as product IDs, so that you can take advantage of your multiple levels or other settings applied in the hierarchy. You can do this in a metric set when working with data directly from a data connector, or in the process result of a data cube.