Using custom attributes to filter data by user
1. Overview
A custom attribute is a custom value assigned to users or groups by an administrator. These are similar to several built-in attributes describing each user that you can select as tokens when filtering a data cube such as Current Account Name and Current Culture Name.
Filtering by attributes and custom attributes allows you to accomplish user-dependent filtering or row-level security. For example, when a user is viewing a dashboard based on a particular data cube, the data can be automatically filtered so that the user only sees the data corresponding to the custom attribute value associated with their account.
This walkthrough shows you how to set up custom attributes and use them to filter a data cube transform parameter, which is one way to accomplish row-level security.
2. Example preparation
Log in as a member of System Administrators and create a new data cube using the Blank option.
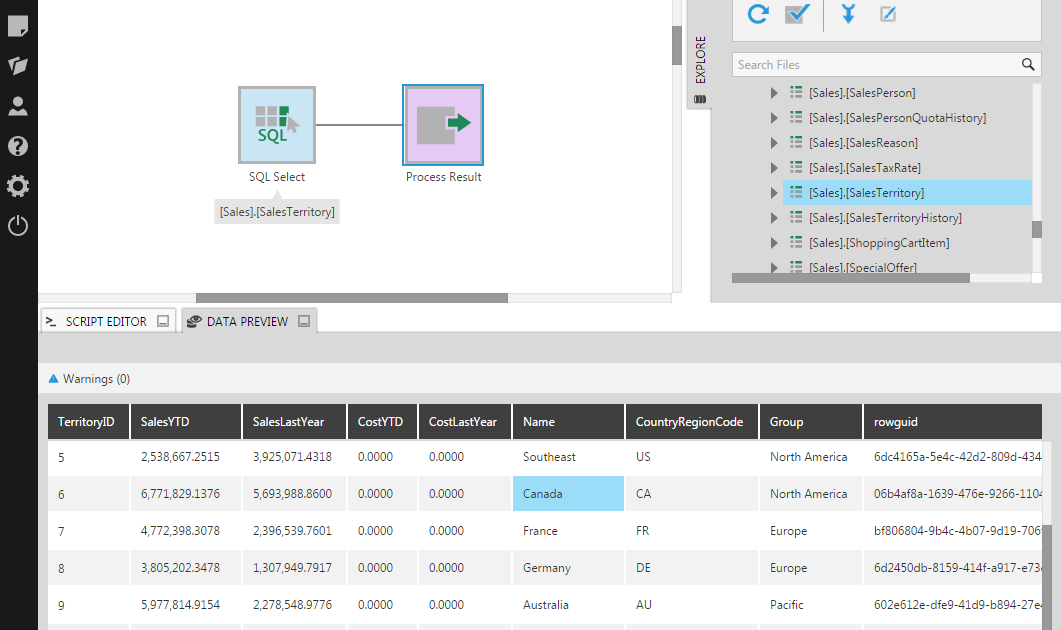
For this example, drag the [Sales].[SalesTerritory] table from an AdventureWorks data connector in the Explore window to the canvas. A SQL Select and Process Result transform appear on the canvas.
Click the Process Result transform and then click the Data Preview window. In the Name column, you'll see a number of countries and territory names such as Canada, France, Germany, etc.
Create a new dashboard using the Blank template.
In the Explore window, locate the data cube and drag its SalesYTD measure to the canvas. It will appear as a table visualization.
Then drag the Name dimension onto the area labeled Row Header over the table.
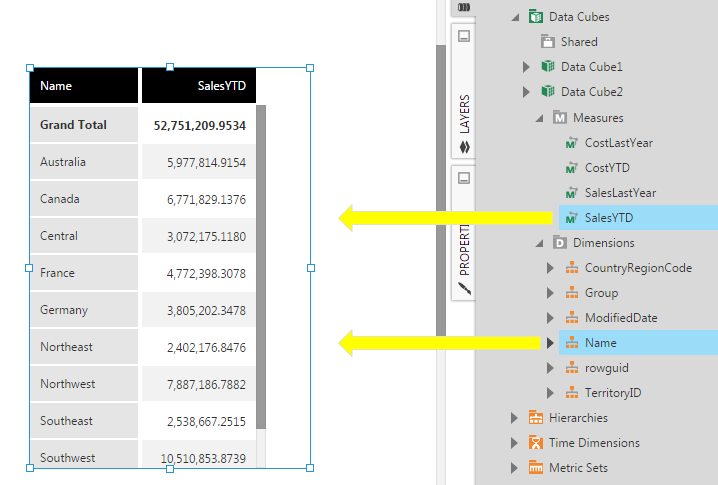
In the Name column, you'll see a number of countries and territory names just like the data preview for the data cube.
3. Add a custom attribute
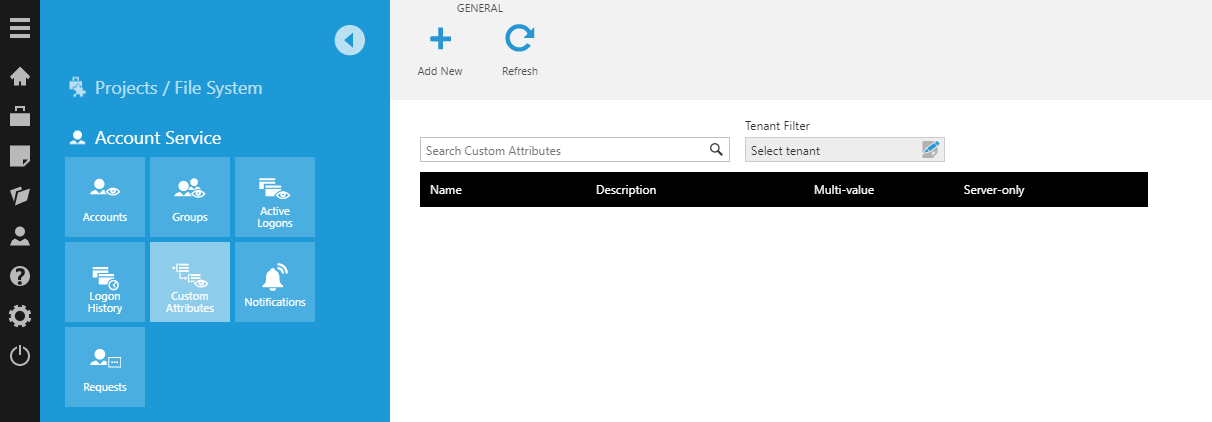
Access Administration from the main menu, expand Account Service and click Custom Attributes.
On the Custom Attributes page, click Add New in the toolbar.
In the Add Custom Attribute dialog, set the Name (e.g., Country) and check that the Currently Selected Data Type matches the type of values you will be filtering by. This is String in our example.
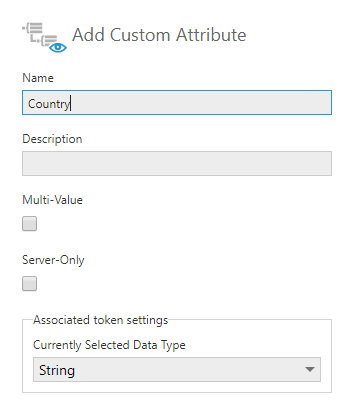
Click Submit and the new custom attribute will be listed on the page.
You can return here later and select it to edit it from the toolbar, or in version 10 or later you can also check its references to find accounts or groups with values assigned to it or files that are using it.
4. Assign custom attribute values
Typically, an administrator will assign the custom attribute values for other users and/or groups of users. You should assign a value for each user or group that needs to access the data from the data cube that will be filtered.
In the Administration screen, expand Account Service and click Accounts or Groups.
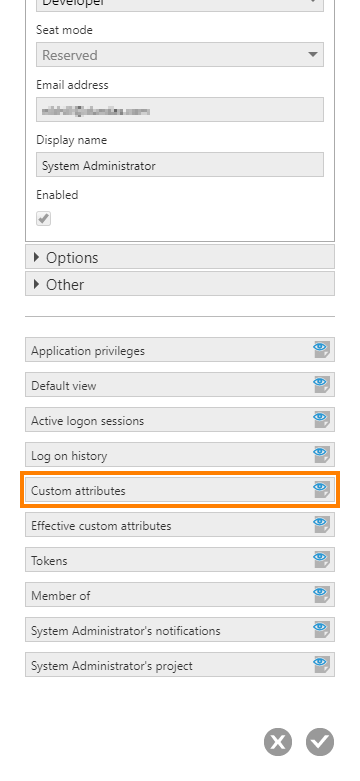
Select a user or group and then click the Edit button on the toolbar. For this example, we will edit System Administrator. Click the Custom attributes button.
In the View Custom Attributes dialog, click Add custom attribute.
In the Select Custom Attributes dialog, select the checkbox for the custom attribute that will be used for filtering (e.g., Country), then click the submit button at the bottom.
In the Edit Custom Attribute dialog, enter the attribute value for this account/group (e.g., Canada) and then click the submit button at the bottom.
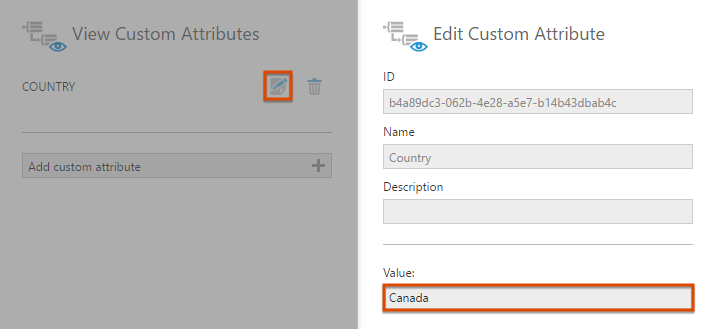
Log out of the application from the main menu and log back on as this user for the custom attribute assignment to take effect.
5. Filter a data cube transform
When editing a data cube, a transform such as SQL Select or Filter can be configured to filter the cube's data by each user's custom attribute values. As an example, click to select a link between two transforms and insert a Filter transform from the toolbar.
Click or right-click the Filter transform and click Configure in the menu or toolbar. In the Filter dialog, click the Edit button next to the column to filter by, which is Name in our example.
In the Transform Element dialog, set the Element Operator to Equals. Then open the token menu for the Value dropdown and select the Country custom attribute token.
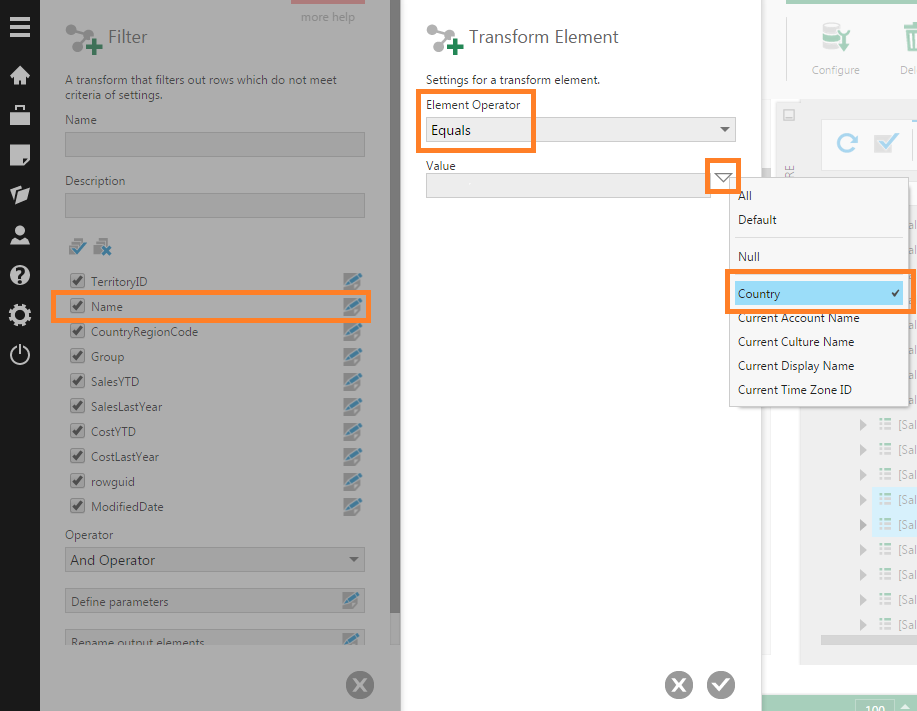
Click Submit and then close the Filter dialog. The filter transform is now configured to filter based on the custom attribute values.
Click the Process Result transform and then click the Data Preview window. For the custom attribute set up in the previous sections, you'll see that the data has been filtered to show only records where the Territory Name is Canada if you are currently logged on as System Administrator.
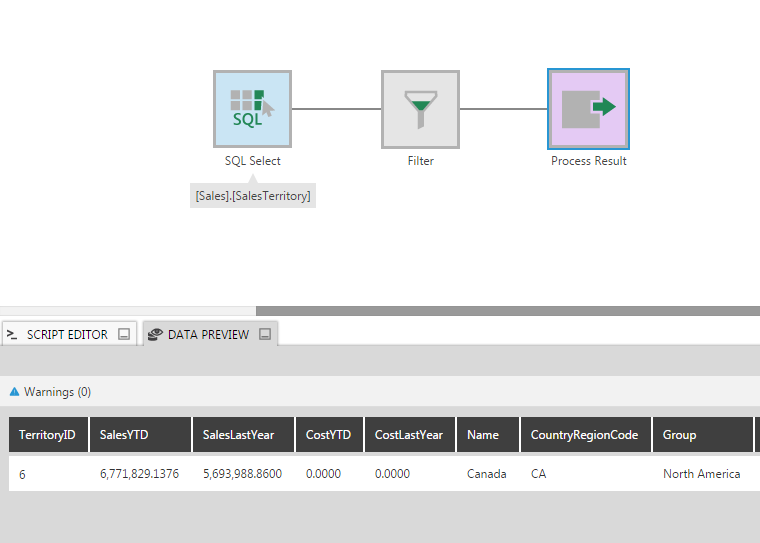
6. View the dashboard
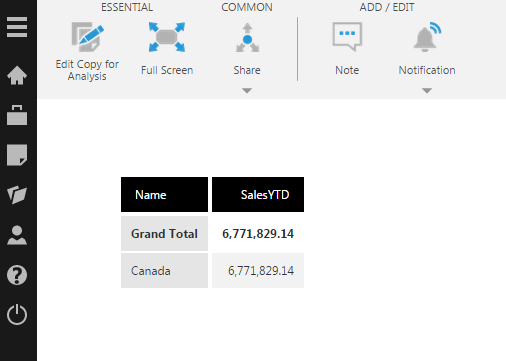
View the dashboard created earlier to see that the table visualization only shows records where the Name is Canada.
7. Multi-value custom attributes
The example above can be modified to use multi-value custom attributes instead, which allow you to choose multiple filter values per user.
First, go to the Admin screen, expand Account Service and click Custom Attributes.
Edit the Country custom attribute and select the Multi-Value checkbox option. (This option cannot be de-selected later.)
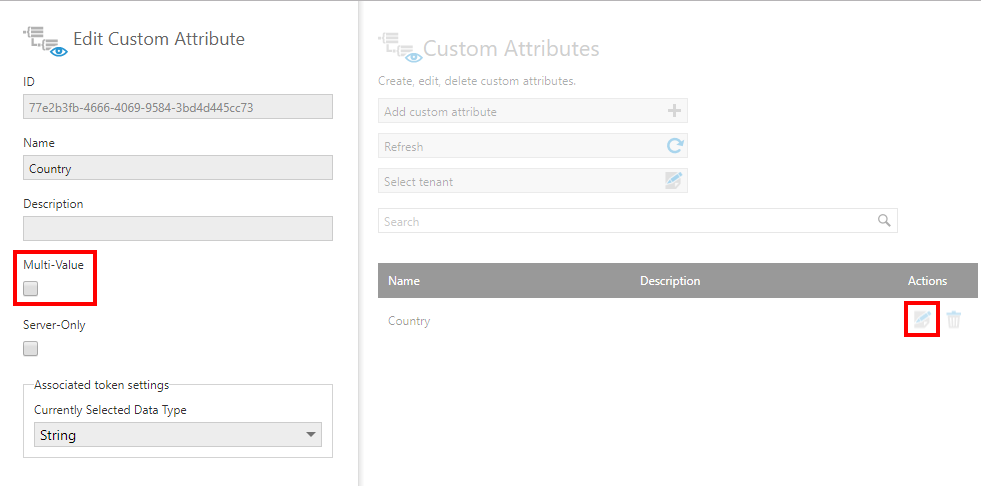
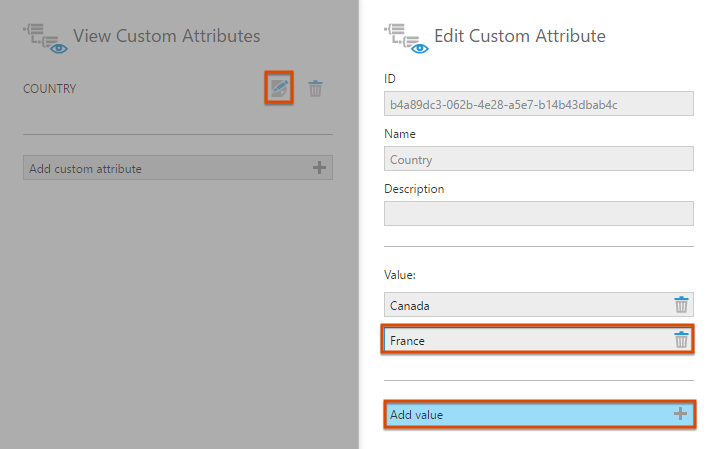
Next, edit the administrator account, scroll down, and click Custom attributes. Edit the Country custom attribute, and click Add value to add another value to the Country custom attribute. Log out and log back on for the changes to take effect.
Edit the data cube and delete the Filter transform to define a parameter on the SQL Select transform instead. (Alternatively, configure the Filter transform to remove the filtering applied earlier, and then define a parameter on it using the steps below.)
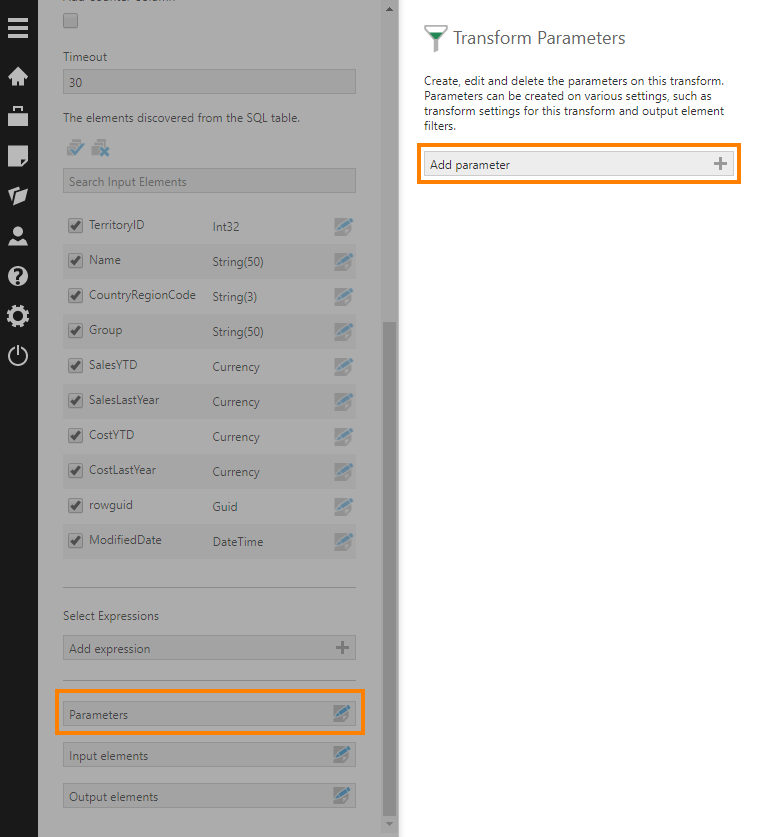
In the transform's configuration dialog, scroll down and click Parameters. In the Transform Parameters dialog, click Add parameter.
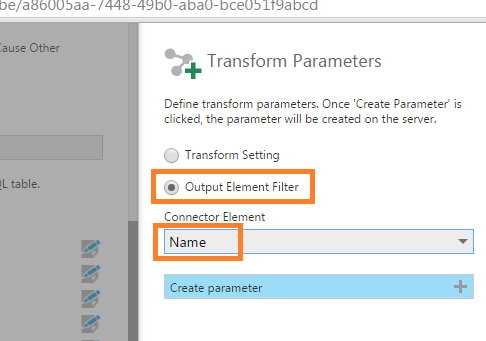
Select Output Element Filter as the Parameter Type and set the Connector Element dropdown to the Name column, then submit the dialog.
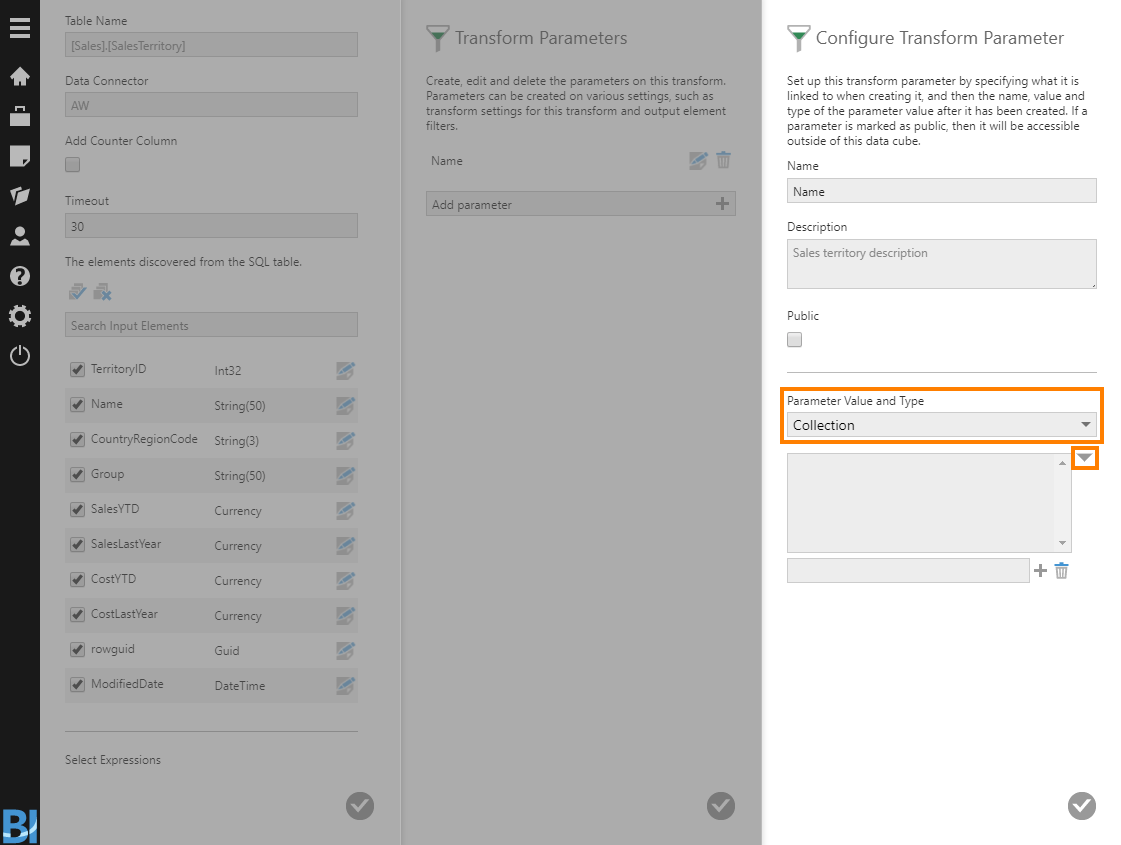
In the Configure Transform Parameter dialog, set the Parameter Value and Type to Collection. Then, from the token menu select the Country custom attribute token.
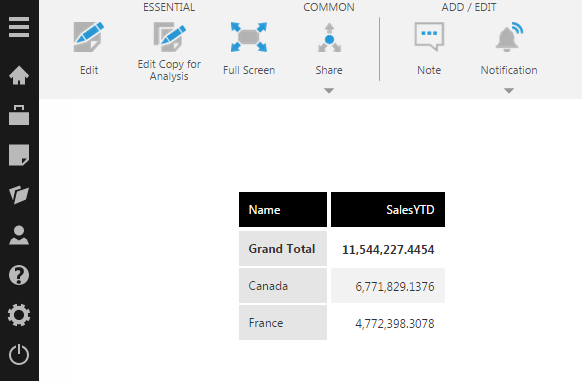
View the dashboard and verify you can see two rows corresponding to the custom attribute values assigned earlier.
8. Notes
- Filtering the raw data using a transform parameter in a data cube is too low-level to determine which values appear to different users in filters connected to a hierarchy, and whether notes attached to hierarchy values can be shared between users. Use custom attributes with a security hierarchy instead to affect the values shown in hierarchy filters and to allow notes to be shared between users when appropriate.
- Select the Server Only option to prevent the custom attribute value from being sent to the user's web browser, in case it contains sensitive information or large amounts of data. These custom attribute values can only be read by system administrators, as well as tenant administrators if the custom attribute was associated with their tenant.
- In the case of a single-value custom attribute or a multi-value value with an inheritance behavior of Override, the attribute value set for an account will override any values inherited from groups. If there is no value set on the account, differing values inherited from multiple groups may result in a conflict error.
9. See also
- Accounts
- Groups
- Using a data cube to join tables
- Using SSAS roles impersonation
- Using custom data and custom attributes to filter SSAS data
- Using a security hierarchy to filter data by user
- Multi-tenancy
- Managing tokens
- Using the filter transform with tokens
- Off the Charts: Use Row-Level Security to Filter Data by User

