
1. Overview
This article shows you how to configure and use the Dundas BI Viewer Web Part, which lets you integrate Dundas BI views such as dashboards and reports into your SharePoint sites and portals.
2. Setup
It is assumed that you have already installed Dundas BI and created content such as dashboards or reports.
The Dundas BI Viewer Web Part should be installed next on your SharePoint server (which may be different than your Dundas BI server). See Add the Dundas BI SharePoint Web Part for more details.
The Web Part is configured by default to connect to a local user account in Dundas BI with the following credentials:
- Username: viewer
- Password: 1234
If your Dundas BI instance uses local user accounts (i.e., non-Windows), you can add this user account for initial testing. For example, log on to Dundas BI as this user and verify that you can view the specific dashboards you intend to access from SharePoint. The basic idea here is to ensure you have a Dundas BI account that can access the desired content from within Dundas BI before trying to access that same content from SharePoint.
3. Add the Viewer Web Part to a page
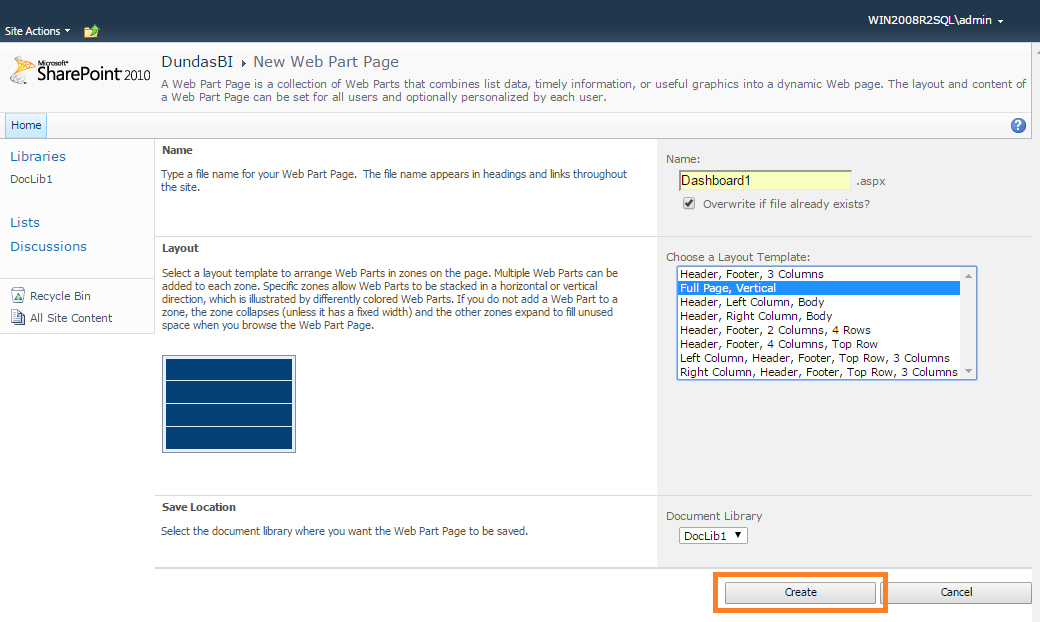
Go to your SharePoint site and create a new Web Part Page.
Click Add a Web Part.

Select the Dundas Web Parts category and then click Add.
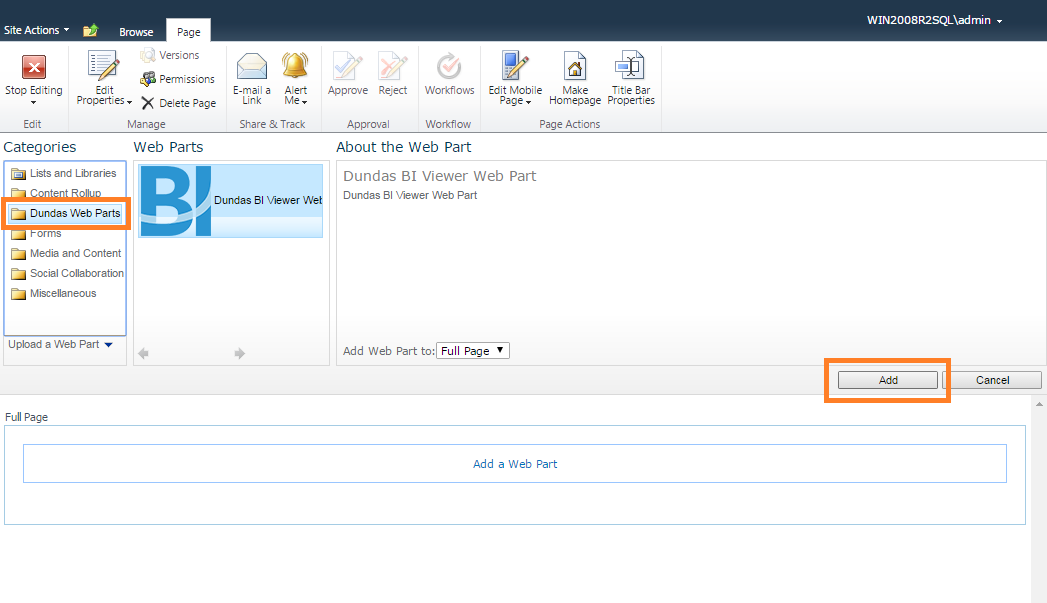
The Dundas BI Viewer Web Part is now added to your page, but it requires further configuration before you can see any dashboards.
4. Configure the Viewer Web Part
4.1. Connection Settings
In your web part page, click open the tool pane.
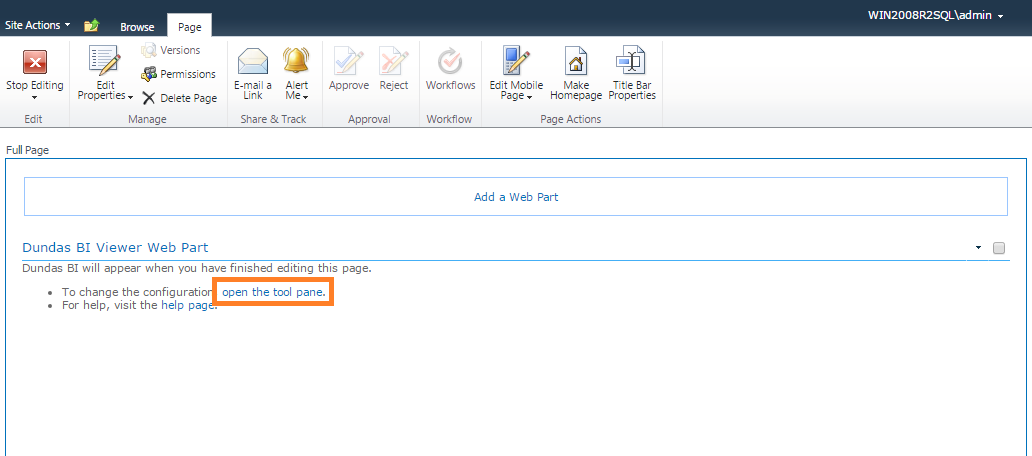
Go to the tool pane on the right to configure connection settings.
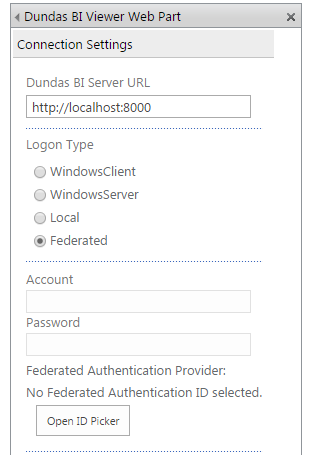
The Dundas BI Server URL field should already be set to the value entered during the installation of the web part from the Deployment application. You can change it here if needed. Specifying a value such as http://localhost:8000/ may work if your Dundas BI instance is running on the SharePoint server.
For the Logon Type field, there are four options:
- Local - Specify a Dundas BI local user account to use for connecting to Dundas BI. In this case, enter the local account name and password in the corresponding fields.
- WindowsClient - Connect to Dundas BI using the Windows credentials stored with the client browser. Some browsers may not support this option. For this option, leave the account and password fields empty.
- WindowsServer - Connect to Dundas BI using the Windows credentials of the user accessing the SharePoint web part page. For this option, leave the account and password fields empty.
- Federated - Connect to Dundas BI using Federated Authentication. For this option, leave the account and password fields empty, and select the Federated Authentication provider from the list of available providers.ImportantWhen viewing the web part with a Federated logon type, the authentication will happen in a pop-up. You may have to adjust the pop-up blocker rules on your site to avoid extra clicking each time.
Click Connect to log on to Dundas BI. Check that the Connection Status says Connected.
4.2. Default View
The Default View option lets you choose a specific view (dashboard, report, or scorecard) to display, or set up a gallery view which presents thumbnails of available dashboards.
You can also configure the viewer features you want, such as showing the full editor or just a simple viewer.
To set the default view, click Open Default View Picker and select one of the options below.
4.2.1. Display a single view
This option lets you choose a specific dashboard, report, or scorecard to display.
For example, expand a project item and locate the dashboard you want to set as the default view. Select the dashboard and click Select View.
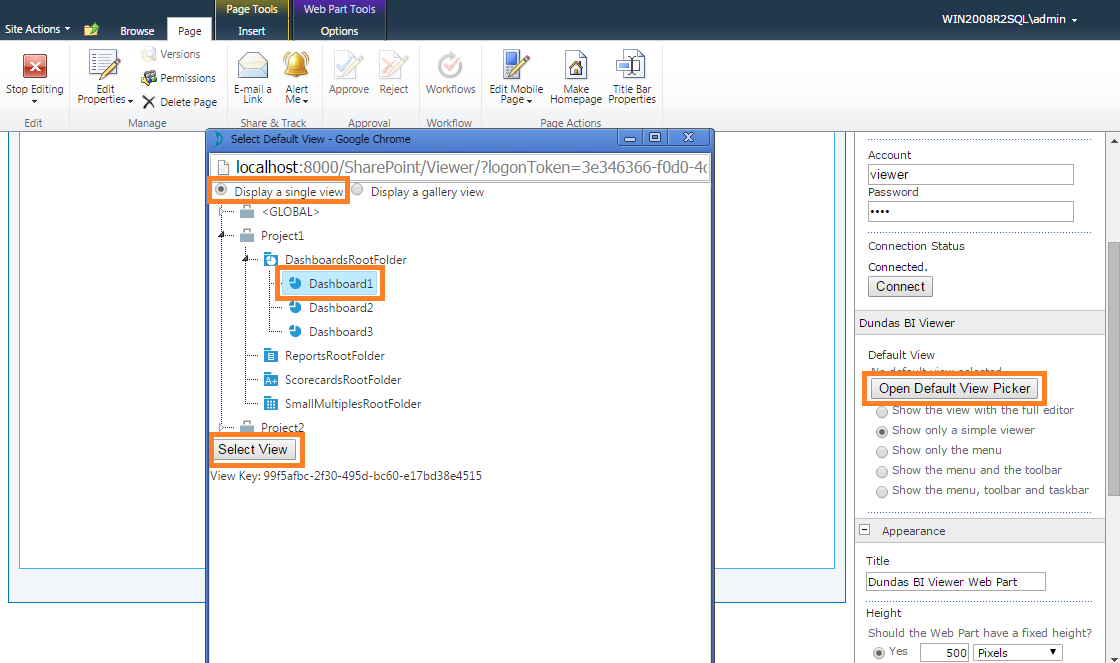
Returning to the tool pane, scroll to the bottom and click OK to complete the configuration. Exit editing of the page.
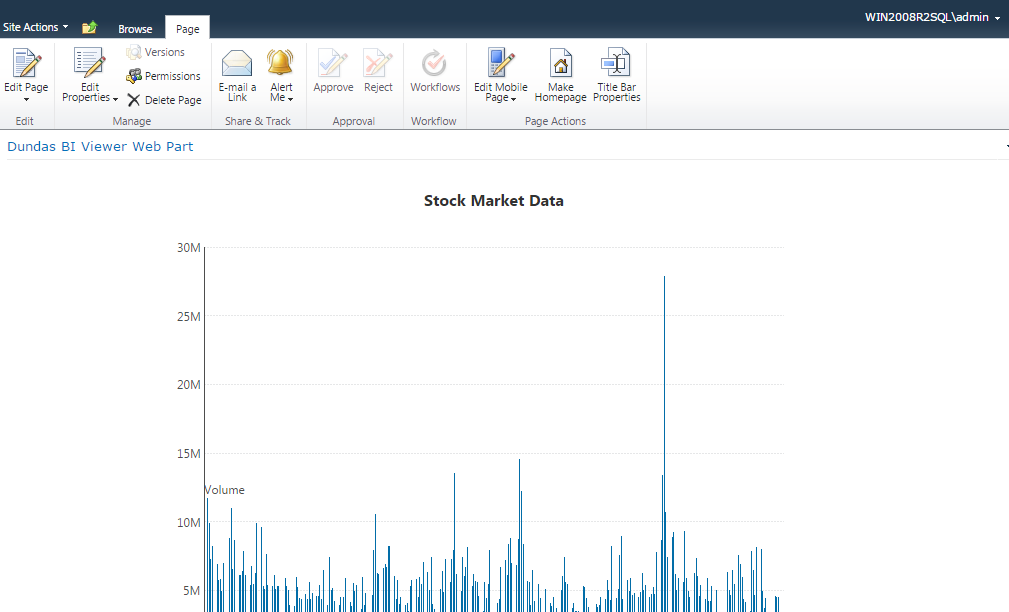
The selected dashboard is now displayed in the web part page.
4.2.2. Display a gallery view
This option lets you display a gallery containing thumbnail-sized previews of dashboards from across all projects or a specified project.
To show dashboards from all projects, select the Display all projects checkbox and click Select View.
To show dashboards from a specific project only, select the project and then click Select View.
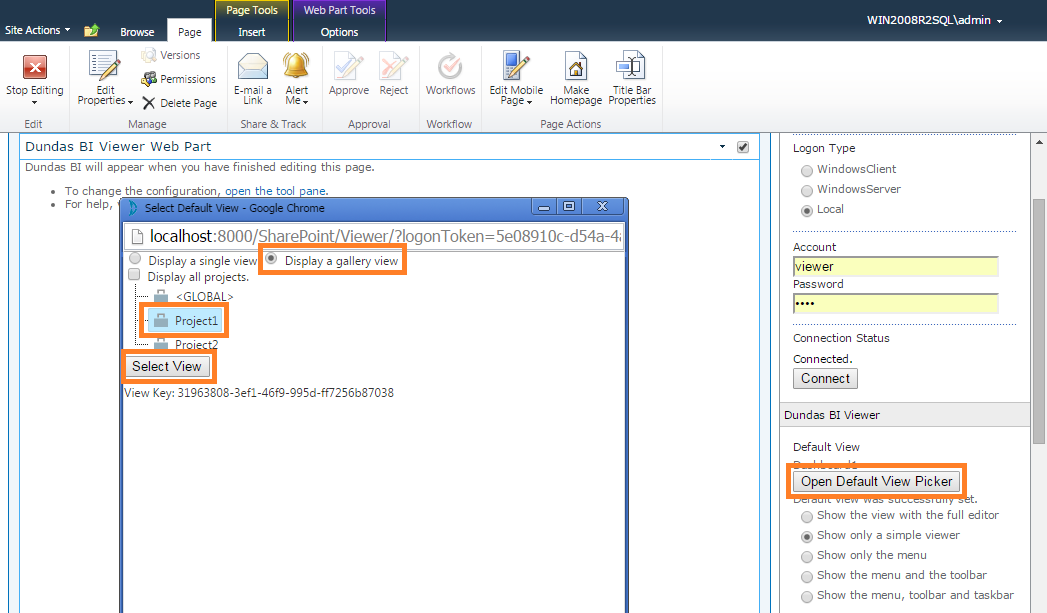
Returning to the tool pane, scroll to the bottom and click OK to complete the configuration. Exit editing of the page.
The gallery is now displayed in the web part page but you won't see any preview images initially while they are being generated in the background. This may take up to a few minutes after which you will need to refresh the page. The preview images will be generated in the App_Data\ViewThumbnails folder of your Dundas BI instance.
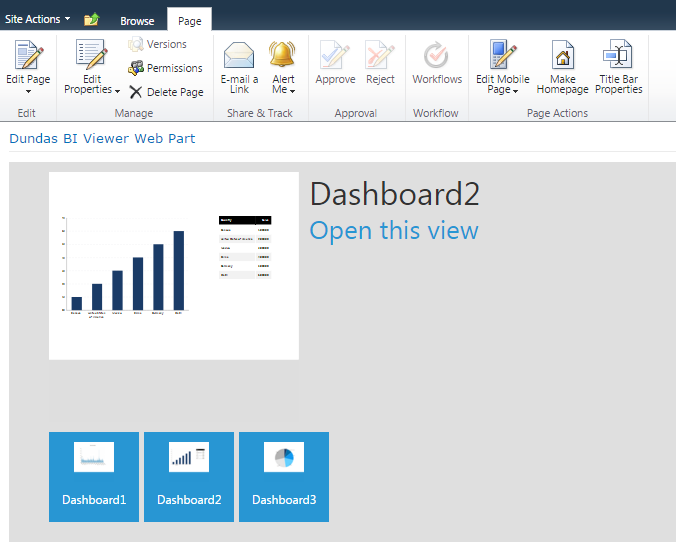
To use the gallery, click on a dashboard tile in the bottom bar, and then click Open this view.
5. See also
- Add the Dundas BI SharePoint Web Part
- Dundas BI SharePoint web part issues
- Accounts
- Edit your profile and change your password