
1. Overview
This article will walk you through steps you can follow to deploy Dundas BI in the public cloud on Amazon Web Services (AWS) if you choose to deploy directly to EC2 compute instances.
2. Prerequisites
To deploy Dundas BI on AWS EC2 instances as described below, you need the following:
- An AWS account
- Access keys for the AWS account or for an AWS IAM user who has permissions to create Amazon VPC networks and launch Amazon EC2 instances
- The Dundas BI Setup program
3. Configure AWS
First, you need to configure AWS with an EC2 instance in which Dundas BI will be installed.
3.1. Build a virtual private cloud
A virtual private cloud (VPC) is a virtual network dedicated to your AWS account. It is logically isolated from other virtual networks in the AWS cloud. You can launch your AWS resources, such as Amazon EC2 instances, into your VPC.
- Sign in to AWS and navigate to the EC2 Dashboard.
- In the top-right corner of the page, use the region selector to choose the location where you want to launch your instances.
- Click the Start VPC Wizard button, select the VPC with a Single Public Subnet option, and click Select.
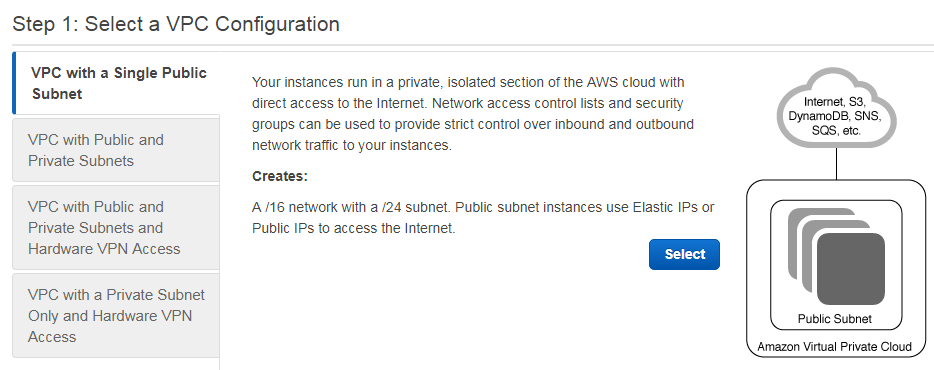
Configure your VPC installation - In Step 2 of the wizard, give your VPC a name (for example, Dundas BI), and click Create VPC. You can leave all the other settings at their default values.
3.2. Configure networking and security
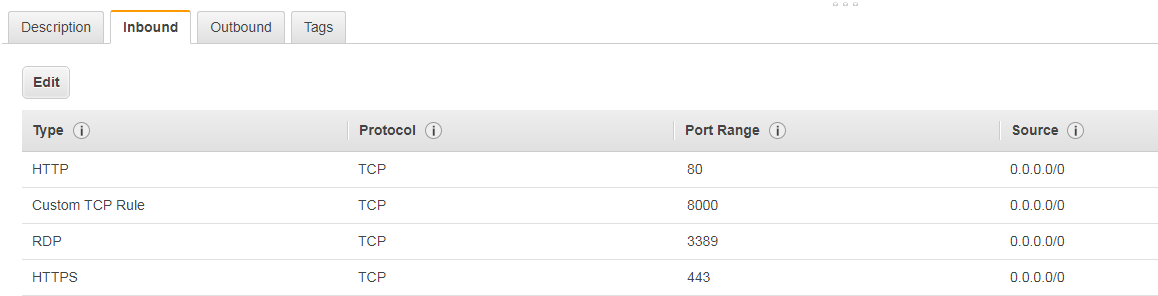
Next, you have to allow inbound traffic from the Internet to reach the VPC via three standard ports (HTTP, HTTPS, and RDP).
- On the VPC Dashboard, choose Security Groups.
- Click the Create Security Group button and enter a name and a description for the new security group. Make sure that your new VPC is selected in the list, and then click Yes, Create.
- Select the new security group, and at the bottom of the page choose the Inbound Rules tab. If you do not see the new security group, refresh the page in the browser.
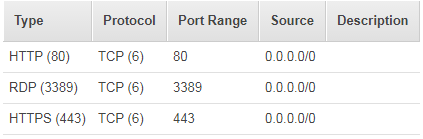
- Click Edit. In the Type list select HTTP (80), and for Source enter 0.0.0.0/0.
- Click Add another rule and add a rule for HTTP (443). Add a third rule for RDP (3389). Use the same value for the source every time.
- Click Save.
3.3. Launch an Amazon EC2 instance
You can now launch an Amazon EC2 instance into the VPC. Navigate back to the VPC Dashboard and click Launch EC2 Instances to start the EC2 wizard:
- Select an Amazon Machine Image (AMI) that meets the Dundas BI system requirements, such as:
With this example, we are installing Dundas BI on an EC2 instance that already has SQL Server on it so we can fulfill the Dundas BI system requirements with no additional setup. However, there are other options for the Dundas BI application and warehouse databases on AWS:
- Select an EC2 that has a Windows OS along with SQL Server as detailed in this article.
- Install on an EC2 instance that has only a Windows operating system (with no SQL Server) and host the Dundas BI application and warehouse databases on Amazon Relational Database Service (RDS).
- Install on an EC2 instance that has only a Windows operating system (with no SQL Server) and host the Dundas BI application and warehouse databases on the same or another EC2 instance that has SQL Server installed on it manually, using a bring your own license (BYOL) model.
- Install on an EC2 that has only a Windows operating system (with no SQL Server) and deploy a PostgreSQL database to host the Dundas BI application and warehouse databases.
- In Step 2 of the wizard, select the instance type you want based on your needs and the Dundas BI system requirements. If you are unsure of which instance you need, the m4.xlarge provides a good starting point.
- In Step 3 of the wizard, select your VPC from the Network list.
- Click through Steps 4 and 5 of the wizard. In Step 6, choose the option Select an existing security group and select the security group that you created earlier.
- Click Review and Launch. If you are prompted with a warning message about opening port 1433, click Continue and processed to review your configuration (there is no need to open that port by default). Then click Launch.
- When you are prompted, select Create a new key pair, name it, download it as a .pem file, and keep it in a safe place. You need the key pair in order to decrypt the administrator password that you can use to log into the EC2 instance.
- When you have finished, click Launch to launch the instance. Note that launching an instance can take several minutes.
- Take note of the instance ID.


3.4. Create a static IP address for the virtual private cloud
The last part of configuring your VPC is to allocate a static public IP address.
- Navigate back to the VPC Dashboard and choose Elastic IPs. Click Allocate New Address and then click Allocate.
- Select the new IP address and click Associate Address.
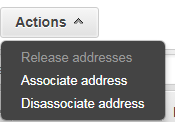
Associate the new IP address - In the Associate Address dialog:
- Verify that Resource type is set to Instance.
- Set the Instance to the ID of your EC2 instance.
- Set the private IP address to one available from the drop-down list. Note that the drop-down will remain empty until you set the Instance ID.
- Click Associate and note the IP address.
4. Install Dundas BI
To run Dundas BI on AWS, you need to install it on the EC2 instance or instances that you just configured.
4.1. Log in to the EC2 instance
To begin, log in to the EC2 instance where you want to install Dundas BI:
- Navigate to the EC2 Dashboard and make sure you are in the region where you launched your EC2 instance.
- On the EC2 dashboard, click Instances. When the instance is running and the status checks are finished, select the instance and click Connect.
- In the Connect To Your Instance dialog, click Download Remote Desktop File. This will create an .rdp file that is configured to connect to the public IP address of your VPC, which you specified in the Elastic IP address that you created.
- Click Get Password and select the .pem file for the key pair you created earlier. This uses the private key from your key pair.
- Click Decrypt Password. When the password is displayed, note the Public DNS (for example, ec2-52-14-143-135.us-east-2.compute.amazonaws.com), user name (such as Administrator), and password.
- Double-click the .rdp file that you downloaded earlier.
- Click Connect (you can ignore the message that indicates that the publisher is unknown).
- Enter the user name and password that you noted in Step 5 and click OK. Ignore any warnings verifying the identity of the computer (click Yes to proceed with connecting).
4.2. Install Dundas BI
You can now install Dundas BI on the EC2 instance. This installation is similar the regular installation process, but you should note the following points:
- The Deployment application will find some missing prerequisites on your EC2 instance (assuming it is a brand new/clean instance). Use the Fix all option (you may have to wait for it to appear) and once done proceed with the installation.
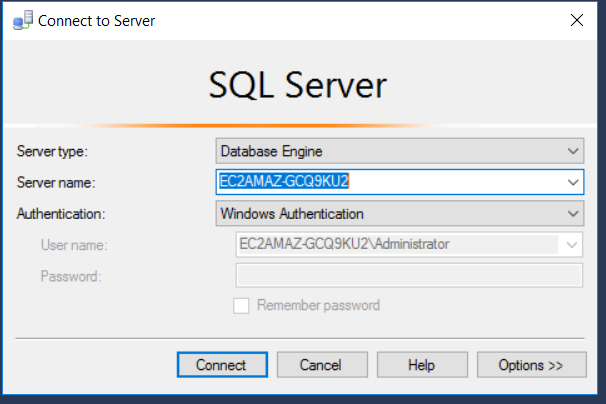
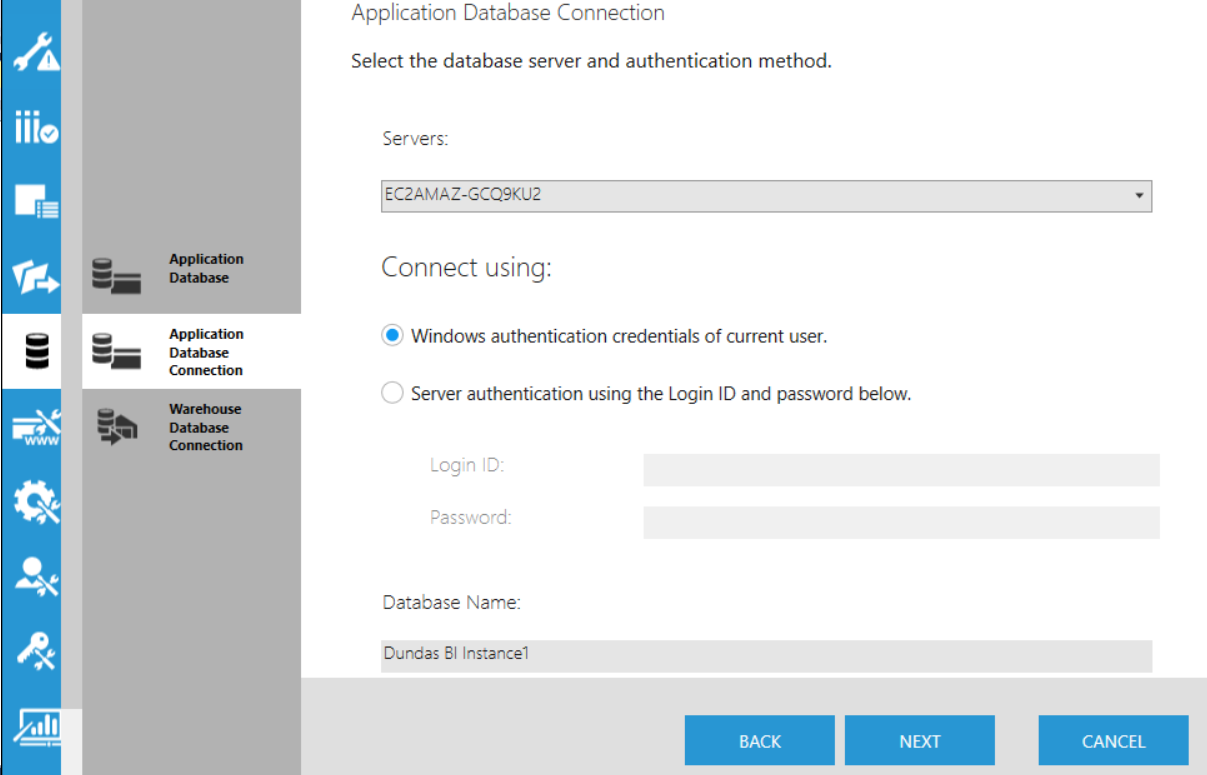
- When configuring the database, you should use the database server you have on one of your EC2 instances or on the Amazon RDS.
TipIf you are unsure of your database server name, there are a number of ways to find it. For example, you can open SQL Server Management Studio on your EC2 instance and copy the name from there. You can then choose to configure Dundas BI to authenticate to the database using Windows authentication or a dedicated SQL account you create on the database server.
- When configuring the web application (IIS), you can choose between creating a new website and creating a virtual directory. If you create a virtual directory under the default web site, you should not need to open any other ports under your AWS VPC network security. If you create a new website, note the port used (the default is 8000) as that port should be added to the VPC network security group (see the following section).
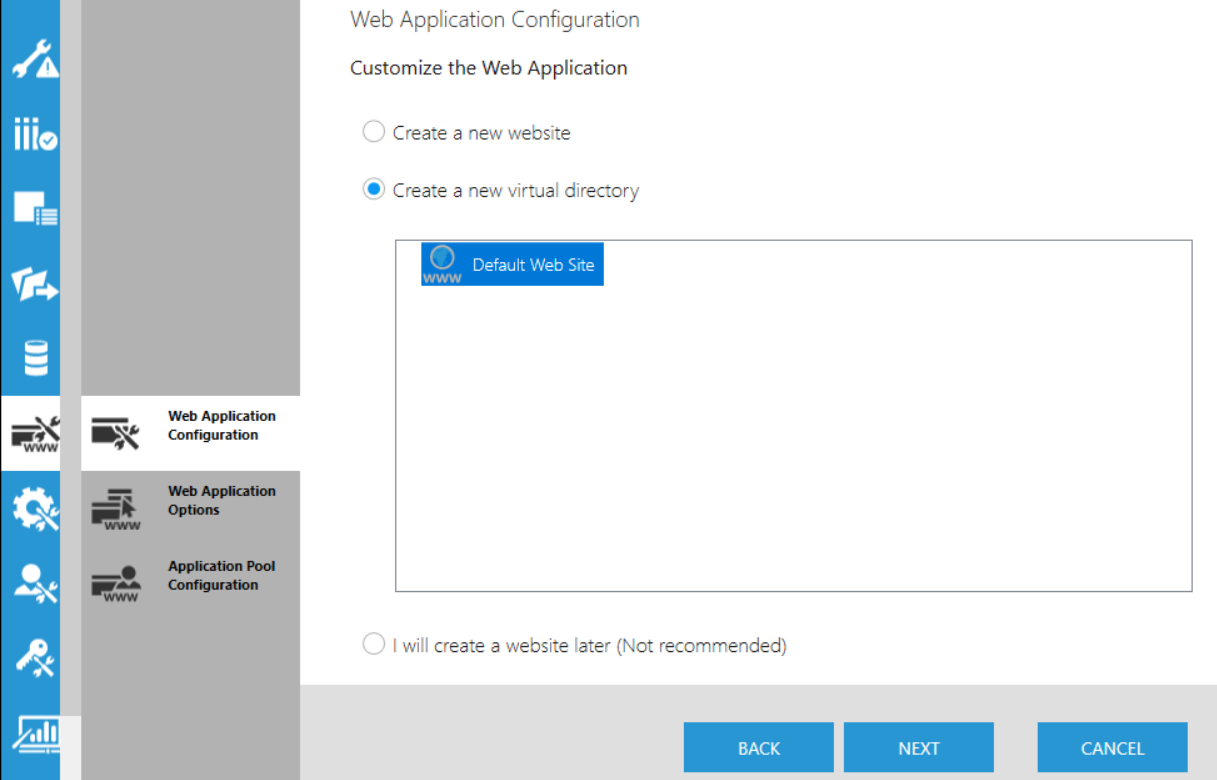
Create a new website and note the port, or simply create a virtual directory
After the installation is complete, open the Dundas BI instance using the URL generated and sign in using the administrator account created during the installation. Now you can add users or perform any other action in Dundas BI.
5. Access Dundas BI
Once Dundas BI is installed on EC2, you can access Dundas BI using the web application from your browser. However, you should store your RDP credentials in a safe place as you will need them to access Dundas BI Deployment again (to deploy samples or perform upgrades) and for maintenance tasks on Windows.
5.1. Set up external access
If you installed Dundas BI as a virtual directory under the default website (that runs under port 80) then you should be able to access it from any browser outside of the EC2 instance by taking the Public DNS name you noted before and adding the instance name to it using a forward slash (http://Public_DNS/instance_name). For example:
http://ec2-52-14-143-135.us-east-2.compute.amazonaws.com/Instance1
If you installed Dundas BI using a new website running on a different port, you can configure the VPC to allow users to access the Dundas BI application over the web without having to login into EC2 instance:
- Navigate to the VPC Dashboard and open Security Groups.
- Edit the security group selected for the Dundas BI instance and add a Custom TCP Rule for port 8000 (or to the port number you defined during the Dundas BI installation).
- Add a Windows firewall exception for Dundas BI on the EC2 instance. To do this, go back to into your EC2 instance using remote desktop, open a command line from the start menu, and type the line netsh advfirewall firewall add rule name="Firewall_Rule_Name" dir=in action=allow protocol=TCP localport=port_number. For example:
netsh advfirewall firewall add rule name="Dundas BI 8000" dir=in action=allow protocol=TCP localport=8000
Now you can take the Public DNS name you noted above and open it in any browser along with the port on which Dundas BI is installed (http://Public_DNS:port_number). For example:
http://ec2-42-18-869-87.us-east-2.compute.amazonaws.com:8000
You can also set up your own custom domain for easier access using a friendly URL. To do so you will need to register your domain name using the Elastic IP you created for the VPC by adding that Elastic IP to your DNS server. You can find more details about Routing Traffic to an EC2 Instance.
Since the instance is now exposed for external access, we strongly recommend that you configure Dundas BI to use SSL (HTTPS) using the certificate authority of your choice. You can install an SSL certificate while installing Dundas BI by choosing HTTPS in the IIS configuration steps. You can also find more information on configuring SSL certificates in IIS in Microsoft's documentation.
6. Configure load balancing
Dundas BI can be load-balanced across multiple servers by installing it on multiple EC2 instances and pointing each instance to the same Dundas BI application database. For more information, see the articles Deploying Dundas BI as a server farm and Managing server groups, and the relevant Amazon documentation: