
1. Overview
Administrators can configure Dundas BI so that a default theme is applied when first creating visualizations, components, and filters, to customize their default colors and other appearance. This includes when data is first added to a visualization, or when re-visualizing the entire visualization when editing or viewing.
2. Setting the default theme
2.1. Get the ID of the theme
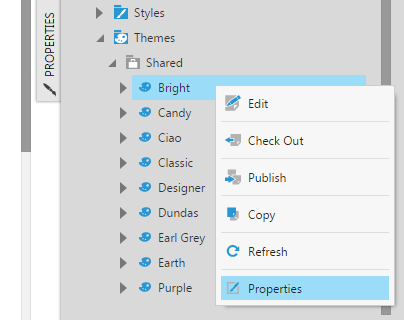
First, right-click the desired theme in Explore and select Properties.
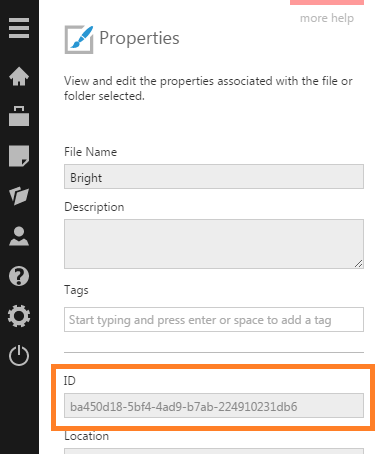
In the Properties dialog for the theme, select the text of the ID and copy it (press Ctrl+C or Γîÿ+C) to refer to below.
2.2. Modify the config setting
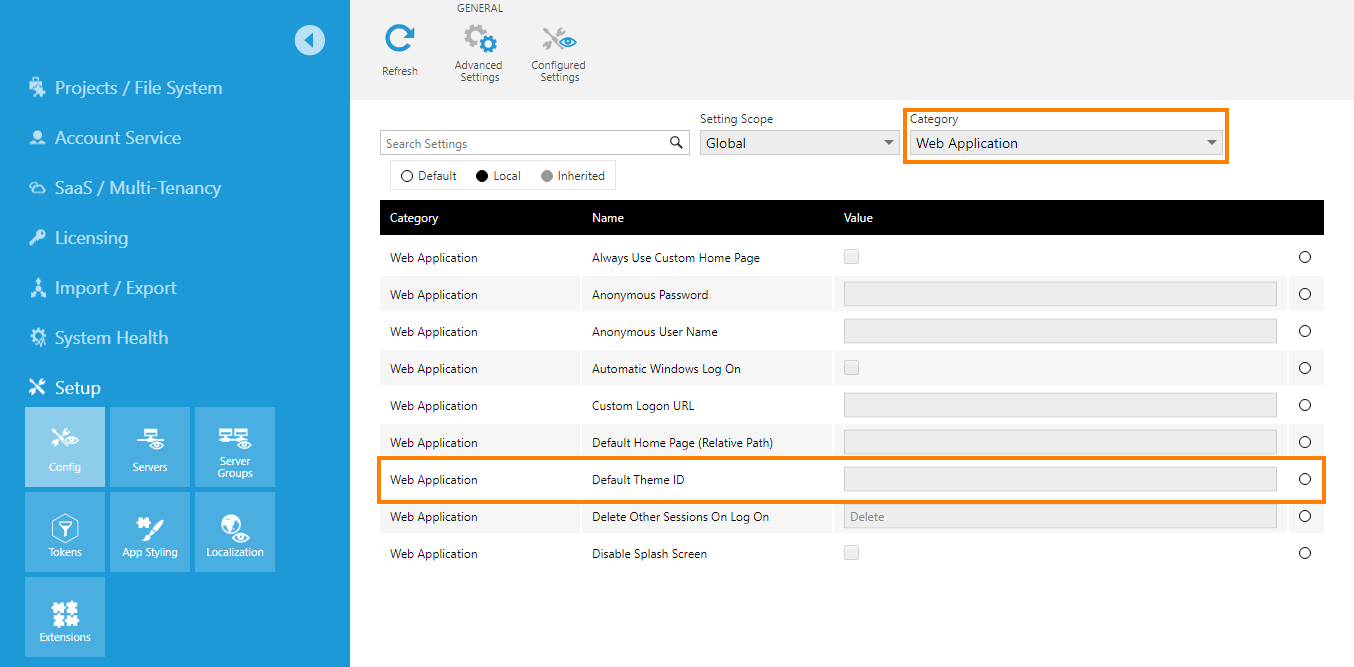
Access Administration from the main menu (you must be logged on as an administrator). Expand the Setup section and click Config.
In the Application Configuration screen, set Category to Web Application. Select the Default Theme ID setting and click the Edit icon.
In the dialog that appears, edit the setting value and paste the ID copied above (press Ctrl+V or Γîÿ+V).
Now whenever a new visualization, component, or filter is added to a dashboard or other view, it will be styled by this theme (if it includes a style that can be applied to that item).