
1. Overview
A group can contain user accounts and also other groups, making it easy to apply permissions to many users at once instead of setting permissions for each account individually.
By default, there are six built-in groups:
- Everyone
- Developers
- Power Users
- Standard Users
- System Administrators
- Global Users
All users are implicitly members of the Everyone group, while membership to the Developers, Power Users, and Standard Users groups is decided based on the seat type of the logged-on user. Global Users implicitly includes all users that are set as global rather than assigned and limited to specific tenants on multi-tenant instances.
2. Add a new group
Access the administration area from the main menu, expand Account Service on the left, and click Groups.
Click Add New in the toolbar to add a new group.

In the dialog that opens, fill in details such as the following:
- Tenant – Choose the tenant (if applicable).
- Group Name - Choose a name for your group, such as Sales or Engineering.
- Group Description - Add an optional description for the group.
- Allowed IP Addresses - An IP address or range that the group members must log on from unless they log onto the server locally.
- Culture - The default culture for this group. Must be a valid IETF language tag such as en or en-US.
- Time Zone – The default time zone for this group.
- Minimum Floating Seat Privilege - This seat type or higher will be assigned to all group members that use floating seats (see the Seat Mode setting in Accounts) even if their own Seat Type is set lower. Choose between Standard user or Power user license seat types, since Developer seats are always reserved.
- Application Privileges - Allow or deny access to specific functionality or UI elements.

Click to Save at the bottom to create the group.
The list of groups is updated with the newly added group.
3. View the list of groups
The Groups page lists the groups in the system. To open it, go to the administration area, expand Account Service, and click Groups.
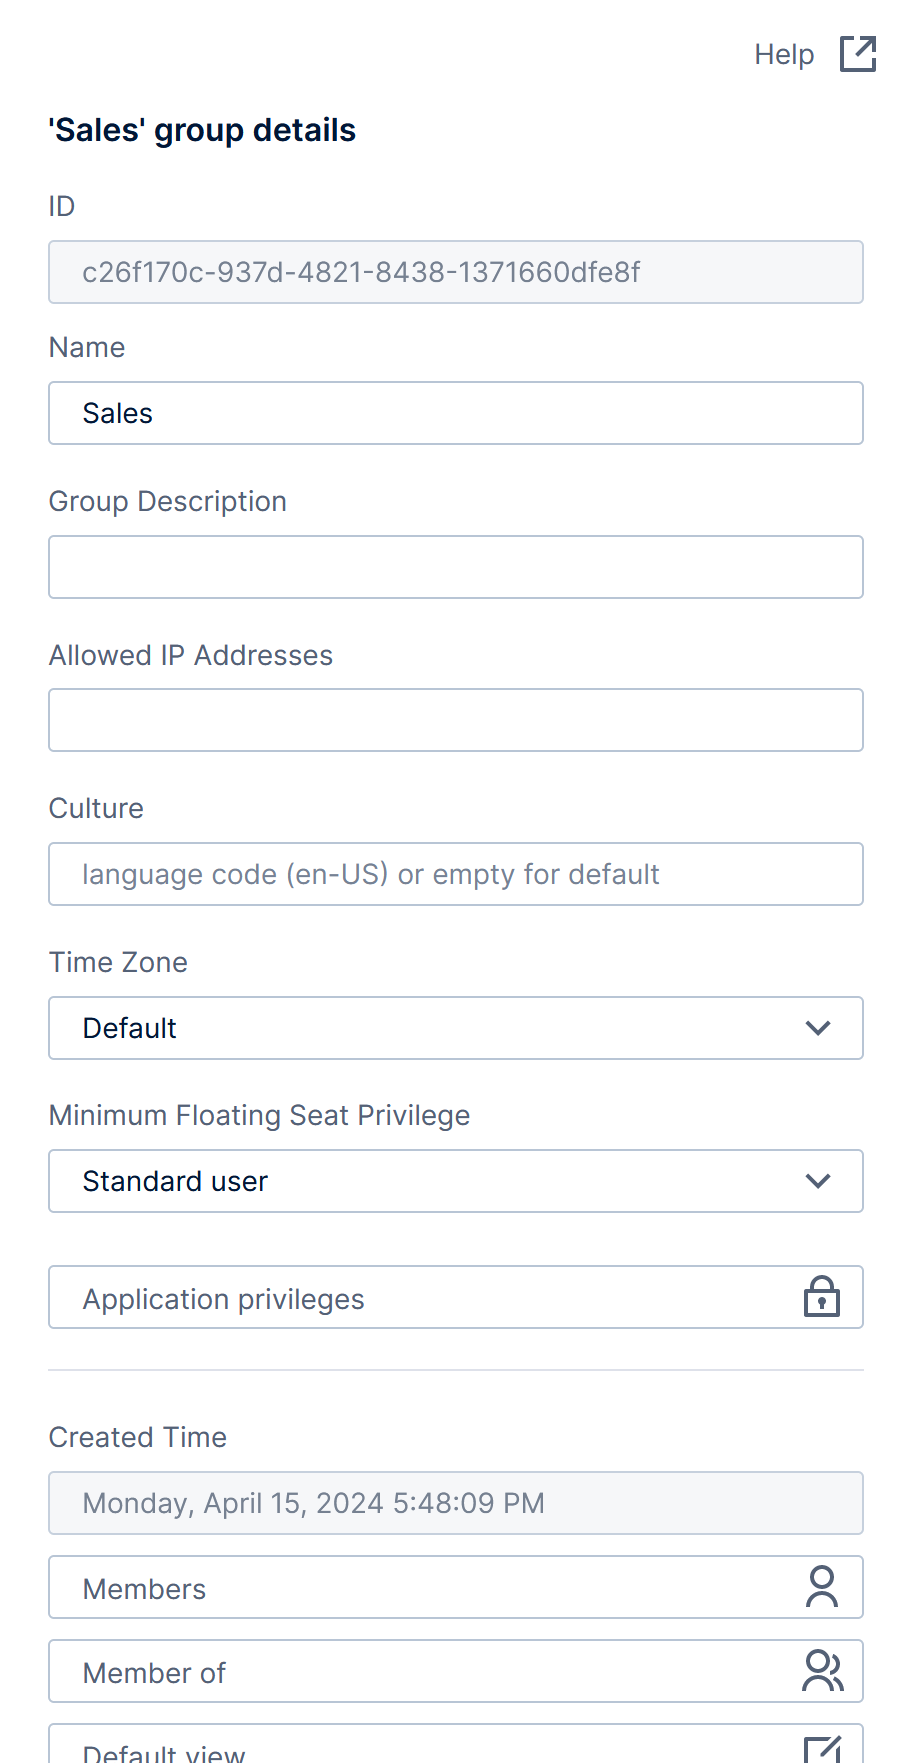
3.1. Edit a group
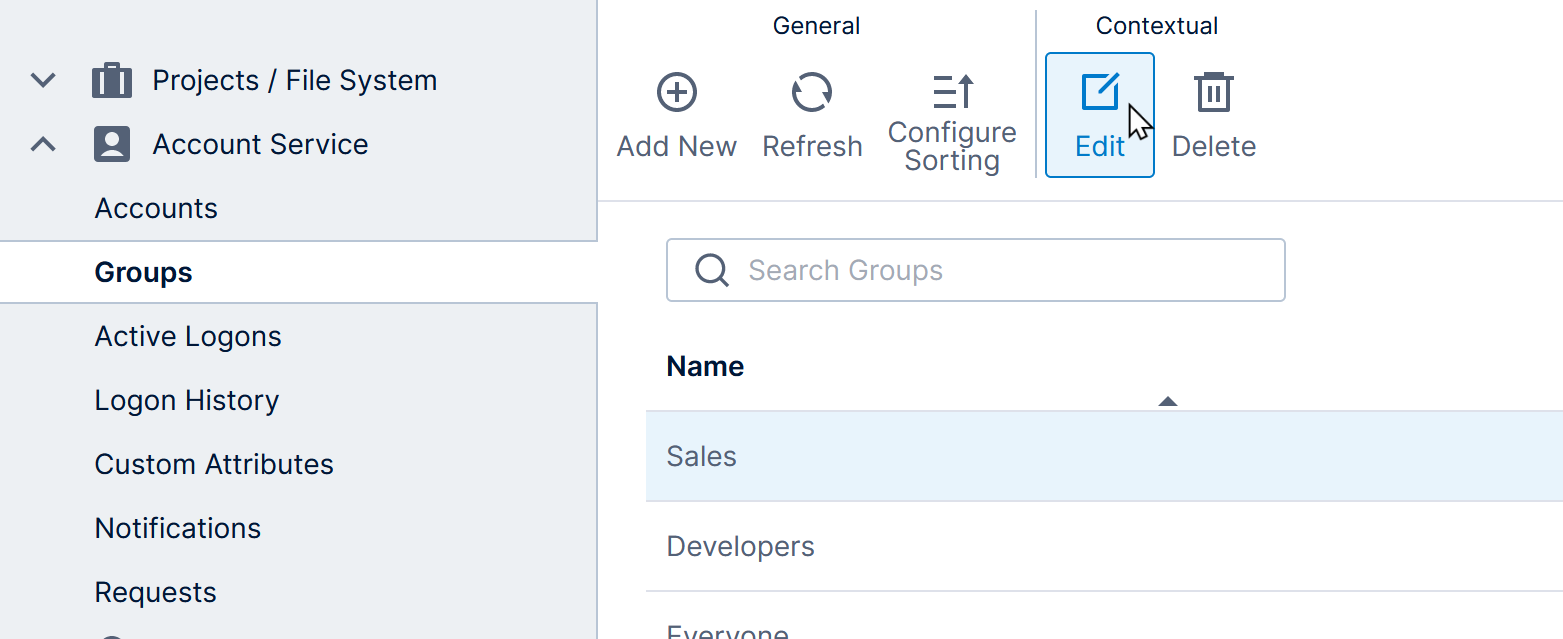
Select a group from the list and click Edit on the toolbar to open the Group Details dialog.
This dialog includes additional settings and information not available when first creating a group.
You can delete a group by selecting it from the list, clicking Delete in the toolbar, and confirming.
3.2. Manage group membership
To add or remove users (or other groups) from a group, edit it as shown above, then scroll down if needed and click Members.
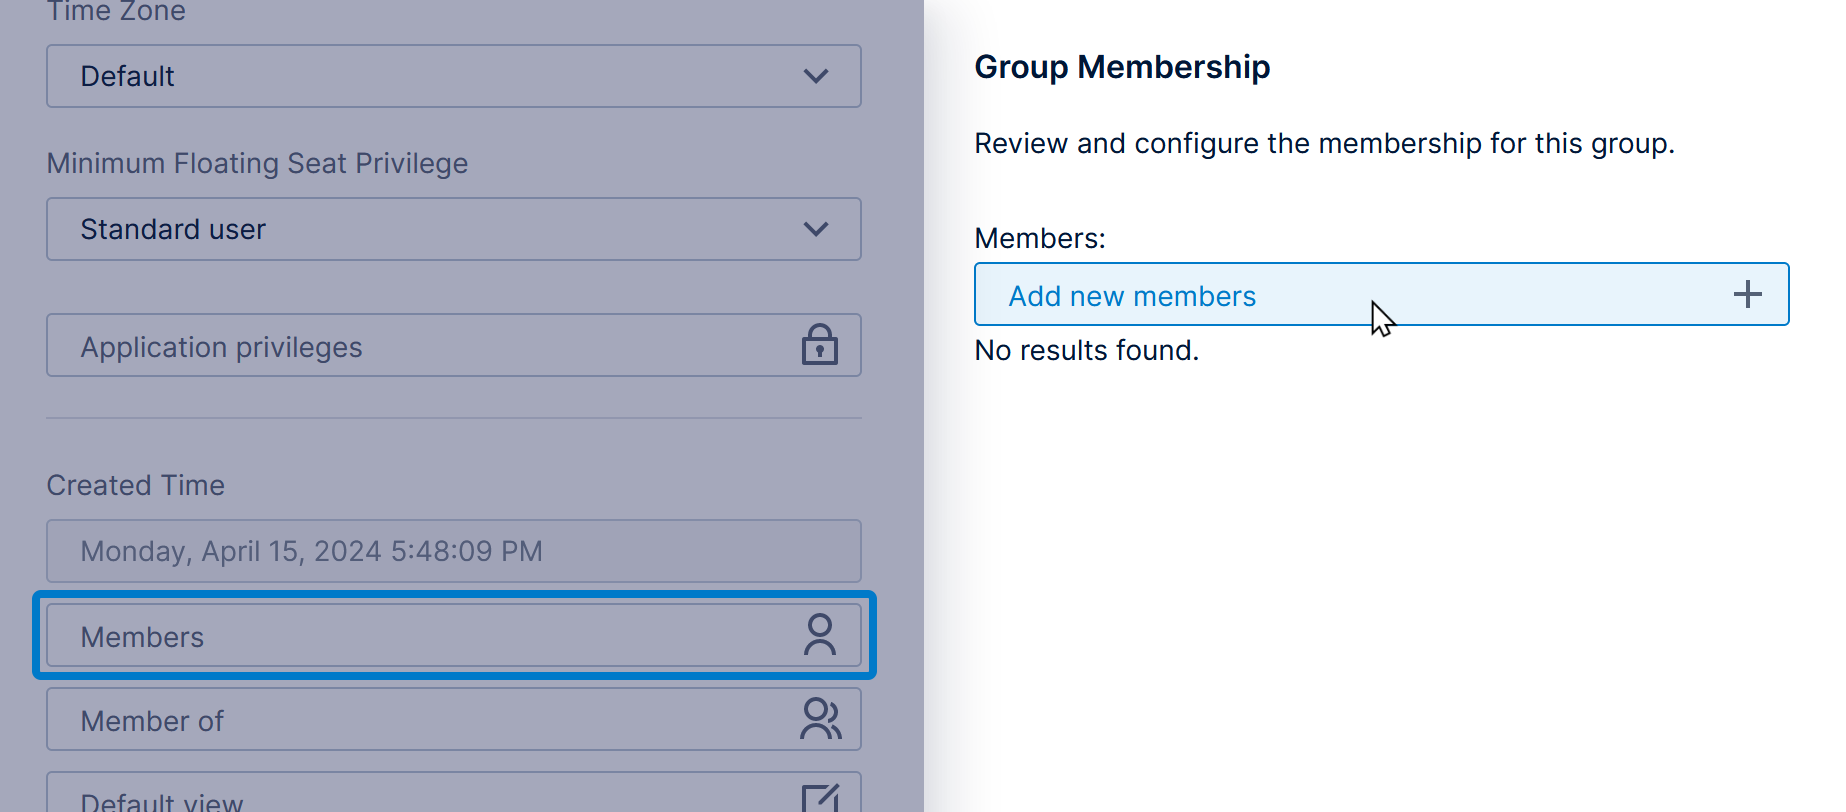
The Group Membership dialog opens and lists any users and groups that already belong to the group you're editing.
Click Add new members to add more.
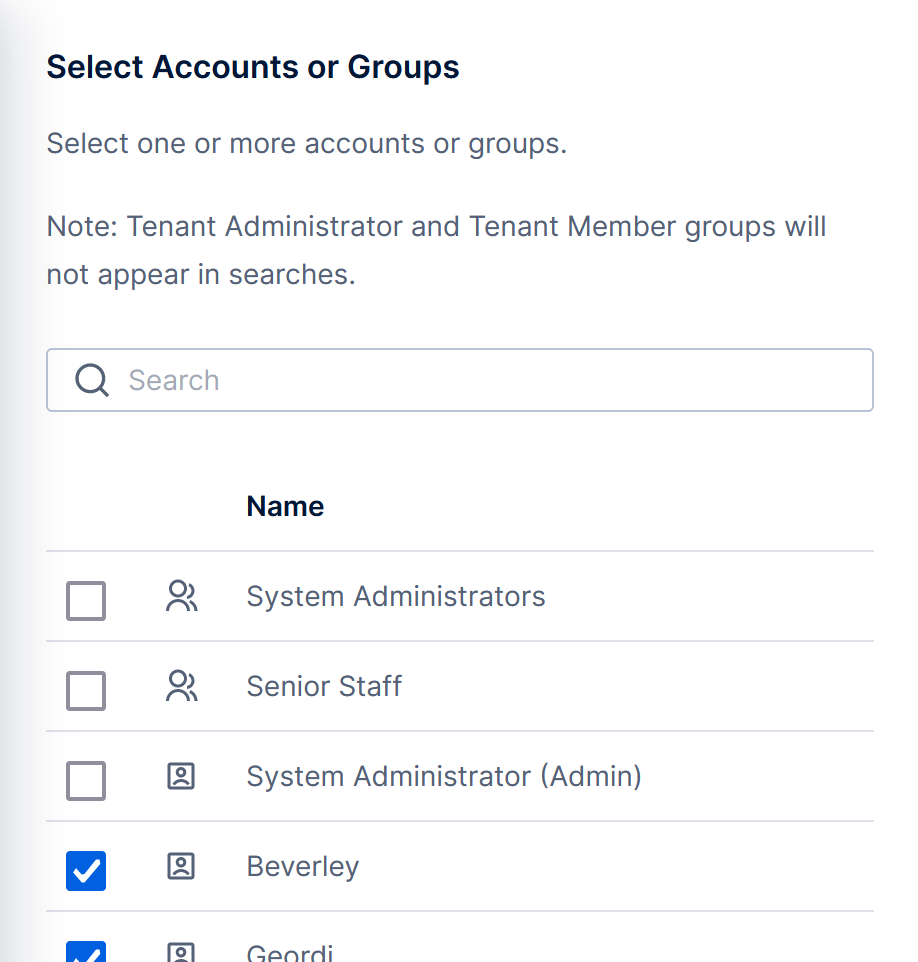
Select users and groups to add, and then click to Save at the bottom.
The Group Membership dialog will update with the newly added members.
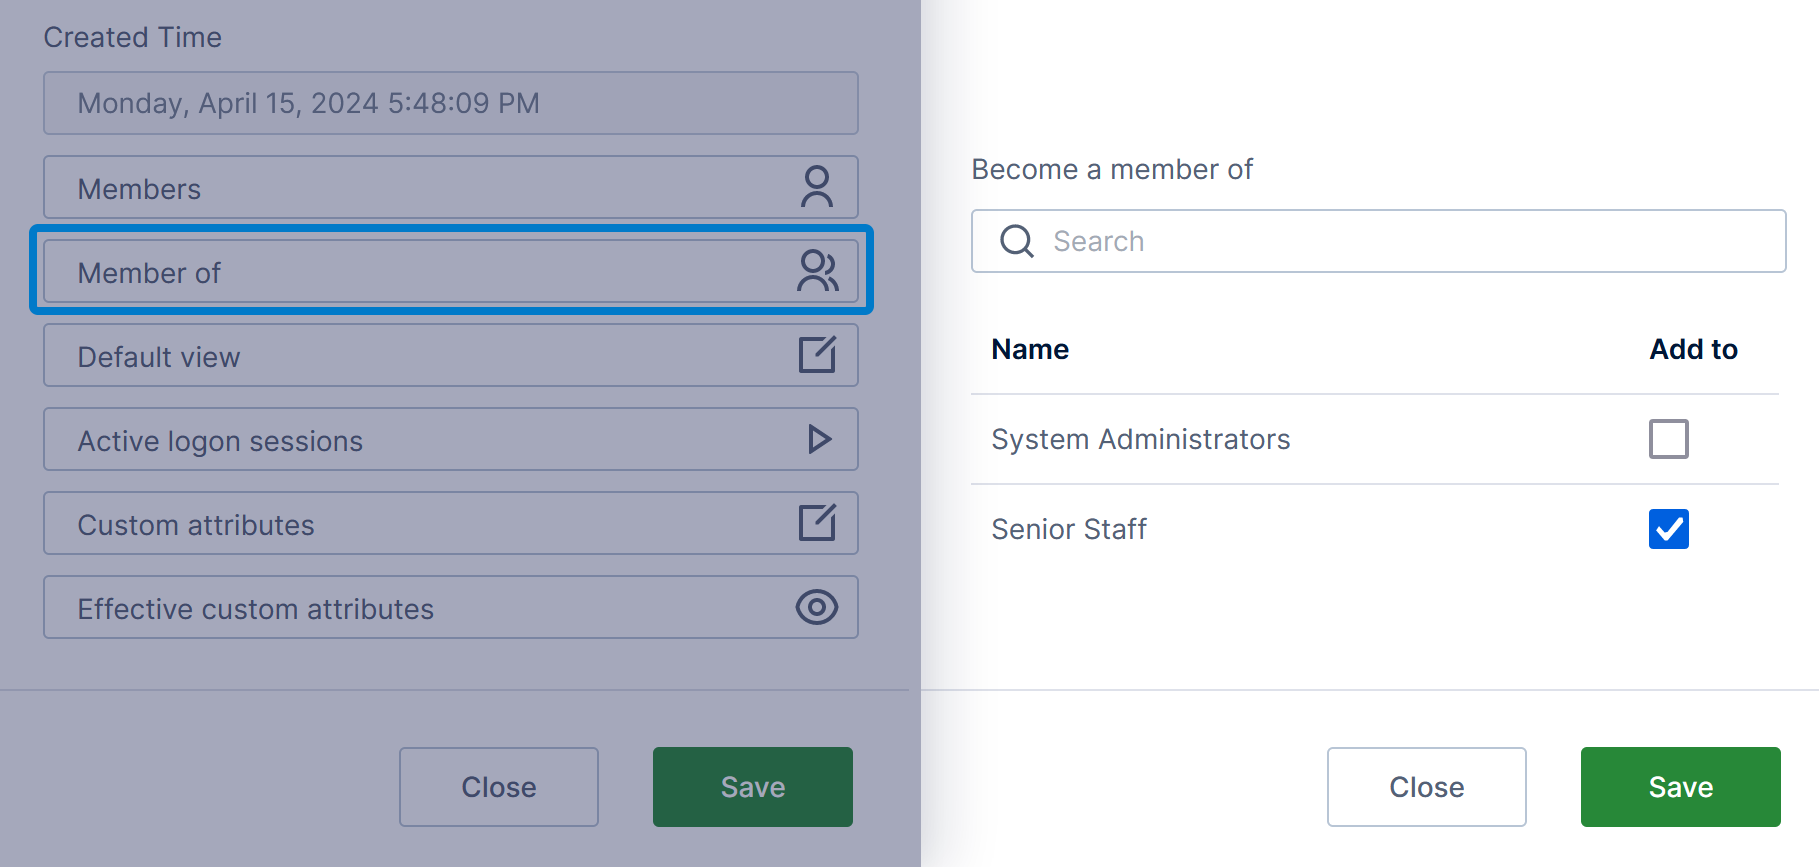
3.3. Add this group to other groups
You can also click Member of when editing a group.
The Member Of dialog lists other groups to which this group already belongs. Select one or more groups to add and click to Save at the bottom.
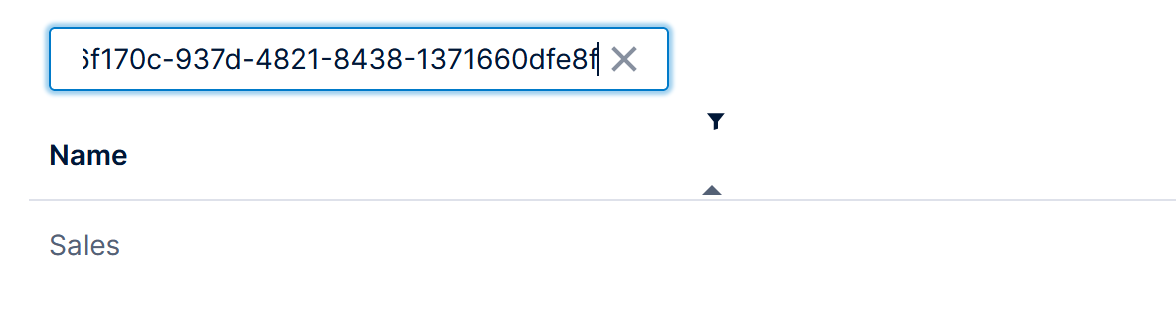
3.4. Search for a group by ID
Every group has an ID (a GUID). If you only know the ID of a specific group, you can quickly search for the corresponding group in the list of groups by pasting the ID into the Search Groups box above.
3.5. Set default view
When editing a group, you can click Default view to set a default view such as a dashboard to open when any user in the group logs in. This will replace the regular Home screen, but can still be overridden by individual users' default view settings.